Binatone Focus 360 User Guide - Page 18
Using the Digital Video Monitor
 |
View all Binatone Focus 360 manuals
Add to My Manuals
Save this manual to your list of manuals |
Page 18 highlights
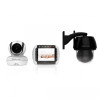
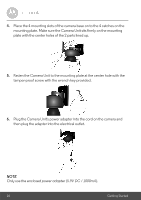
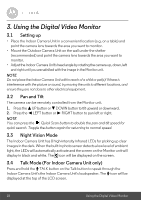
3. Using the Digital Video Monitor 3.1 Setting up • Place the Indoor Camera Unit in a convenient location (e.g. on a table) and point the camera lens towards the area you want to monitor. • Mount the Outdoor Camera Unit on the wall under the shelter (recommended) and point the camera lens towards the area you want to monitor. • Adjust the Indoor Camera Unit's head angle by rotating the camera up, down, left and right until you are satisfied with the image in the Monitor unit. NOTE Do not place the Indoor Camera Unit within reach of a child or pet(s)! If there is interference with the picture or sound, try moving the units to different locations, and ensure they are not close to other electrical equipment. 3.2 Pan and Tilt The camera can be remotely controlled from the Monitor unit. 1. Press the + UP button or - DOWN button to tilt upward or downward. 2. Press the < LEFT button or > RIGHT button to pan left or right. NOTE You can press the Quick Scan button to double the pan and tilt speed for quick search. Toggle the button again for returning to normal speed. 3.3 Night Vision Mode The Indoor Camera Unit has 8 high-intensity infrared LEDs for picking up clear images in the dark. When the built-in photo sensor detects a low level of ambient light, the LEDs will automatically activate and the screen on the Monitor unit will display in black and white. The icon will be displayed on the screen. 3.4 Talk Mode (For Indoor Camera Unit only) Press and hold the T TALK button on the Talk button to speak through the Indoor Camera Unit's the Indoor Camera Unit's loudspeaker. The T icon will be displayed at the top of the LCD screen. 18 Using the Digital Video Monitor
-
 1
1 -
2
-
3
-
4
-
5
-
6
-
7
-
8
-
9
-
10
-
11
-
12
-
 13
13 -
 14
14 -
 15
15 -
 16
16 -
 17
17 -
 18
18 -
 19
19 -
 20
20 -
 21
21 -
 22
22 -
 23
23 -
24
-
25
-
26
-
27
-
28
-
29
-
30
-
31
-
32
-
33
-
34
-
35
 |
 |
