Binatone S500 User Manual
Binatone S500 Manual
 |
View all Binatone S500 manuals
Add to My Manuals
Save this manual to your list of manuals |
Binatone S500 manual content summary:
- Binatone S500 | User Manual - Page 1
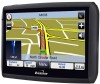
User Guide S500 1st edition www.binatonegps.com Binatone Navigation software - Binatone S500 | User Manual - Page 2
the GPS Receiver. Unpacking your Binatone Navigation System In the box you will find ·GPS navigation device ·Car mounting kit ·In-car charger ·USB cable ·User guide · used to charge your device with your computer or update your system. Charging via the USB cable will take much longer than by mains/car - Binatone S500 | User Manual - Page 3
of the United States of America, who are responsible for its availability and accuracy. Any changes in GPS availability and accuracy, or in environmental conditions, may impact the operation of you Binatone Personal Navigation Device (PND). Using Your PND in the Car When using your PND while driving - Binatone S500 | User Manual - Page 4
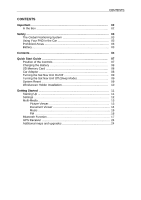
Sat Nav Unit On/Off 09 Turning the Sat Nav Unit Off (Sleep Mode 09 System Reset 09 Windscreen Holder Installation 10 Getting Started 11 Starting Up 11 Settings 12 Multi-Media 13 Picture Viewer 13 Document Viewer 14 Music 15 FM 16 Bluetooth Function 17 GPS Receiver 24 Additional maps - Binatone S500 | User Manual - Page 5
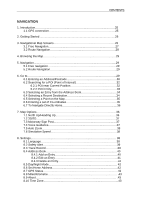
CONTENTS NAVIGATION 1. Introduction 25 1.1 GPS connection 25 2. Getting Started 26 3. Navigational Map Screens 26 3.1 Free Navigation 27 3.2 Route Navigation 28 4. Browsing the Map 29 5. Navigation 29 5.1 Free navigation 29 5.2 Route Navigation 29 6. Go to 29 6.1 Entering an Address/ - Binatone S500 | User Manual - Page 6
48 10.7 Settings 48 Frequently asked questions 49 The map contains an error / POI's are missing 49 I am experiencing problems getting a GPS fix 49 Where can I get technical support 49 Where can I get additional maps and guides 49 Technical Specifications 50 EC Declaration of Conformity 51 6 - Binatone S500 | User Manual - Page 7
contained within this user guide before operating this unit. If you experience any problems, please go through the user guide before contacting the operation. 4. Reset - System reset switch. 5. Speaker - For voice guidance instructions. 6. Memory Card Slot - For use with MicroSD type cards. Do not - Binatone S500 | User Manual - Page 8
QUICK START GUIDE Charging the Battery Before using your GPS device for the first time, we recommend that you unit will light up red. When fully charged the red light will turn green. When using the GPS device in your car, we recommend that you always use the car charger in order to maintain the - Binatone S500 | User Manual - Page 9
QUICK START GUIDE Turning the Sat Nav Unit On/Off Press and hold the On/Off button on the Off button for around 3 seconds during operation, the unit will show up the following display, Turning the Sat Nav Unit Off or Sleep Mode Press the sleep icon to put the unit into sleep mode. Press and hold - Binatone S500 | User Manual - Page 10
QUICK START GUIDE Windscreen Holder Installation The car mount has a suction pad that fits to the windscreen or a flat area on the dashboard. A. Fitting to windscreen Pull the - Binatone S500 | User Manual - Page 11
MAIN MENU Starting Up Press the On/Off button on the top until the following screens are displayed, When you press MENU, the following screens will be displayed: 11 - Binatone S500 | User Manual - Page 12
clicking " " or " ". This can also be done via the navigation software later. Pressing the speaker button will mute/un-mute the speaker. is shown the navigation software later. Press to confirm and exit Date & Time This device can auto-set the current date and time by receiving 3 GPS signals. - Binatone S500 | User Manual - Page 13
page contains information about your operating system software version. It also allows you to default the reset. Note : If you encounter any problems when connecting your unit to a PC using ActiveSync. following screen is displayed. Picture Viewer This device supports, .bmp, .jpg and .gif file formats only - Binatone S500 | User Manual - Page 14
mode. 7. Rotate : Press to rotate the image 90 degree right. 8. Document name : This shows the file name of the current document. Document Viewer This device supports, txt file format viewing only, as with the picture viewer copy the files you want to read to a SD card. Press the "Doc Viewer" you - Binatone S500 | User Manual - Page 15
previous page. 4. Page down : Press to scroll to the next page. 5. Document name : This shows the file name of the current document. Music This device supports .MP3, .WMA and .WAV file formats only. To play your music files: 1) Copy all the files you want to play on to the Micro-SD - Binatone S500 | User Manual - Page 16
MAIN MENU FM This device has the function to connect the music and navigation voice to your car radio system. Select "FM" in the Mult Media menu. Decrease frequency Increase frequenc Turn On/Off Save the Exit current 1) First you need to locate the empty FM frequency channel in your area from - Binatone S500 | User Manual - Page 17
MAIN MENU Bluetooth Function Your GPS device has built-in Bluetooth 2.0 technology which can connect to other Bluetooth devices like mobile phones to perform the following functions: - Making a call using the - Binatone S500 | User Manual - Page 18
is "0000". You can tap the icon PIN code next to the PIN code, which will allow you to set a new Ver: This is the software version number 18 - Binatone S500 | User Manual - Page 19
Pairing with a Mobile Phone Select the Paired List icon. List of Mobile Ph MAIN MENU Exit Connect Disconnec Search Delet to mobile t from Mobile e Scroll the list 1. Turn on the Bluetooth function of your Mobile phone device and make sure it is visible to other devices. 2. Tap the icon to - Binatone S500 | User Manual - Page 20
MAIN MENU 6. To disconnect the PND from your Mobile phone, select the phone name from the paired list and tap to disconnect your mobile phone. Then the phone name will be turned red in the list. • Note: your phone will still be paired with the PND and can be re-connected at a later date; also - Binatone S500 | User Manual - Page 21
MAIN MENU Dial a Number Tap the Dial icon in the Bluetooth menu; you will see the following screen. To make a call from your PND, key in the digits and then tap the phone button to make the call via your mobile phone. The following screen will be displayed. This screen will also be displayed when - Binatone S500 | User Manual - Page 22
MAIN MENU Phonebook You can retrieve and review the phonebook of the connected mobile phone via the contacts one by one to the PND using your mobile phone. Please refer to the instructions in your mobile phone user guide on how to do this. Note: When opened on subsequent occasions you will be shown - Binatone S500 | User Manual - Page 23
timer icon on the display. MAIN MENU 23 - Binatone S500 | User Manual - Page 24
MAIN MENU Call List You can review the Call history. Tap the Call list icon in the Bluetooth menu. The calls list will open, showing you the most recent call activity including - Binatone S500 | User Manual - Page 25
There may be occasions within your home or surrounding area when the signal strength is limited and GPS navigation Mode may not be possible. This is quite normal of products of this type. Additional maps and upgrades: Please visit www.binatonegps.com or contact the helpline on 08452 459677 for more - Binatone S500 | User Manual - Page 26
destinations before you set off on your journey. This manual leads you through the main features of the system. 1.1 GPS connection Your navigation device uses GPS technology for navigation. The device receives signals from a number of GPS satellites in order to determine your current position - Binatone S500 | User Manual - Page 27
be shown the Binatone screen, which shows the progress of the loading software on the yellow bar at the bottom. Once the software has loaded you here you can select a point to navigate to. Map Options - Allows you change the way the map looks and behaves during navigation. Settings - Allows access - Binatone S500 | User Manual - Page 28
maps. 2 Compass - Shows your current heading by means of a letter, while the red part of the compass needle always points North. (Tapping will change between 2D & 3D view). 3 GPS reception - Shows the current status of the GPS if you do. Tap to enter the GPS status screen (see page 32). 4 Time - Binatone S500 | User Manual - Page 29
a point of interest. 13 Turn indicator - Shows a graphical representation of the next manoeuvre and the distance to the manoeuvre. Tap to replay the voice instruction. 14 Current road - Shows the name of the road you are currently on. 15 Menu button - Tap to access the navigation options. (Only - Binatone S500 | User Manual - Page 30
and Route Navigation. 5.1 Free navigation In free navigation the unit does not have a planned route for you to follow, so simply plots your GPS position on the map and then follows your movement as you drive. The unit shows you the current time and date, as well as your current position in - Binatone S500 | User Manual - Page 31
will open with a list of all available countries (note: the list of countries will depend on the model of unit you have purchased, e.g. UK & ROI or Western Europe). Use the or keys to move through the list until you see your desired country. Then select the country from the list so that - Binatone S500 | User Manual - Page 32
NAVIGATION confirm or double tap the list item. The screen will change to the Address Search window with the selected city now shown on the city field. Note: That there is no need to enter any special characters in the city name as the unit will search for and match whether these are entered or not. - Binatone S500 | User Manual - Page 33
for a POI from a particular category or for all categories around your current location as shown on the map (this will either be your current GPS position or the position where you last had a GPS lock). From the POI category screen select the category for which you want to search in and - Binatone S500 | User Manual - Page 34
etc. Tap to view the location on the map and once in the map view you can browse the map (see page 24), to exit from the map view back to the previous screen tap . You also have the option of selecting a point from this map to navigate to, this can be used to exactly pin point your - Binatone S500 | User Manual - Page 35
34). Tap to go back to the Search Menu screen. Tap to view the location on the map and once in the map view you can browse the map (see page 24), to exit from the map view back to the previous screen tap . Tap to delete the currently selected address book entry. Warning - Binatone S500 | User Manual - Page 36
want to use as your destination. Tap Point On Map the screen will change to show the map. The location of the map will either be your current/last known GPS position or the last position you viewed on the map. You can then browse the map (see page 24) and select a point you want to - Binatone S500 | User Manual - Page 37
icon will be shown in the centre of the screen and will rotate to show your current direction of travel. Heading Up - Means that the map will be rotated to always face the direction you are travelling, while the position icon will be fixed at the lower centre of the screen - Binatone S500 | User Manual - Page 38
onto your current position. The option with the blue indicator is the currently selected option. Tap to confirm the change. Note: You can toggle the map between 2D and 3D modes quickly, by tapping on the compass in the top right of the navigation screen. 7.3 Motorway Sign Post When switched on - Binatone S500 | User Manual - Page 39
activate or deactivate the auto zoom feature. When auto zoom is activated the unit will automatically zoom the map during navigation according to your speed, the faster you are travelling the more the map will zoom out to give you a better view of the road ahead. When activated the box will be - Binatone S500 | User Manual - Page 40
Trace Record The unit is capable of logging all positioning information received from the GPS satellites during navigation. It then uses this information to draw a track of the route on the map. This enables you to review the route at a later time. If you have previously recorded any trace records - Binatone S500 | User Manual - Page 41
record you want to view. The currently selected trace record will be highlighted blue. Then use the button to view the trace record on the map. When active the button will then change to show . The trace record will be shown as a slightly opaque line with green arrows indicating the direction - Binatone S500 | User Manual - Page 42
. Icon - Tap the icon, you are then able to select from 10 different icons which are used to indicate this address book location on the map. Highlight the icon you wish to use and tap . Once you have entered the information and are happy. Tap to return to the address book - Binatone S500 | User Manual - Page 43
map so that the colour and brightness are optimal for driving in either day time or night time conditions. There are two options to choose from; manually and automatic. Manually shows you information about your current GPS position. Including the date & time specific number shown inside the circle. 43 - Binatone S500 | User Manual - Page 44
this change will be reflected both on the map and in the voice directions. Tap this option you information relating to the version of navigation software you are running. 8.10 Time Zone Allows zone according to your current GPS position. Manually - When selected you can manually set the time zone - Binatone S500 | User Manual - Page 45
screen. The screen will change to the calibration screen; follow the onscreen instructions in order to complete the calibration process. 9 Route Plan Once you have to navigate if you are moving, but your position on the map will not be updated and no voice prompts will be given. Tap to return or - Binatone S500 | User Manual - Page 46
9.2 Waypoints You can add up to two additional destinations before you begin navigating, these additional destinations are know as waypoints. When the unit calculates the route it will navigate you to each waypoint first before continuing on to your final destination. This is handy if you are - Binatone S500 | User Manual - Page 47
tap , you will be asked if you would like to change your starting point. Your current starting point will be your current position on the map. Tap to change your starting point, you will be taken to the Search Menu screen. You can then enter the start point just as if - Binatone S500 | User Manual - Page 48
then choose the option which is the next lowest distance. The unit will than calculate a detour route, this new route can be viewed on the map as a blue line. Tap to confirm the new route the unit will return to the navigation screen but will now direct you via the detour - Binatone S500 | User Manual - Page 49
viewing the first route. Use the or keys to change between the different routes, the information shown will only be for that particular route. 10.6 Map Options This allows access to the Map options (see page 26). 10.7 Settings This allows access to the - Binatone S500 | User Manual - Page 50
on how to obtain a GPS fix. Where can I get technical support? Please contact our help line 0845 345 9677. Where can I get software updates? Please contact our helpline or your retail store for information about software updates. Where can I get additional maps and guides? Please refer to www - Binatone S500 | User Manual - Page 51
Technical Specifications TECHNICAL SPECIFICATIONS CPU Operating System Antenna Atlas IV 500 MHz Microsoft WinCE.NET 6.0 Core Version Built-in GPS high sensitivity receiver (64 channels) Memory 128MB DDR2 Built-in Display 5″colour TFT touch screen Bluetooth Headset, Handsfree, Phonebook FM - Binatone S500 | User Manual - Page 52
: [email protected] EC Declaration of Conformity We the manufacturer / Importer : Binatone Telecom Plc 1 Apsley Way London NW2 7HF, United Kingdom. Declare under our sole responsibility that the following product Type of equipment: Model Name: GPS S500 series Country of Origin - Binatone S500 | User Manual - Page 53
TECHNICAL SPECIFICATIONS Paul Tsui, Product Operation Director Signature: London, Place & Date: 1 Feb, 2011 53
-
 1
1 -
 2
2 -
 3
3 -
 4
4 -
 5
5 -
 6
6 -
 7
7 -
8
-
9
-
10
-
11
-
12
-
13
-
14
-
15
-
16
-
17
-
18
-
19
-
20
-
21
-
22
-
23
-
24
-
25
-
26
-
27
-
28
-
29
-
30
-
31
-
32
-
33
-
34
-
35
-
36
-
37
-
38
-
39
-
40
-
41
-
42
-
43
-
44
-
45
-
46
-
47
-
48
-
49
-
50
-
51
-
52
-
53
 |
 |

User Guide
S500
1
st
edition
www.binatonegps.com
Binatone Navigation software