Bissell Pet Hair Eraser® Vacuum 87B43 User Guide - English - Page 6
Attach vacuum hose and tools, Power cord usage
 |
View all Bissell Pet Hair Eraser® Vacuum 87B43 manuals
Add to My Manuals
Save this manual to your list of manuals |
Page 6 highlights
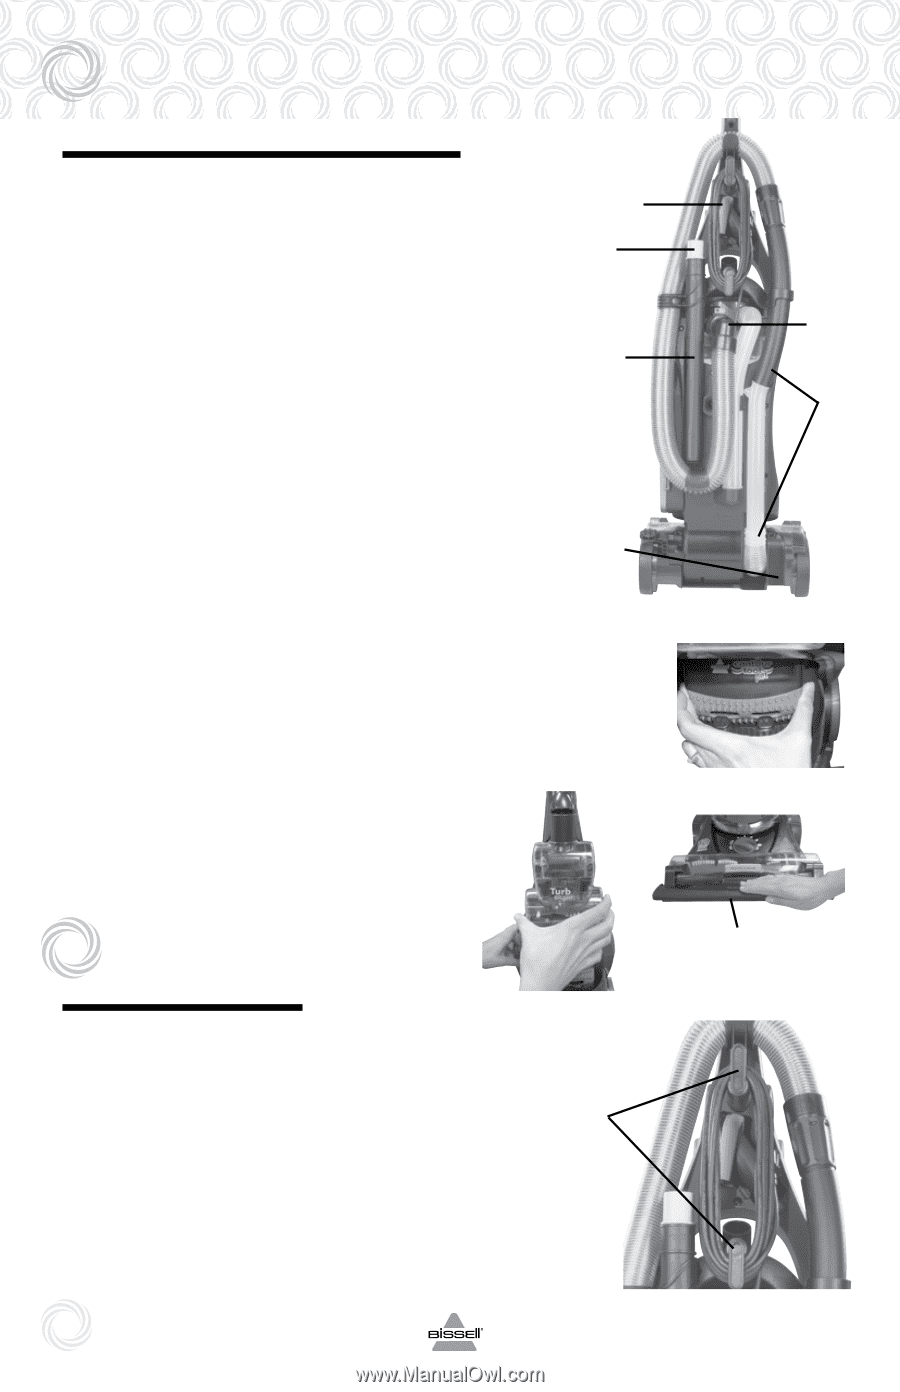
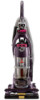
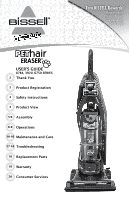
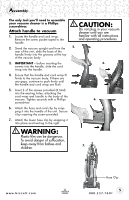
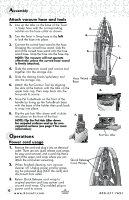
Assembly Attach vacuum hose and tools 1. Line up the tabs on the base of the Twist 'n Snap hose with the corresponding notches on the hose collar as shown. 2. Turn the Twist 'n Snap hose to the left to lock the hose into place. 5. 4. 3. Connect the curved hose wand to the hose. Grasping the curved hose wand, slide the end of the curved hose wand onto the hose 4. wand base. Snap the hose into the hose clip. NOTE: The vacuum will not operate effectively unless the curved hose wand is firmly attached. 4. Slide the extension wand and crevice tool together into the storage clip. 5. Slide the dusting brush/upholstery tool into the storage clip. 6. Attach the Pet Contour Tool by aligning the slots at the bottom with the tabs on the upper tank cap, then snap back into the two posts to secure. Hose Wand Base 7. Store Pet TurboBrush on the front of the handle by lining up the TurboBrush base with the base of the holder then push back to snap into place. 8. Flip the pet hair lifter down until it clicks into place on the front of the foot. 7. NOTE: Flip the Pet Hair Lifter down for carpeted surfaces and up for noncarpeted surfaces (see page 7 for more information) Operations Power cord usage 1. Remove the cord and plug it into an electrical outlet. There are two quick release cord wraps for easy cord removal, and a cord clip that is part of the upper cord wrap where you can attach the cord when vacuuming. Quick Release 2. When finished cleaning, turn vacuum Cord Wraps cleaner off. Unplug power cord by grasp- ing the polarized plug (NOT the cord) and disconnect from outlet. 3. Return Quick Release cord wrap to original position and loop power cord around cord wrap. Clip molded plug to 6 power cord to secure. www.bissell.com 1. 3. 6. 8. Pet Hair Lifter 800.237.7691
-
 1
1 -
 2
2 -
 3
3 -
 4
4 -
 5
5 -
 6
6 -
 7
7 -
 8
8 -
 9
9 -
 10
10 -
 11
11 -
 12
12 -
13
-
14
-
15
-
16
-
17
-
18
-
19
-
20
 |
 |