Bosch SPE53B52UC Use and Care Manual 1 - Page 12
Bosch SPE53B52UC Manual
 |
View all Bosch SPE53B52UC manuals
Add to My Manuals
Save this manual to your list of manuals |
Page 12 highlights
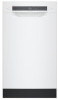
en-us Familiarizing yourself with your appliance 1 ON/OFF button and reset button Switching on the appliance → Page 25 Switching off the appliance Terminating the wash cycle → Page 26 2 Cycle buttons Cycles 3 Rinse aid refill indicator Rinse aid system → Page 19 4 WLAN display Home Connect → Page 29 5 Water supply display Display for water supply 6 button 7 Start button If you press for approx. 3 seconds, you can open the basic settings. Starting the wash cycle → Page 26 8 Cycle buttons and options Cycles Options 9 Remote Start 10 Electronic delay time Setting the electronic delay time → Page 26 11 Display 12 Door opener1 The display shows information about the remaining run time or basic settings. You can change the basic settings via the display and the setting buttons. Open the appliance door. 1 Depending on the appliance specifications 12
-
 1
1 -
2
-
3
-
4
-
5
-
6
-
 7
7 -
 8
8 -
 9
9 -
 10
10 -
 11
11 -
 12
12 -
 13
13 -
 14
14 -
 15
15 -
 16
16 -
 17
17 -
18
-
19
-
20
-
21
-
22
-
23
-
24
-
25
-
26
-
27
-
28
-
29
-
30
-
31
-
32
-
33
-
34
-
35
-
36
-
37
-
38
-
39
-
40
-
41
-
42
-
43
-
44
-
45
-
46
-
47
-
48
-
49
-
50
-
51
-
52
-
53
-
54
-
55
-
56
 |
 |
