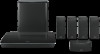
Bose Lifestyle 600 English Owners Guide - Page 36
Connecting an AC-2 adapter
 |
View all Bose Lifestyle 600 manuals
Add to My Manuals
Save this manual to your list of manuals |
Page 36 highlights
A P P E N D I X A : I N S TA L L AT I O N R E F E R E N C E Connecting an AC-2 adapter 1. Using the screwdriver, turn the screws to the left (counterclockwise) to loosen the wire terminals. 2. For front speakers: Insert the bare ends of the four-pin cable into the adapter by placing the red wire marked L+, C+ or R+ into the red terminal ( + ) and the plain wire into the plain silver terminal ( - ). For rear speakers: Insert the bare ends of the two-pin cable into the adapter by placing the red wire marked + into the red terminal ( + ) and the plain wire into the plain silver terminal ( - ). Note: Be sure to only insert the bare ends of each exposed wire to avoid clamping the wire's insulation. 3. Using the screwdriver, turn the screws right (clockwise) to secure the wires into the terminals. 4. Repeat steps 1 - 4 to connect the other adapter. 36 - ENGLISH
-
 1
1 -
2
-
3
-
4
-
5
-
6
-
7
-
8
-
9
-
10
-
11
-
12
-
13
-
14
-
15
-
16
-
17
-
18
-
19
-
20
-
21
-
22
-
23
-
24
-
25
-
26
-
27
-
28
-
29
-
30
-
 31
31 -
 32
32 -
 33
33 -
 34
34 -
 35
35 -
 36
36 -
 37
37 -
 38
38 -
 39
39 -
 40
40 -
 41
41 -
42
-
43
-
44
 |
 |
