Brother International BAS-326G PS Basic Instruction Manual - English
Brother International BAS-326G PS Manual
 |
View all Brother International BAS-326G PS manuals
Add to My Manuals
Save this manual to your list of manuals |
Brother International BAS-326G PS manual content summary:
- Brother International BAS-326G PS | Basic Instruction Manual - English - Page 1
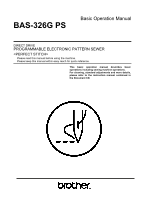
BAS-326G PS Basic Operation Manual DIRECT DRIVE PROGRAMMABLE ELECTRONIC PATTERN SEWER Please read this manual before using the machine. Please keep this manual within easy reach for quick reference. This basic operation manual describes basic operations including sewing machine - Brother International BAS-326G PS | Basic Instruction Manual - English - Page 2
thread take-up lever, and consequently there is always a danger of injury that can be caused by these parts. Follow the instructions from training personnel and instructors regarding safe and correct operation before operating the machine so that you will know how to use it correctly. BAS-326G PS - Brother International BAS-326G PS | Basic Instruction Manual - English - Page 3
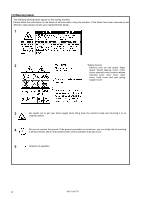
[1] Safety indications and their meanings This instruction manual and the indications and symbols that are used on the machine itself are provided in order to ensure safe of the thing that must be done. (For example, the symbol at left means "you must make the ground connection".) BAS-326G PS i - Brother International BAS-326G PS | Basic Instruction Manual - English - Page 4
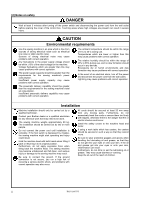
from the wall outlet. Lightning may cause problems with correct operation. Installation Machine installation should only be carried out by a qualified technician. Contact your Brother dealer or a qualified electrician for any or vomiting. Keep the oil out of the reach of children. ii BAS-326G PS - Brother International BAS-326G PS | Basic Instruction Manual - English - Page 5
all safety precautions. Use only the proper replacement parts as specified by Brother. If any safety devices have been removed, be absolutely sure to Any problems in machine operation which result from unauthorized modifications to the machine will not be covered by the warranty. BAS-326G PS iii - Brother International BAS-326G PS | Basic Instruction Manual - English - Page 6
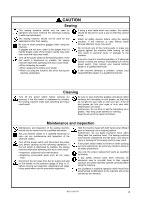
the instructions on the labels at all times when using the machine. If the labels have been removed or are difficult to read, please contact your nearest Brother of receiving a serious electric shock, and problems with correct operation may also occur. 5 Direction of operation iv BAS-326G PS - Brother International BAS-326G PS | Basic Instruction Manual - English - Page 7
Motor cover Solenoid cover Tension release solenoid cover Inner cover L Outer cover Fixed cover L Motor cover L Eye guard Finger guard Thread take-up cover Inner cover R Outer cover Fixed cover R Motor cover R Gas spring support cover 2138B BAS-326G PS 2139B v - Brother International BAS-326G PS | Basic Instruction Manual - English - Page 8
Name and function of each operation panel item 24 5-2. Loading sewing data 26 5-3. Setting the program number 26 5-4. Setting the X-scale and Y-scale 27 5-5. Setting the sewing speed 27 5-6. Checking Using the STOP switch 32 6-3. Using the thread wiper switch 32 Document CD 34 BAS-326G PS - Brother International BAS-326G PS | Basic Instruction Manual - English - Page 9
sewing program. Easy and accurate feed plate replacement INSTRUCTION MANUAL CD 10-11-1. Installing the feed plate The feed plate installation position can be obtained accurately by using the panel, which makes feed plate replacement much easier. Feed plate installation mode 2375B BAS-326G PS 1 - Brother International BAS-326G PS | Basic Instruction Manual - English - Page 10
CFTM is a trademark of SanDisk Corporation. 2 Safety devices: (12) Finger guard (13) Eye guard (14) Thread take-up cover (15) Motor cover (16) Solenoid cover BAS-326G PS 2140B - Brother International BAS-326G PS | Basic Instruction Manual - English - Page 11
be carried out by a qualified technician. Contact your Brother dealer or a qualified electrician for any electrical work secure, you run a high risk of receiving a serious electric shock, and problems with correct operation may also occur. Install the safety covers to the machine BAS-326G PS 1837B 3 - Brother International BAS-326G PS | Basic Instruction Manual - English - Page 12
3-3. Installing the oil pan 1840B (8) Power switch (9) Wood screws [2 pcs.] (10) Staples [4 pcs.] 1841B (1) Oil pan (2) Nails [7 pcs.] (3) Rubber cushions [4 pcs.] (4) Waste oil tank 2142B 4 BAS-326G PS - Brother International BAS-326G PS | Basic Instruction Manual - English - Page 13
pan. • When holding the machine head, do not hold it by the pulse motor. This may cause problems with operation of the pulse motor. 1855B (4) Hinge holders [2 pcs.] (5) Bolts [4 pcs.] (6) Plain washers [4 pcs.] (7) Nuts [4 pcs.] (8) Head rest (9) Bolts with washer [4 pcs.] 4913Q BAS-326G PS 5 - Brother International BAS-326G PS | Basic Instruction Manual - English - Page 14
head. NOTE: Two or more people should tilt back the machine head, and it should be tilted gently while being held with both hands. 2143B 6 BAS-326G PS - Brother International BAS-326G PS | Basic Instruction Manual - English - Page 15
washers (medium) [2 pcs.] (24) Plain washers (large) [2 pcs.] (25) Spring washers [2 pcs.] (26) Nuts [2 pcs.] (27) Gas spring shaft U (28) Set screw (29) Gas spring support cover (30) Bolts with washer [6 pcs.] 2145B BAS-326G PS 7 - Brother International BAS-326G PS | Basic Instruction Manual - English - Page 16
) is turned on as shown in figure 1. NOTE: If the machine head switch is not turned on, errors "E050", "E051" and "E055" will be generated. 8 BAS-326G PS - Brother International BAS-326G PS | Basic Instruction Manual - English - Page 17
in the table, and then insert it into the control box through the hole in the side of the control box. (13)Staples [3 pcs.] 4920Q BAS-326G PS 9 - Brother International BAS-326G PS | Basic Instruction Manual - English - Page 18
pneumatic unit, adjust the air pressure. (Refer to "10-16. Adjusting the air pressure" in the instruction manual CD.) NOTE: Make sure that the pneumatic unit does not touch the control box or the work table while the power is turned off by pressing the manual button. 5220Q 1905B 10 BAS-326G PS - Brother International BAS-326G PS | Basic Instruction Manual - English - Page 19
8-pin Solenoid selection harness 4-pin*2 P7 (PRG) (3) P3(CUTTER) - *2 : The 4-pin solenoid selection harness may not be used for some versions of tension release solenoid. BAS-326G PS 11 - Brother International BAS-326G PS | Basic Instruction Manual - English - Page 20
location on PMD P.C. board P3 (PPM) P6 (SOL1) P7 (SOL2) P8 (YPM) P10 (XPM) Cord clamp/cable tie (4) (5) (5), (6) Cable tie (5), (6) (5), (6) (5), (6) (5), (6) (5), (6) (Continued on next page) 12 BAS-326G PS - Brother International BAS-326G PS | Basic Instruction Manual - English - Page 21
the ground connection is not secure, you run a high risk of receiving a serious electric shock, and problems with correct operation may also occur. (1) Ground wire from upper shaft motor harness (2) Ground wire from the ground connections are secure in order to ensure safety. 2150B BAS-326G PS 13 - Brother International BAS-326G PS | Basic Instruction Manual - English - Page 22
-phase power. NOTE: Do not use an extension cord. If this is not observed, it may cause problems with correct operation. Green and yellow wire (ground wire) Green and yellow wire (ground the nut (3) so that the cotton stand does not move. 4930Q 14 BAS-326G PS - Brother International BAS-326G PS | Basic Instruction Manual - English - Page 23
.] After installing the eye guard assembly (3), return the eye guard (2) to its original angle, and then tighten the screw (1) to secure it in place. 2152B BAS-326G PS 15 - Brother International BAS-326G PS | Basic Instruction Manual - English - Page 24
.] (7) Solenoid cover (8) Screws [2 pcs.] (9) Screws [2 pcs.] NOTE: Be careful not to clamp the cords when installing the motor cover and the solenoid cover. 1862B 16 BAS-326G PS - Brother International BAS-326G PS | Basic Instruction Manual - English - Page 25
of non-use. Use only the lubricating oil specified by Brother. * If this type of lubricating oil is difficult to obtain, the recommended oil to use is - Brother International BAS-326G PS | Basic Instruction Manual - English - Page 26
be sure to readjust the needle clearance. (Refer to "10-7. Adjusting the needle clearance" in the instruction manual CD.) 4-2. Threading the upper thread Thread the upper thread correctly as shown in the illustration below. is too long, it may cause the thread to become tangled. 18 BAS-326G PS - Brother International BAS-326G PS | Basic Instruction Manual - English - Page 27
machine will start. * The work clamp lowering method can be changed using memory switch No. 002. (Refer to "6-3. List of memory switch settings" in the instruction manual CD.) BAS-326G PS 19 - Brother International BAS-326G PS | Basic Instruction Manual - English - Page 28
winder tension assembly (8) up and down to adjust. * For case A, move the bobbin winder tension assembly (8) down, and for case B, move it upward. For case B BAS-326G PS - Brother International BAS-326G PS | Basic Instruction Manual - English - Page 29
the thread through the thread slot (2), pass it underneath the spring (3), and then pass it through the thread guide (4), leaving a trailing-out length of about 35 mm. 4. Hold the latch on the bobbin case and insert hook. (The thread will be released from the thread hold spring (5).) BAS-326G PS 21 - Brother International BAS-326G PS | Basic Instruction Manual - English - Page 30
being sewn. 2. Use the tension nut (2) (sub tension) to adjust the upper thread trailing length to about 45 mm. Stronger Weaker Stronger Weaker 2153B 22 BAS-326G PS - Brother International BAS-326G PS | Basic Instruction Manual - English - Page 31
out, the work clamp will move to the sewing start position and then it will rise.) * For programs with a large number of stitches, the buzzer will sound after the home position is detected, and then the turn the pulley (1) in the direction of operation to clear the error display. BAS-326G PS 23 - Brother International BAS-326G PS | Basic Instruction Manual - English - Page 32
/CLAMP indicator Illuminates when the THREAD/CLAMP key (6) has been pressed. (8) TENSION/WIND key Used to wind the lower thread. (9) TENSION/WIND indicator Spare 24 BAS-326G PS 4435Q - Brother International BAS-326G PS | Basic Instruction Manual - English - Page 33
) is inserted while the power is turned on. [Option compatibility] (22) Function keys [F1, F2, F3, F4] Used to select user programs and to set and select cycle programs. (23) R/W key Used to read data from and write data to external media. CFTM is a trademark of SanDisk Corporation. BAS-326G PS 25 - Brother International BAS-326G PS | Basic Instruction Manual - English - Page 34
sewing start position, and then the program number will be applied. • The program number will stop flashing and illuminate steadily. NOTE: After completing the setting, be sure to refer to "5-6. Checking the sewing pattern" to check that the needle drop position is correct. 2156B 26 BAS-326G PS - Brother International BAS-326G PS | Basic Instruction Manual - English - Page 35
in units of mm. 2. Press the or key (5) to set the scale (0 − 400). • The program number will flash in the PROGRAM No. display (6). 3. Depress the work clamp switch (7) to lower the work clamp, and then depress (4) to set the sewing speed. (Sewing speed setting: 400 − 2700) 4956Q BAS-326G PS 27 - Brother International BAS-326G PS | Basic Instruction Manual - English - Page 36
the start switch (2). • The work clamp will move to the sewing start position, and then the program number will stop flashing and illuminate steadily. • The number of stitches will appear in the menu display , it will then stop. Press the TEST key. TEST indicator switches off 28 BAS-326G PS - Brother International BAS-326G PS | Basic Instruction Manual - English - Page 37
foot height setting mode. • " 4" will appear in the PROGRAM No. display and the intermittent presser foot (1) will rise to instruction manual CD.) 3 Intermittent stroke Refer to "10-14. Changing the intermittent stroke" in the instruction manual CD when making the adjustment. 1899B BAS-326G PS - Brother International BAS-326G PS | Basic Instruction Manual - English - Page 38
with a capacity of more than 2GB are not supported.) • Do not disassemble or modify the CF loading from or writing to such cards manual are trademarks or registered trademarks of the respective owners. However, no TM or other similar symbols appear in the main text of this manual. 30 BAS-326G PS - Brother International BAS-326G PS | Basic Instruction Manual - English - Page 39
power switch. 2. Press the or key (1) to select the sewing program number that you would like to use. * Refer to "5-2. Loading sewing data" for details on reading sewing data from a CF card. 2159B 3. Depress the work clamp to stop the work clamp and feed plate from being slippery. BAS-326G PS 31 - Brother International BAS-326G PS | Basic Instruction Manual - English - Page 40
stop sounding. 2. If you do not wish to continue sewing, press the RESET key (3) once more. • The program number will flash. Carry out preparation for the next sewing. 4982Q If you can be used to turn the thread wiper (2) on and off. 4983Q 32 BAS-326G PS - Brother International BAS-326G PS | Basic Instruction Manual - English - Page 41
MEMO BAS-326G PS 33 - Brother International BAS-326G PS | Basic Instruction Manual - English - Page 42
and/ or other countries. Windows® and Microsoft® Internet Explorer are either registered trademarks of Microsoft Corporation in the United States and/ or other countries. © 2010 Brother Industries, Ltd. All Rights Reserved. This is the original instructions. BAS-326G PS SB1294-001 E 2010.03. B (1)
-
 1
1 -
 2
2 -
 3
3 -
 4
4 -
 5
5 -
 6
6 -
 7
7 -
8
-
9
-
10
-
11
-
12
-
13
-
14
-
15
-
16
-
17
-
18
-
19
-
20
-
21
-
22
-
23
-
24
-
25
-
26
-
27
-
28
-
29
-
30
-
31
-
32
-
33
-
34
-
35
-
36
-
37
-
38
-
39
-
40
-
41
-
42
 |
 |
BAS-326G PS
DIRECT DRIVE
PROGRAMMABLE ELECTRONIC PATTERN SEWER
<PERFECT STITCH>
Please read this manual before using the machine.
Please keep this manual within easy reach for quick reference.
This
basic
operation
manual
describes
basic
operations including sewing machine operations.
For cleaning, standard adjustments and more details,
please refer to the instruction manual contained in
the Document CD.
Basic Operation Manual