Brother International DCP-8155DN Scan to Network Guide - English - Page 5
Configuration for Scan to Network using a Web Browser, Adding the Scan to Network file name
 |
View all Brother International DCP-8155DN manuals
Add to My Manuals
Save this manual to your list of manuals |
Page 5 highlights
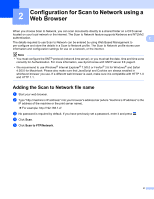
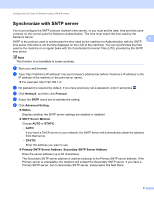
2 Configuration for Scan to Network using a Web Browser 2 When you choose Scan to Network, you can scan documents directly to a shared folder on a CIFS server located on your local network or the internet. The Scan to Network feature supports Kerberos and NTLMv2 authentication. 2 The details required to use Scan to Network can be entered by using Web Based Management to pre-configure and store the details in a Scan to Network profile. The Scan to Network profile stores user information and configuration settings for use on a network, or the internet. Note • You must configure the SNTP protocol (network time server), or you must set the date, time and time zone correctly for Authentication. For more information, see Synchronize with SNTP server uu page 6. • We recommend to use Windows® Internet Explorer® 7.0/8.0 or Firefox® 3.6 for Windows® and Safari 4.0/5.0 for Macintosh. Please also make sure that JavaScript and Cookies are always enabled in whichever browser you use. If a different web browser is used, make sure it is compatible with HTTP 1.0 and HTTP 1.1. Adding the Scan to Network file name 2 a Start your web browser. b Type "http://machine's IP address/" into your browser's address bar (where "machine's IP address" is the IP address of the machine or the print server name). For example: http://192.168.1.2/ c No password is required by default. If you have previously set a password, enter it and press . d Click Scan. e Click Scan to FTP/Network. 2
-
 1
1 -
 2
2 -
 3
3 -
 4
4 -
 5
5 -
 6
6 -
 7
7 -
 8
8 -
 9
9 -
 10
10 -
 11
11 -
12
-
13
-
14
-
15
-
16
-
17
-
18
-
19
-
20
-
21
-
22
-
23
-
24
-
25
-
26
-
27
-
28
-
29
 |
 |