Brother International DreamWeaver„ VQ3000 Sewing End Point 1.05 or Later - Page 1
Brother International DreamWeaver„ VQ3000 Manual
 |
View all Brother International DreamWeaver„ VQ3000 manuals
Add to My Manuals
Save this manual to your list of manuals |
Page 1 highlights
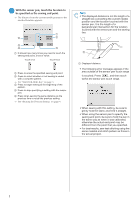
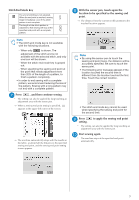
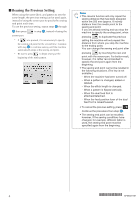
Using the Sensor Pen to Specify the Sewing End Point (Version 1.05 or later) The procedures to specify the sewing end point using the sensor pen differ from those described in the Operation Manual. Refer to the following. We recommend that you keep this manual with the Operation Manual. Note • In order to specify the location accurately, use the sensor pen to touch the end point twice. Be sure to touch the same point. • Before starting to sew, mark the end point. Before start sewing, test the pattern first from steps a to e to see if the stitch can be used with this d Press . function. Before starting to sew, mark the end point. a Turn on the machine. b Press the Utility or Character Decorative Stitch tab on the Utility Stitch Screen. c Start sewing, and when the desired then stop the machine sewing end point enters the sensor pen touch range. Note • If the needle drop point is being specified with the sensor pen within 70 mm (approx. 2-3/4 inches) from the sewing end point, the machine will not require the second touch. After completing step f, continue with step j. However, the actual sewing end point may be slightly different than the specified location. In order to specify the location accurately, stop the machine at a location more than 70 mm (approx. 2-3/4 inches) away from the sewing end point before specifying it for the first time. → The sensor functions screen appears. e Press . Memo • If the needle drop point is greater than 100 mm (approx. 4 inches) from the selected ending point using the sensor pen, a more accurate position can be specified the second time that the point is touched. → The sewing end point setting screen appears. Note • If is not available, the sewing end point cannot be specified with the selected stitch pattern. Select a different stitch pattern. 1
-
 1
1 -
 2
2 -
 3
3 -
 4
4
 |
 |