Brother International Innov-is 4750D Software Users Manual/4.0 Operation Manua - Page 8
Attaching the Border Embroidery Frame to the Embroidery Unit
 |
View all Brother International Innov-is 4750D manuals
Add to My Manuals
Save this manual to your list of manuals |
Page 8 highlights
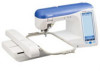
■ Attaching the Border Embroidery Frame to the Embroidery Unit CAUTION • After firmly hooping the fabric in the border embroidery frame, attach the frame to the embroidery unit. Otherwise, the needle may break and cause injuries. • Before attaching the border embroidery frame to the embroidery unit, make sure that the needle and presser foot have been raised. Otherwise, the needle may break and cause injuries. d Slide the border embroidery frame into the embroidery frame holder, making sure to align the border embroidery frame's arrow mark (U) with the embroidery frame holder's arrow mark (U). a Note • Before attaching the border embroidery frame, wind the bobbin with thread and install it. a Make sure that the needle and presser foot have been raised. If the needle has not been raised, press the "Needle Position" button to raise it. If the presser foot has not been raised, press the "Presser Foot Lifter" button to raise it. b Make sure that the embroidery unit carriage has moved to its initial position. c Align the guide on the border embroidery frame with the right edge of the embroidery frame holder. a Arrow marks e Lower the frame-securing lever so that it is level with the border embroidery frame to secure the border embroidery frame in the embroidery frame holder. a a Frame-securing lever a b CAUTION • If the frame-securing lever is not lowered, the pattern may not embroider correctly or the presser foot may strike the border embroidery frame and cause injuries. a Embroidery frame holder b Guide on border embroidery frame 7
-
 1
1 -
2
-
 3
3 -
 4
4 -
 5
5 -
 6
6 -
 7
7 -
 8
8 -
 9
9 -
 10
10 -
 11
11 -
 12
12 -
 13
13 -
14
-
15
-
16
-
17
-
18
-
19
-
20
-
21
-
22
-
23
-
24
-
25
-
26
 |
 |
