Brother International MFC 665CW Quick Setup Guide - English - Page 12
Choosing your language (Canada only), 9 Setting the LCD contrast, Black OK?, Press 1, Color OK?
 |
UPC - 012502615811
View all Brother International MFC 665CW manuals
Add to My Manuals
Save this manual to your list of manuals |
Page 12 highlights
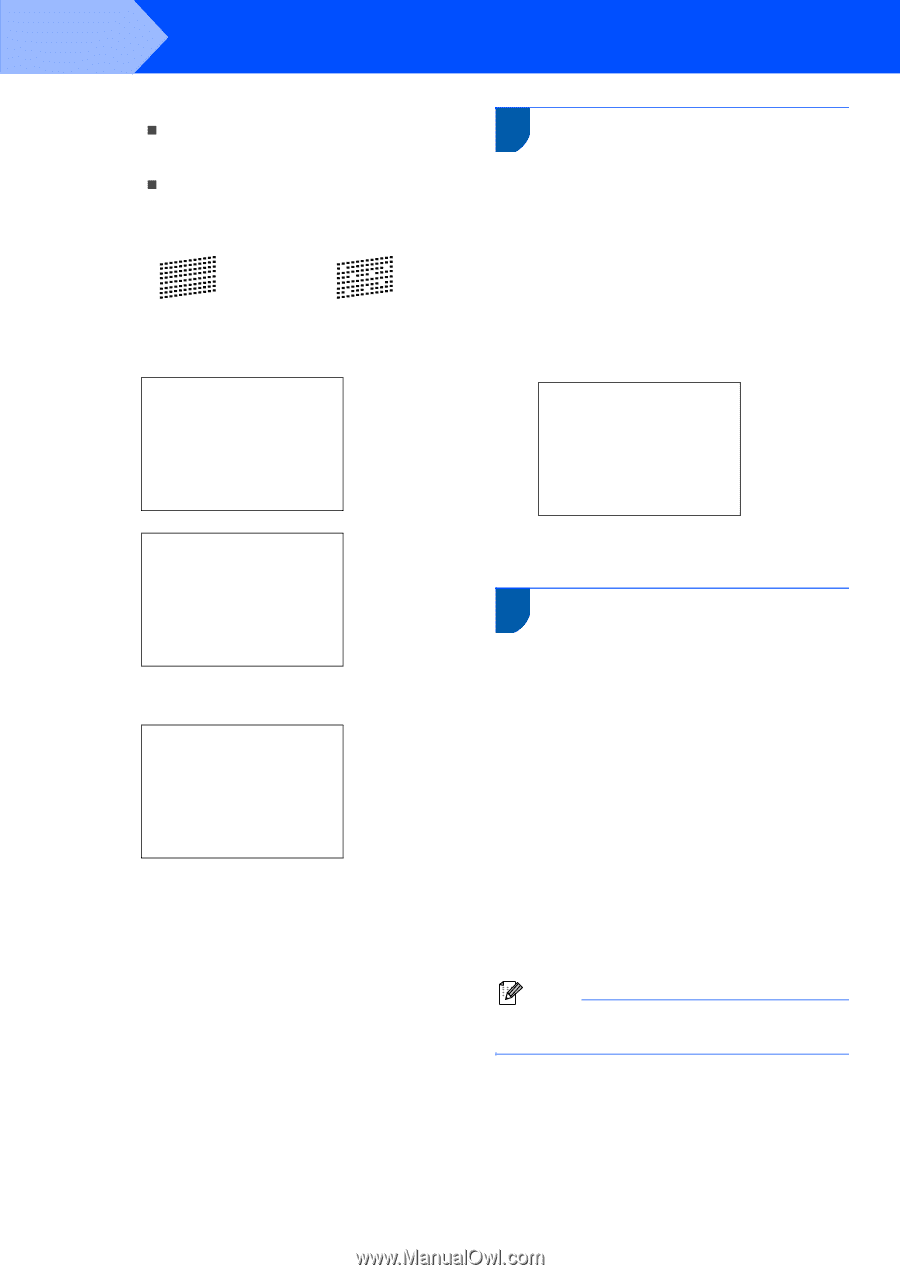
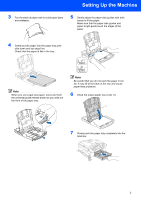
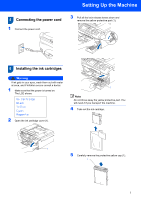
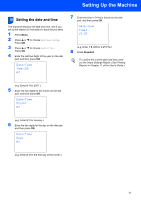
STEP1 Setting Up the Machine 5 Do one of the following: „ If all lines are clear and visible, press 1 (Yes) on the dial pad to finish the quality check. „ If you can see missing short lines, press 2 (No) on the dial pad and go to step 6. OK Poor 6 The LCD asks you if the print quality is OK for black and color. Press 1 (Yes) or 2 (No) on the dial pad. Black OK? Yes iPress 1 No iPress 2 8 Choosing your language (Canada only) 1 Press Menu. 2 Press a or b to choose Initial Setup. Press OK. 3 Press a or b to choose Local Language. Press OK. 4 Press a or b to choose your language (English or French), and then press OK. Local Language English French Color OK? Yes iPress 1 No iPress 2 After pressing 1 (Yes) or 2 (No) for both black and color, the LCD shows: Start Cleaning? Yes iPress 1 No iPress 2 7 Press 1 (Yes), the machine will then start cleaning the colors. 8 After cleaning is finished, press Color Start. The machine starts printing the Print Quality Check Sheet again and goes back to step 3. 5 Press Stop/Exit. 9 Setting the LCD contrast You can adjust the LCD contrast for a sharper and more vivid display. If you are having difficulty reading the LCD, try changing the contrast setting. 1 Press Menu. 2 Press a or b to choose General Setup. Press OK. 3 Press a or b to choose LCD Settings. Press OK. 4 Press a or b to choose LCD Contrast. Press OK. 5 Press a or b to choose Light, Med or Dark. Press OK. 6 Press Stop/Exit. Note You can also adjust the angle of the LCD display by lifting it. 10
-
 1
1 -
2
-
3
-
4
-
5
-
6
-
 7
7 -
 8
8 -
 9
9 -
 10
10 -
 11
11 -
 12
12 -
 13
13 -
 14
14 -
 15
15 -
 16
16 -
 17
17 -
18
-
19
-
20
-
21
-
22
-
23
-
24
-
25
-
26
-
27
-
28
-
29
-
30
-
31
-
32
-
33
-
34
-
35
-
36
-
37
-
38
-
39
-
40
-
41
-
42
-
43
-
44
-
45
-
46
-
47
-
48
-
49
-
50
-
51
-
52
-
53
-
54
-
55
-
56
-
57
 |
 |