Brother International PR-1000 Table Set Installation Manual PRWT1 - Page 4
Installing the table
 |
View all Brother International PR-1000 manuals
Add to My Manuals
Save this manual to your list of manuals |
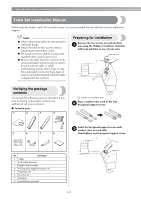
Page 4 highlights
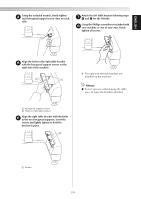
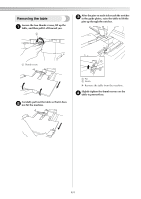
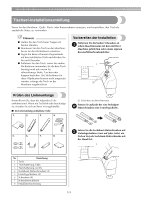
Installing the table Loosen the two thumb screws 5 to 6 turns. 1 Slide in the table while supporting it so that 4 it remains level. Push the table in until it lightly touches the machine. • If the table does not move smoothly, slightly lift it up, and then slide it in. Position the table so that the notch at the 2 center aligns with the machine bed, and then place the table flat on the guide plates. While looking below the table, lightly lift it 5 up, and then lower it so that the screw fits into the notch at the front of the guide plate. 1 Notch in table 2 Machine bed 3 Guide plate Pull the table toward you slowly, until the 3 pins on the mounting brackets (attached on each side to the bottom of the table) fit into the notches in the guide plates. 1 Notch at front Tighten the two thumb screws so that the 6 table is secured. 1 Pin 2 Notch 1 Thumb screw 3/4
-
 1
1 -
 2
2 -
 3
3 -
 4
4 -
 5
5 -
 6
6 -
 7
7 -
 8
8 -
 9
9 -
 10
10 -
11
-
12
-
13
-
14
-
15
-
16
-
17
-
18
-
19
-
20
-
21
-
22
-
23
-
24
-
25
-
26
-
27
-
28
-
29
-
30
-
31
-
32
-
33
-
34
-
35
-
36
-
37
-
38
-
39
-
40
-
41
-
42
-
43
-
44
 |
 |
