Bushnell Weather FXI Owner's Manual - Page 9
Receiver Display Guide - manual
 |
View all Bushnell Weather FXI manuals
Add to My Manuals
Save this manual to your list of manuals |
Page 9 highlights
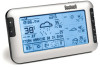
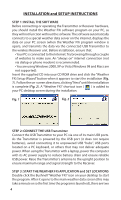
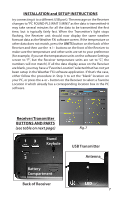
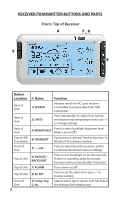
RECEIVER DISPLAY GUIDE A BC D E F G N H IJ K LM A) RF (RADIO FREQUENCY) RECEPTION STATUS This icon shows the connection status between the Receiver unit and the USB Transmitter. There are three basic status indications: The Receiver is successfully synchronized to the USB Transmitter and receiving weather data from it periodically. A flashing icon indicates that the Receiver is searching for the RF signal from the USB Transmitter. No vertical bars indicates that the RF signal from the USB Transmitter is not being received or is too weak. B) NETWORK TIME (Auto-synchronized clock) The clock on the main unit is synchronized to the Internet network time automatically and is adjusted for optimal accuracy. Press UNITS on the back of the Receiver until you see "Hour Format Setting" and use the + / - buttons to select 12 or 24 Hr time format. NOTE: If your PC is not connected to the internet for a long period of time, the clock display may not be accurate. Once you reconnect to the internet, exit and then relaunch the Weather FXi software, then click "Send to Receiver". C) ALARM ON INDICATOR Icon appears confirming the alarm has been set by pressing ALARM. D) WEATHER FORECAST SYMBOLS (ICONS) Please see the "Forecast Icons Reference" at the back of this manual 9
-
 1
1 -
2
-
3
-
 4
4 -
 5
5 -
 6
6 -
 7
7 -
 8
8 -
 9
9 -
 10
10 -
 11
11 -
 12
12 -
 13
13 -
 14
14 -
15
-
16
 |
 |
