Canon C83-1004 ImageBrowser_v1x_guide.pdf - Page 6
Importing Images to Your Computer
 |
UPC - 082966162169
View all Canon C83-1004 manuals
Add to My Manuals
Save this manual to your list of manuals |
Page 6 highlights
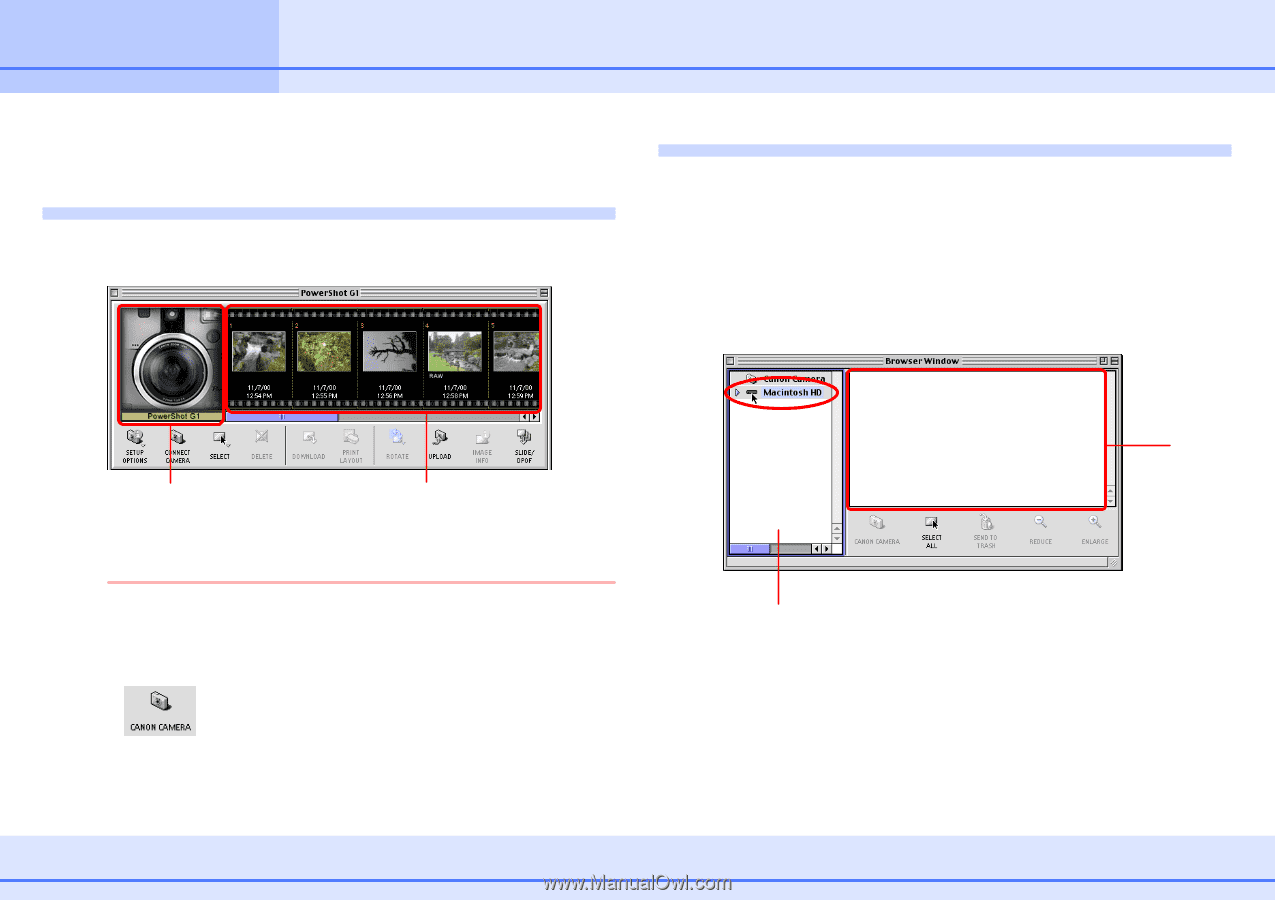
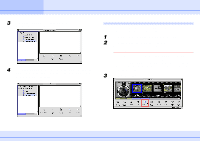
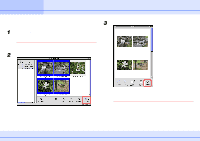
Chapter 1 Try It! ImageBrowser Importing Images to Your Computer (1/3) This section explains how to import images to your computer (how to copy images to your computer from a camera). About the Camera Window When you connect a camera to your computer and start ImageBrowser, the following window appears. Creating a destination folder Let's begin with how to create a new folder to use as the destination folder for images imported from the camera. 1 Click the Browser Window to bring it to the front. 2 In the Explorer View Section, click the disk where you want to create new folders, as shown in the figure below. New folders are created in the disk that you select here. Browser Window The model name of the camera that you are using and its images appear here. Images stored in the camera are displayed in the order in which they were taken. REFERENCE The Camera Window does not appear when you start ImageBrowser from the desktop. However, when you connect the camera and make it ready for communication with your computer, the Camera Window appears. If you make the camera ready for communication with your computer and the Camera Window does not appear, click [Canon Camera] at the lower left of the Browser Window. 6 ImageBrowser Software Guide Explorer View Section The disks that you can use to create destination folders on your computer are displayed in the Explorer View Section. Browser Area
-
 1
1 -
 2
2 -
 3
3 -
 4
4 -
 5
5 -
 6
6 -
 7
7 -
 8
8 -
 9
9 -
 10
10 -
 11
11 -
 12
12 -
13
-
14
-
15
-
16
-
17
-
18
-
19
-
20
-
21
-
22
-
23
-
24
-
25
-
26
-
27
-
28
-
29
-
30
-
31
-
32
-
33
-
34
-
35
-
36
-
37
-
38
-
39
-
40
-
41
-
42
-
43
-
44
-
45
-
46
-
47
-
48
-
49
-
50
-
51
-
52
-
53
-
54
-
55
-
56
-
57
-
58
-
59
-
60
-
61
-
62
-
63
-
64
-
65
-
66
-
67
-
68
-
69
-
70
-
71
-
72
-
73
-
74
-
75
-
76
-
77
-
78
-
79
 |
 |