Canon SELPHY ES40 SELPHY ES40 Printer User Guide - Page 64
Adding Contents Data to SELPHY, Display the [Printer Setup] screen.
 |
View all Canon SELPHY ES40 manuals
Add to My Manuals
Save this manual to your list of manuals |
Page 64 highlights
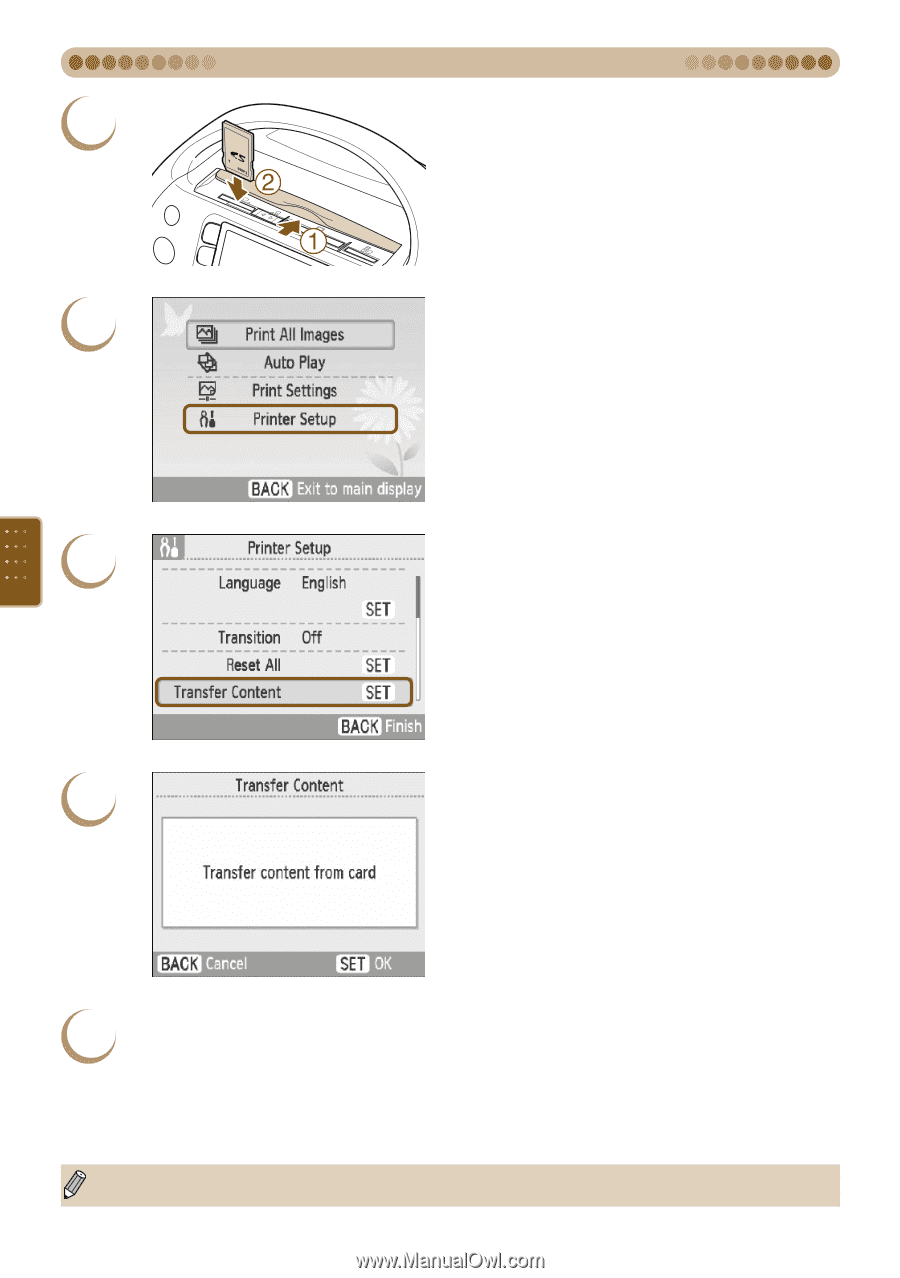
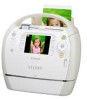
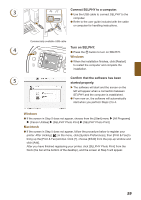
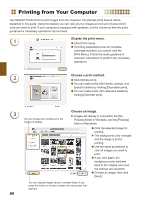
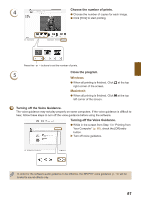
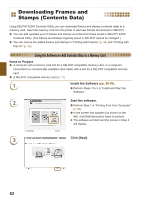
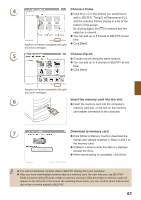
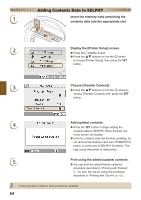
Adding Contents Data to SELPHY 1 Insert the memory card containing the contents data into the appropriate slot. 2 Display the [Printer Setup] screen. Press the m(MENU) button. Press the ud buttons or turn the w wheel to choose [Printer Setup], then press the o button. 3 Choose [Transfer Content]. Press the ud buttons or turn the w wheel to choose [Transfer Content], then press the o button. 4 Add (update) contents. Press the o button to begin adding the contents data to SELPHY. When finished, the menu screen will display. Until the contents data has finished updating, do not remove the memory card, turn off SELPHY's power, or press any of SELPHY'S buttons. This may cause the printer to malfunction. 5 Print using the added (update) contents. You can print the added frames using the procedure described in "Printing with Frames" (p. 40) and, the clip art using the procedure described in "Printing with Clip Art" (p. 42). In the procedure in Step 4, all 5 contents are updated. 64
-
 1
1 -
2
-
3
-
4
-
5
-
6
-
7
-
8
-
9
-
10
-
11
-
12
-
13
-
14
-
15
-
16
-
17
-
18
-
19
-
20
-
21
-
22
-
23
-
24
-
25
-
26
-
27
-
28
-
29
-
30
-
31
-
32
-
33
-
34
-
35
-
36
-
37
-
38
-
39
-
40
-
41
-
42
-
43
-
44
-
45
-
46
-
47
-
48
-
49
-
50
-
51
-
52
-
53
-
54
-
55
-
56
-
57
-
58
-
 59
59 -
 60
60 -
 61
61 -
 62
62 -
 63
63 -
 64
64 -
 65
65 -
 66
66 -
 67
67 -
 68
68 -
 69
69 -
70
-
71
-
72
-
73
-
74
-
75
-
76
-
77
-
78
-
79
-
80
-
81
-
82
 |
 |