Canon imageCLASS MF4150 imageCLASS MF4150 Starter Guide - Page 7
Connect the Power Cord and Turn On the Machine, Set the Date and Time - printer paper tray
 |
View all Canon imageCLASS MF4150 manuals
Add to My Manuals
Save this manual to your list of manuals |
Page 7 highlights
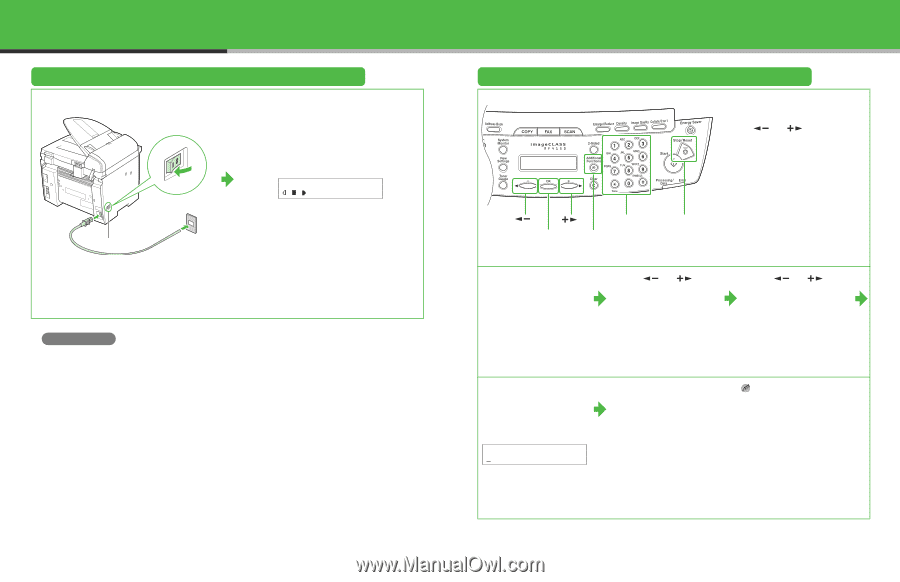
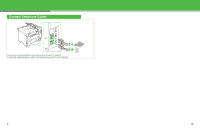
Connect the Power Cord and Turn On the Machine 1 2 Ex. 100% LTR TEXT/PHOTO 1 Main power switch Connect the power cord into the rear socket and the wall outlet, and press the [I] side of the main power switch to ON. The machine enters the standby mode. What if... ● is displayed: Make sure that the printer cover and scanning platform are closed properly. (See "Install Toner Cartridge," on p. 5.) ● is displayed: Make sure that the toner cartridge is installed properly. (See "Install Toner Cartridge," on p. 5.) ● is displayed: Make sure that paper is loaded in the machine. (See "Set Up the Paper Trays and Load Paper," on p. 7.) 11 Set the Date and Time ● Entering Information - Numeric keys: Enters numbers. - [ ] or [ ]: Moves the cursor position. - [OK]: Confirms the entry. [ ] [ ] Numeric [OK] Keys [Additional Functions] [Stop/Reset] 1 Press [Additional Functions]. 2 Use [ ] or [ ] to select , then press [OK]. 3 Use [ ] or [ ] to select , then press [OK]. 4 Use the numeric keys to enter the time (in 24-hour format) and date (month/ day/year), then press [OK]. Ex. DATE&TIME SETTING 11:19 12 31 ´06 5 Press [Stop/Reset] to return to the standby mode. NOTE - You can select the date format among three types listed below at . - - - - By default, in the menu is set to . If you want to set in the menu to , see Chapter 1, "Before Using the Machine," in the Basic Guide. 12
-
 1
1 -
 2
2 -
 3
3 -
 4
4 -
 5
5 -
 6
6 -
 7
7 -
 8
8 -
 9
9 -
 10
10 -
 11
11 -
 12
12 -
13
-
14
-
15
-
16
-
17
 |
 |