Casio CTK3000 User Guide - Page 35
N a v
 |
View all Casio CTK3000 manuals
Add to My Manuals
Save this manual to your list of manuals |
Page 35 highlights
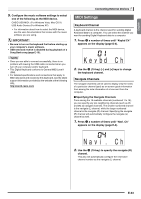
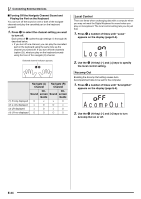
English 5. Configure the music software settings to select one of the following as the MIDI device. CASIO USB-MIDI: (For Windows Vista, Mac OS X) USB Audio Device: (For Windows XP) • For information about how to select the MIDI device, see the user documentation that comes with the music software you are using. • Be sure to turn on the keyboard first before starting up your computer's music software. • USB send and receive is disabled during playback of a Song Bank song (page E-15). • Once you are able to connect successfully, there is no problem with leaving the USB cable connected when you turn off your computer and/or keyboard. • This Digital Keyboard conforms to General MIDI Level 1 (GM). • For detailed specifications and connections that apply to MIDI data send and receive by this keyboard, see the latest support information provided by the website at the following URL. http://world.casio.com/ Connecting External Devices MIDI Settings Keyboard Channel A keyboard channel is the channel used for sending Digital Keyboard data to a computer. You can select the channel you want for sending Digital Keyboard data to a computer. 1. Press 3 a number of times until "Keybd Ch" appears on the display (page E-4). Ke y bd Ch 2. Use the bn (10-key) [-] and [+] keys to change the keyboard channel. Navigate Channels The navigate channels can be used to display only the notes of a particular channel (part) as on-screen guide information from among the note information of a tune sent from the computer. ■ Specifying the Navigate Channels From among the 16 available channels (numbered 1 to 16), you can specify any two neighboring channels (such as 05 and 06) as navigate channels. The smaller numbered channel is the navigate (L) channel, while the larger numbered channel is the navigate (R) channel. Specifying the navigate (R) channel will automatically configure the navigate (L) channel as well. 1. Press 3 a number of times until "Navi. Ch" appears on the display (page E-4). Navi . Ch 2. Use the bn (10-key) to specify the navigate (R) channel. This also will automatically configure the next lower channel number as the navigate (L) channel. E-33
-
 1
1 -
2
-
3
-
4
-
5
-
6
-
7
-
8
-
9
-
10
-
11
-
12
-
13
-
14
-
15
-
16
-
17
-
18
-
19
-
20
-
21
-
22
-
23
-
24
-
25
-
26
-
27
-
28
-
29
-
 30
30 -
 31
31 -
 32
32 -
 33
33 -
 34
34 -
 35
35 -
 36
36 -
 37
37 -
 38
38 -
 39
39 -
 40
40 -
41
-
42
-
43
-
44
-
45
-
46
 |
 |
