Casio CW-K85 User Guide
Casio CW-K85 - Disc Title Printer B/W Thermal Transfer Manual
 |
UPC - 079767175276
View all Casio CW-K85 manuals
Add to My Manuals
Save this manual to your list of manuals |
Casio CW-K85 manual content summary:
- Casio CW-K85 | User Guide - Page 1
corrupted. • Note that CASIO COMPUTER CO., LTD. shall not be held liable for any loss or corruption of data on discs arising through the use of this printer. * CD-R, CD-RW, DVD-R, etc. Be sure to read the Safety Precautions contained in this manual before trying to use the printer for the first time - Casio CW-K85 | User Guide - Page 2
operate the equipment. Proper connectors must be used for connection to host computer and/or peripherals in order to meet FCC emission limits. Cable specified for PC Windows® compatible PC to CW-K85 Declaration of Conformity Model Number: CW-K85 Trade Name: CASIO COMPUTER CO., LTD. Responsible party - Casio CW-K85 | User Guide - Page 3
person or entity that may arise through the use of this printer. • Reproduction of this manual in any form, either in part or its entirety, is forbidden without the express permission of CASIO COMPUTER CO., LTD. • The contents of the manual are subject to change without notice. © Copyright 2006 - Casio CW-K85 | User Guide - Page 4
, USB cable Misuse of the power cord, AC adaptor, or USB cable creates the risk of fire and electric shock. Make sure you follow the precautions listed below. • Use only items that are specified for the product. • Use only a power source whose output matches the rating marked on the plate on the - Casio CW-K85 | User Guide - Page 5
unattended for long periods (such as when you go on a trip), unplug the power cord and USB cable. • When not using the printer, be sure to unplug the AC adaptor from the power outlet and disconnect the USB cable from the printer's USB port. • At least once a year, clean away any dust built up in - Casio CW-K85 | User Guide - Page 6
Caution Connection precaution Connect only items that are specified for the product to its connectors. Connecting a non-specified item creates the risk of fire and electric shock. Keep backup copies of all important data Be sure that you keep separate copies of important data in a notebook or some - Casio CW-K85 | User Guide - Page 7
light. Contents Safety Precautions 1 Operating Precautions 5 CW-K85 Printer Features 7 General Guide 8 Power Requirements 9 Using the AC Adaptor 9 Using batteries 10 Initializing Printer Memory 12 To initialize printer memory 12 Data Error 12 Powering Up and Selecting a Printing Mode 12 - Casio CW-K85 | User Guide - Page 8
text you have just input 42 Using STYLE Menu Attributes 42 Saving, Recalling and Deleting Labels 44 To save a label 44 To recall a label 44 To delete a label 44 Configuring the Printer Setup 45 Demo Printing 45 Reference 46 Caring for the Printer 46 Troubleshooting 47 Error Messages 49 - Casio CW-K85 | User Guide - Page 9
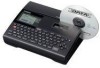
CW-K85 Printer Features The CW-K85 makes it possible to print on discs without connecting to a computer or installing any special software. A selection of illustrations and fonts makes labels stylish and informative. 7 E - Casio CW-K85 | User Guide - Page 10
load or remove the ink ribbon cassette. USB port For connection of a USB cable when exchanging data with a computer. AC adaptor terminal Connect the AC adaptor here. Battery cover Slit Slide the disc to be printed into the slit. Press to turn off power. Press to turn on power. E 8 Print Head - Casio CW-K85 | User Guide - Page 11
that come with the printer. Using the AC Adaptor Use AC adaptor (AD-A12280L) when you want to plug into a household power outlet. ■ To connect the AC adaptor Important! • Use only the special AC adaptor (AD-A12280L). • Whenever switching between battery power and AC adaptor power, be sure to first - Casio CW-K85 | User Guide - Page 12
you have stored in printer memory. 1. Unplug the power cord from the wall outlet (1), and then unplug the AC adaptor from the printer (2). • Take care Using Batteries Note • The printer can run on eight AA-size alkaline batteries. Be sure to use alkaline batteries only. 1. Turn over the printer - Casio CW-K85 | User Guide - Page 13
3. Replace the battery cover. Important! • The printer may suddenly turn off during printing if battery power goes low. Because of this, use of the special AC adaptor (AD-A12280L) is recommended to power the printer. • Because of the affect cold has on batteries, the "LOW BATTERY!" may appear - Casio CW-K85 | User Guide - Page 14
used it for a long time, or if it fails to operate normally when you turn power on. Important! Initializing printer memory clears its memory of all input data. To initialize printer memory 1. Make sure that the printer problem, it will display the following message: DATA ERROR! INITIALIZE THE PRINTER - Casio CW-K85 | User Guide - Page 15
while the printer is being powered by the AC adaptor and is connected to a computer. Important • See page 45 for information about configuring contrast, print density, and language (English, German, French, Italian, Spanish) settings. • All of the display examples in this User's Guide use English as - Casio CW-K85 | User Guide - Page 16
below shows the basic flow for mode selection after turning on the printer. To input new label text ••• To recall previously saved text into a label To display the text you were working on the last time you were using the printer (LAST DATA) E 14 • Producing a demo print (page 45) or initializing - Casio CW-K85 | User Guide - Page 17
You should use only the special ink ribbon cassettes that are specified for this printer. To load the ink ribbon cassette 1. Open the cassette cover. 2. Remove the stopper from the ink ribbon cassette. 4. Load the ink ribbon cassette into the printer. • Make sure that the ink ribbon passes between - Casio CW-K85 | User Guide - Page 18
cassette 1. Open the cassette cover. 2. Grasping both sides of the ink ribbon cassette, lift it straight up. Storing a Partially Used Ink Ribbon Cassette Install a stopper on the partially used ink ribbon cassette, place the cassette into its plastic bag, and then into its box. Store it where it - Casio CW-K85 | User Guide - Page 19
Using the Printer's Keys wq 1234 1 2 56 3 4 5 90 6 7 87 8 9 0 q w • Press to print. • Press Next, press and then this key. For more information, see page 38. Press to store and recall often-used words and phrases. Press to delete the character to the left of the cursor. • Press and then - Casio CW-K85 | User Guide - Page 20
, you should first take some time to become acquainted with the symbols and indicators used on the label printer display. ■ Symbols and Indicators 23 04 1 9 cursor 8 7 SANS-SERIF SANS-S ITC SANS-S RND 5 ROMAN ROMAN ITC SMALL FONT q 6 w 4 1 Function/Shift/Code indicator appears when you - Casio CW-K85 | User Guide - Page 21
out and printing disc labels. Disc Label Printing General Procedure Connect the AC adaptor (Page 9). Or load batteries into the printer. (Page 10) Load an ink ribbon cassette (Page 15). Select the print pattern you want to use (Page 20). Select the format and input its text. Print the label (Page - Casio CW-K85 | User Guide - Page 22
DATA icon will also appear on the Main Menu if there is input data left over from the last time you used the printer. See page 14 for more information. 2. Use and to select NEW, and then press SET. • This displays a print pattern selection screen. AREA A AREA A 6. After inputting the text press - Casio CW-K85 | User Guide - Page 23
here. Use and Note that CASIO COMPUTER CO CD-R disc. Trying to print on such discs can damage the printer. This printer supports printing on 12cm diameter discs only. • Place the printer on a level surface when printing. A tilted surface can make normal printing impossible. 1. Make sure an ink ribbon - Casio CW-K85 | User Guide - Page 24
malfunction of the printer. • If you have a problem removing a disc due to printer malfunction, try using the procedure on page 8 to remove it. 7. When printing is complete, the disc will stop moving and the screen shown here will appear on the display. 5. Use the positioning guide to position the - Casio CW-K85 | User Guide - Page 25
print on a disc before you record anything on it. Note that CASIO COMPUTER CO., LTD. will not be held responsible for any data that CD-R or a business card size CD-R disc. Trying to print on such discs can damage the printer. This printer supports printing on 12cm diameter discs only. 1. Use and - Casio CW-K85 | User Guide - Page 26
■ To exit the printing operation 1. When the screen shown above is on the display, use and to select EXIT, and then press SET twice. • This will display the main menu screen. • See page 44 for information about using the STORE option on the above screen. E 24 - Casio CW-K85 | User Guide - Page 27
disc printing terms that are used in this part of the manual. ■ Print Surface This is the side of the disc that the printer will print on. Some you can then use it to print directly onto the disc. Getting Ready • Connect the AC adaptor or load batteries (page 9). • Load an ink ribbon cassette (page - Casio CW-K85 | User Guide - Page 28
Main Menu if there is input data left over from the last time you used the printer. If you want to continue working with the data from your previous session, use and to select LAST DATA, and then press SET. 2. Use and to select NEW, and then press SET. • This displays a print pattern selection - Casio CW-K85 | User Guide - Page 29
Label" on page 30 for information about inputting frames. Have the printer automatically select text size in accordance with the number of characters page 54 for details about all the label formats that are available. 5. Use and to scroll through the available label formats until the one you want - Casio CW-K85 | User Guide - Page 30
print the label (page 21) or to save the label (page 44). Inserting a Logo Into a Label When creating a label using a LOGO format (LOGO 1 through LOGO 4), you can insert one of the printer's 12 built-in logos into the graphic block of the format. • You can also exit your label making session by - Casio CW-K85 | User Guide - Page 31
a new label" on page 26. 2. On the label format selection screen, use and to scroll through the label formats until one of the LOGO formats (LOGO 1 through LOGO 4) is displayed. 3. Press SET. 4. Use and to scroll through the logo data names, until the one you want - Casio CW-K85 | User Guide - Page 32
insert a frame into your label. See page 53 for a list of all the available frames. Output Samples The following shows examples of labels that use frames. FRAME 1 FRAME 2 To insert a frame into a label 1. Perform steps 1 through 4 of the procedure under "To create a new label" on page 26. 2. On the - Casio CW-K85 | User Guide - Page 33
an AUTO format label 1. Perform steps 1 through 4 of the procedure under "To create a new label" on page 26. 2. On the label format selection screen, use and to scroll through the label formats until AUTO1 or AUTO2 is displayed. 3. Press SET. 4. Input the text you want. 5. Press SET. • Now you can - Casio CW-K85 | User Guide - Page 34
to select the alignment setting you want. 4. When the setting you want is selected, press SET. 5. On the next screen that appears, use and to select the range of text to which you want to apply your alignment setting. To apply the alignment setting to this text: All - Casio CW-K85 | User Guide - Page 35
: FUNCTION FUNCTION To input alpha-numeric characters Example: ABXYZ 1234567890 1. Input the characters by typing them on the printer's keyboard. • To input the uppercase letters, you can use either SHIFT or CAPS. With SHIFT you must shift the keyboard for each character. With CAPS the keyboard - Casio CW-K85 | User Guide - Page 36
causes a menu of symbols, dingbats, number formats, Greek letters, or Russian letters to appear. • To exit the SYMBOL menu without selecting anything, press ESC. 3. Use the cursor keys to select the character you want to input, and then press SET. • Pressing SET returns to the input screen, with the - Casio CW-K85 | User Guide - Page 37
Inputting Illustrations Your printer gives you a choice of 124 illustrations that you can use in your labels. To input illustrations 1. With the cursor at the location where you want to input an illustration, press ILLUST to display the ILLUST menu. 2. Use the cursor keys to select the illustration - Casio CW-K85 | User Guide - Page 38
in place of SET. Text Editing You can set up the label printer so it either inserts new input between existing characters, or overwrites existing to display the SET UP menu. 2. Use and to select INPUT and then press SET. 3. On the next screen that appears, use and to select INSERT, or OVERWRITE and - Casio CW-K85 | User Guide - Page 39
screen that appears, input the text that you want, and then press SET. 6. Use and to select the phrase memory where you want to store the text, and then check the text and make any changes that you want and then press SET. 6. Use and to select the phrase memory where you want to store the text, and - Casio CW-K85 | User Guide - Page 40
the text and make any changes that you want, and then press SET. 6. Use and to select the phrase memory where you want to store the text, and When inputting text, press PASTE. 2. On the list of copied text that appears, use and to select the text you want, and then press SET. • This pastes the - Casio CW-K85 | User Guide - Page 41
location on the text input screen. User Character Drawing Screen Cursor 4. Use the following operations to draw the character you want. To do this: cursor jump to the left, right, top or bottom of the drawing screen Do this: Use the cursor keys. Press FUNCTION followed by , , , or . Draw a black - Casio CW-K85 | User Guide - Page 42
a user character 1. With the cursor located in the input screen where you want to input the user character, press USER CHR. 2. Use and to select RECALL and then press SET. 3. Use the cursor keys to select the user character you want to recall and then press SET. To delete a user character 1. Press - Casio CW-K85 | User Guide - Page 43
fonts, the printer also has a "SMALL FONT," which is used automatically whenever the use. The following points all apply while SMALL FONT is in use. • All font settings are ignored. Everything is printed using the same font. • The proportional setting is turned off. • SMALL FONT is supported - Casio CW-K85 | User Guide - Page 44
you have just input 1. After inputting the text you want, press FONT. 2. Use and SET. to select the font you want to change to and then press All of the text in the current line Select this option: ALL LINE Using STYLE Menu Attributes The STYLE menu lets you apply the following attributes to - Casio CW-K85 | User Guide - Page 45
All of the text in the current line Select this option: ALL LINE • SMALL FONT is supported for normal and bold text only. Outline, shadow, and raised font characters are printed using normal font. A pointer appears to indicate the current STYLE setting: [A] (BOLD), [ ] (OUTLINE), [ ] (SHADOW - Casio CW-K85 | User Guide - Page 46
Deleting Labels To save a label 1. Create the label you want to save. 2. After you finish inputting text, the following screen will appear on the printer display. 3. Use and to select STORE. 4. Press SET. 5. Input up to five characters for the label name, and then press SET. Total amount of memory - Casio CW-K85 | User Guide - Page 47
performing a demo print. 1. Make sure an ink ribbon cassette is loaded in the printer. • See page 15 for information about loading ink ribbon cassettes. 2. If the printer is on, press to turn it off. 3. Press to turn on the printer. 4. Press SET UP. 5. Use and to select DEMO PRINT, and then press - Casio CW-K85 | User Guide - Page 48
soft material to clean the print head. 1. Press OFF to turn off power. 2. Open the cassette cover. 3. Use a cotton swab moistened with alcohol to clean the print head. • You can use a commercially available cassette tape recorder head cleaning kit to clean the print head. Print head E 46 Clean - Casio CW-K85 | User Guide - Page 49
Consult the troubleshooting tables below whenever you start to have problems with the printer or application. If you can't find the solution to your problem below, contact your original retailer or your nearest authorized CASIO service center. Symptom Nothing appears on the display when - Casio CW-K85 | User Guide - Page 50
cassette cover is not closed properly. The disc is not positioned correctly in the printer. Recommended Action Use the positioning guide when aligning the disc. (page 22) Correctly connect the power cord and the AC adaptor. (page 9) If you cannot easily remove the disc from between the print head - Casio CW-K85 | User Guide - Page 51
BATTERY! CONTINUE TO PRINT? SET/ESC MEMORY FULL! Cause and Action • Battery power is low. ➜ Replace the batteries or use the AC adaptor to power the printer. • Temperature is below 10˚C (50˚F) ➜ Move the printer to a location where the temperature is within the operating temperature range (10˚C to - Casio CW-K85 | User Guide - Page 52
, contact your retailer or your nearest CASIO service center. • There is no ink ribbon cassette loaded in the printer or the ink ribbon cassette is not loaded correctly. ➜ Check the ink ribbon cassette. • The ink ribbon cassete has reached its end. ➜ Replace the ink ribbon cassette • The disc is not - Casio CW-K85 | User Guide - Page 53
Message TOO MANY CHARACTERS! SOME WERE NOT PASTED Cause and Action • Pasting copied text will cause the number of characters to exceed the allowable limit for the location where you are pasting. ➜ Re-input so the pasted text does not cause the allowable number of characters to be exceeded. See - Casio CW-K85 | User Guide - Page 54
Illustrations ● NUMBER Symbols, Dingbats, and Special Characters ● SYMBOL ● GREEK, RUSSIAN ● DINGBAT E 52 - Casio CW-K85 | User Guide - Page 55
Frames 53 E - Casio CW-K85 | User Guide - Page 56
Label Formats Type Number FORMAT 1 2 3 4 5 6 7 Format 8 9 10 E 54 Input Item Vertical Size Maximum (mm/inch) Number TITLE 12/1Ú2" 12 TITLE 9/3Ú8" 16 TITLE1 6/1Ú4" 24 TITLE2 6/1Ú4" 24 TITLE 9/3Ú8" 16 COMMENT 3/1Ú8" 49 COMMENT 3/1Ú8" 49 TITLE 9/3Ú8" 16 TITLE 6/1Ú4" 24 - Casio CW-K85 | User Guide - Page 57
Type Number FRAME 1 2 3 4 Format 5 AUTO 1 2 Input Item Vertical Size Maximum (mm/inch) Number TITLE 12/1Ú2" 9 TITLE1 3/1Ú8" 36 TITLE2 3/1Ú8" 36 TITLE 6/1Ú4" 18 COMMENT 3/1Ú8" 36 COMMENT 3/1Ú8" 36 TITLE 6/1Ú4" 18 TITLE1 3/1Ú8" 36 TITLE2 3/1Ú8" 36 TITLE3 3/1Ú8" 36 - Casio CW-K85 | User Guide - Page 58
CW-K85 Print System : Thermal transfer Approximate Speed Power Requirements : AC adaptor (AD-A12280L); Eight AA-size alkaline batteries Power Consumption : 18W Auto Power Off : Approximately six minutes after last key operation • Auto Power Off disabled under AC adaptor power and when printer - Casio CW-K85 | User Guide - Page 59
CASIO Europe GmbH Bornbarch 10, 22848 Norderstedt, Germany - Casio CW-K85 | User Guide - Page 60
This mark applies in EU countries only. Diese Markierung trifft nur auf EU-Länder Zu. Cette marque ne s'applique qu'aux pays de I'UE. Este símbolo es válido sólo en países de la UE. Questo marchio vale soltanto nei paesi dell'UE. - Casio CW-K85 | User Guide - Page 61
CASIO COMPUTER CO., LTD. 6-2, Hon-machi 1-chome Shibuya-ku, Tokyo 151-8543, Japan MO0606-B
-
 1
1 -
 2
2 -
 3
3 -
 4
4 -
 5
5 -
 6
6 -
 7
7 -
8
-
9
-
10
-
11
-
12
-
13
-
14
-
15
-
16
-
17
-
18
-
19
-
20
-
21
-
22
-
23
-
24
-
25
-
26
-
27
-
28
-
29
-
30
-
31
-
32
-
33
-
34
-
35
-
36
-
37
-
38
-
39
-
40
-
41
-
42
-
43
-
44
-
45
-
46
-
47
-
48
-
49
-
50
-
51
-
52
-
53
-
54
-
55
-
56
-
57
-
58
-
59
-
60
-
61
 |
 |
E
CW-K85
User’s Guide
°
We recommend that you print on a disc* before you record anything
on it. Printing on a disc that already has data recorded on it can
cause the data to become corrupted.
°
Note that CASIO COMPUTER CO., LTD. shall not be held liable for
any loss or corruption of data on discs arising through the use of this
printer.
* CD-R, CD-RW, DVD-R, etc.
Be sure to read the Safety Precautions contained in this manual before trying
to use the printer for the first time, and always keep this manual on hand for
future reference.
RCA502991-001V01