Casio DT-X10 User Guide
Casio DT-X10 - M30U - Win CE Manual
 |
UPC - 079767602307
View all Casio DT-X10 manuals
Add to My Manuals
Save this manual to your list of manuals |
Casio DT-X10 manual content summary:
- Casio DT-X10 | User Guide - Page 1
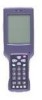
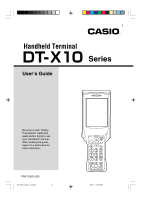
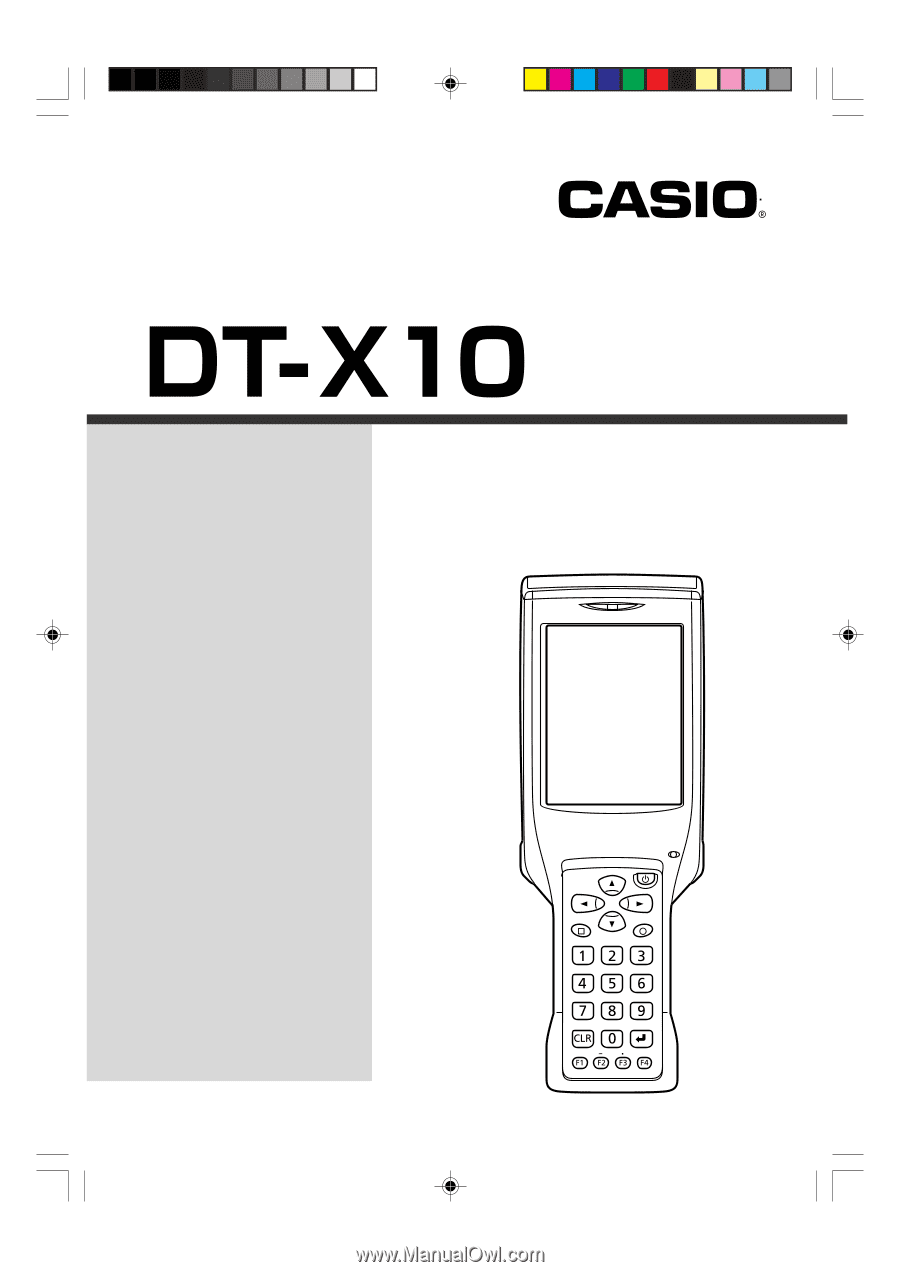
E Handheld Terminal User's Guide Series Be sure to read "Safety Precautions" inside this guide before trying to use your Handheld Terminal. After reading this guide, keep it in a safe place for future reference. PN410369-005 DT-X10_E_Hyo_1_4.p65 3 Fn BL ABC DEF GHI JKL MNO PQRS TUV WXYZ BS - Casio DT-X10 | User Guide - Page 2
SDK for Windows® CE operating system or its derivative work, which use is governed by a license granted by Extended Systems Inc. • BLUETOOTH is a trademark owned by Bluetooth SIG, Inc. and licensed to CASIO guide are trademarks or registered trademarks of their respective owners. DT-X10_E_P00.p65 2 - Casio DT-X10 | User Guide - Page 3
of this CASIO product. • Never try to disassemble or modify the Handheld Terminal and its options in any way. High Handheld Terminal and its options become hot or start to emit smoke or a strange odor, immediately turn off the power, and contact your original vendor or an authorized CASIO service - Casio DT-X10 | User Guide - Page 4
, immediately turn off the power and contact your original vendor or an authorized CASIO service provider. Continued use creates the danger of fire and electric shock. Moisture • Though your Handheld Terminal is water splash-resistant, its Bridge Satellite Cradle and other optional peripherals are - Casio DT-X10 | User Guide - Page 5
a car parked in direct sunlight. Heavy Objects • Never place heavy objects on top of the Handheld Terminal and its options. Doing so creates the danger of loss of balance and the objects falling, which with clean tap water and then consult a physician. DT-X10_E_P01_07.p65 3 05.4.1, 11:03 AM E-3 - Casio DT-X10 | User Guide - Page 6
positive (+) and negative (-) polarities must be oriented correctly when it is loaded into battery charger or the Handheld Terminal. Connecting the battery pack with its polarities reversed creates the danger of battery pack fluid leakage, heat emission, explosion, and fire. • Never dispose of the - Casio DT-X10 | User Guide - Page 7
tap water. Prolonged contact with battery pack fluid can cause skin irritation. • Keep the battery pack out of the reach of small children. Do not let small children remove the battery pack from battery charger or the Handheld Terminal while it is powered on. E-5 DT-X10_E_P01_07.p65 5 05.5.17 - Casio DT-X10 | User Guide - Page 8
Handheld Terminal shock. • When using the battery charger and Bridge Satellite Cradle, be or an authorized CASIO service provider about repair wall outlet before moving the battery charger and Bridge Satellite Cradle the wall outlet before cleaning the battery charger and Bridge Satellite Cradle. - Casio DT-X10 | User Guide - Page 9
• Note that CASIO Computer Co., Ltd. shall not be held liable to you or any third party for any damages or loss caused by deletion or corruption of data due to use of the Handheld Terminal, malfunction or repair of the Handheld Terminal or its peripherals, or due to the batteries going dead. • The - Casio DT-X10 | User Guide - Page 10
problems with data storage and other problems. Note and observe the following precautions to ensure proper operation. • Do not continue operating the Handheld Terminal when battery that comes with the Handheld Terminal to operate its touch the Handheld Terminal. To clean the Handheld Terminal, wipe - Casio DT-X10 | User Guide - Page 11
the procedures. Warranty and After Service • Should this product ever malfunction, contact your original retailer providing information about the product name, the date you purchased it, and details about the problem. This mark applies in EU countries only. DT-X10_E_P08_11.p65 9 05.4.1, 11:03 - Casio DT-X10 | User Guide - Page 12
accordance with the instructions, may cause DT-893LTCV) CF Card Extension Unit (DT-894CFU) Cables (DT887AXA, DT888RSC, DT-380USB, SB-201) Declaration of Conformity Model Numbers: DT-X10M30U, DT-X10M30URC2, DT-160IOE, DT-167CHGE, DT-169CHGE, DT-5022CHG Trade Name: CASIO Responsible party: CASIO - Casio DT-X10 | User Guide - Page 13
Iceland, Lichtenstein, Norway NONE CASIO COMPUTER CO., LTD. CASIO DT-X10M30E, DT-X10M30U, DT-X10M30RC2 DT-X10M10E, DT-X10M10RC2 are tested and found the council of March 9, 1999 on Radio equipment and Telecommunications Terminal Equipment and the mutual recognition of their conformity and with the - Casio DT-X10 | User Guide - Page 14
Important ...E-9 Before Getting Started E-14 Handheld Terminal System Configuration E-16 Options ...E-16 General Guide E-19 Replacing the Battery E-21 Replacing the Battery Pack E-21 Attaching the Wrist Strap E-24 Configuring Handheld Terminal Settings E-25 Calibrating Touch Screen Alignment - Casio DT-X10 | User Guide - Page 15
-169CHGE) Specifications E-49 Using the Dual Battery Charger E-50 General Guide E-50 Option ...E-50 Charging a Battery Pack E-52 Connecting Multiple Dual Battery Chargers E-53 Dual Battery Charger (DT-5022CHG) Specifications E-54 Using PC Card (DT-X10M30E / M30U / M10E E-55 Affixing a PC Card - Casio DT-X10 | User Guide - Page 16
are included. Handheld Terminal Stylus Fn BL ABC DEF GHI JKL MNO PQRS TUV WXYZ BS Alpha Large-capacity battery pack Cover PC Card Remover (2 pcs) Wrist Strap User's Guide (this manual) 2. Charge the battery pack. Charge the separately available battery pack (DT-5023BAT or DT-5025LBAT). You - Casio DT-X10 | User Guide - Page 17
(two places) to the "LOCK" positions. When loading a large-capacity rechargeable battery pack, mount the large-capacity rechargeable battery pack cover. 1 2 3 3 4. Hold down the power key for about one second to turn on the Handheld Terminal. Start up the application you want to run. Fn BL ABC - Casio DT-X10 | User Guide - Page 18
Handheld Terminal System Configuration DT-X10 Series Options Bridge Satellite Cradle DT-160IOE Required AC Adaptor (AD-S42120A) Fn BL ABC DEF GHI JKL MNO PQRS TUV WXYZ BS Alpha Laser Scanner models • DT-X10M10E • DT-X10M10RC2 C-MOS Imager models • DT-X10M30E • DT-X10M30U* • DT-X10M30RC2 • - Casio DT-X10 | User Guide - Page 19
DT-5023BAT (Battery Pack) Battery Pack DT-5025LBAT (Large-capacity Battery Pack) Dual Battery Charger DT-5022CHG Required AC Adaptor (MPC-577ADP) DT-X10_E_P14_36.p65 17 05.4.1, 11:04 AM E-17 - Casio DT-X10 | User Guide - Page 20
Bundled Items Large Card Cover 4 screws DT-887AXA DT-888RSC DT-380USB Cables Bridge Satellite Cradle Cable/RS-232C Dsub-9Pin (Female) Bridge Daisy Chain Cable USB Cable SB-201 PC Connection Cable (USB) DT-892TCV DT-893LTCV Communication Card Cover E-18 DT-X10_E_P14_36.p65 18 2005.4.15, 11 - Casio DT-X10 | User Guide - Page 21
General Guide Left Front 15 Green: Read successful 2 Indicator 2 This lamp indicates the charge status of the battery pack. Red: Charging Green: Charging complete 3 LCD Panel/Touch Shows text, F4: Toggles to switch between numbers and alphabets. E-19 DT-X10_E_P14_36.p65 19 05.4.1, 11:04 AM - Casio DT-X10 | User Guide - Page 22
13 CLR Key 14 Fn Key 15 PC Card Slot 16 USB Port 17 Headset Jack 18 Battery Pack Cover Lock Switches 19 R Trigger Key 20 L reset the Handheld Terminal. For connection of a separately available CF Card Extension Unit. Covers the compartment that holds the battery pack. DT-X10_E_P14_36.p65 20 - Casio DT-X10 | User Guide - Page 23
use the large-capacity battery pack (DT-5025LBAT) instead of the standard battery pack (DT-5023BAT). The backup battery is installed inside of the Handheld Terminal. This guide uses the following terms to refer to the batteries. Battery Pack: Rechargeable battery pack (DT-5023BAT or DT-5025LBAT) for - Casio DT-X10 | User Guide - Page 24
on both sides of the Handheld Terminal to the "FREE" position, and then remove the battery pack cover. 4. Remove the battery pack as shown in the illustration. 5. Taking care to ensure it is oriented correctly, load a new battery pack into the Handheld Terminal. E-22 DT-X10_E_P14_36.p65 22 05 - Casio DT-X10 | User Guide - Page 25
, make sure you do not leave the Handheld Terminal without a battery pack for more than about 10 minutes. Doing so can cause data in the memory to be deleted. • When replacing the battery, be sure you carefully follow the proper procedure as explained in this guide. • Never try to use other type of - Casio DT-X10 | User Guide - Page 26
it around. To attach the wrist strap 1. Pass the thin cord of the wrist strap through the wrist strap hole on the back of the Handheld Terminal. 2. Pass the other end of the strap (the part where you insert your wrist) through the loop formed by the thin cord. Important! Do not - Casio DT-X10 | User Guide - Page 27
Configuring Handheld Terminal Settings Calibrating Touch Screen Alignment Whenever you feel that touch screen response is poor or that the operations the target at five different locations. • Press the Execute key or tap anywhere on the touch screen. DT-X10_E_P14_36.p65 25 05.4.1, 11:04 AM E-25 - Casio DT-X10 | User Guide - Page 28
by consecutively tapping "Brightness" on the control panel. Important! • If you use your Handheld Terminal in a location where it is hot, it automatically dims the screen to protect against damage then tap "Backlight" to set the displayed parameters. E-26 DT-X10_E_P14_36.p65 26 05.4.1, 11:04 AM - Casio DT-X10 | User Guide - Page 29
Handheld Terminal so that the entire code is enclosed within the red light. Important! • If you have problem Handheld Terminal further away from the code. • Note that a special reader application is required to read barcodes and 2-dimensional codes. • The DT-X10M30E/M30U/M30RC2/M30URC2 supports - Casio DT-X10 | User Guide - Page 30
About the Class 1 LED Label • This label identifies the Handheld Terminal as a Class 1 LED product under IEC60825-1: 1997. E-28 DT-X10_E_P14_36.p65 28 05.4.1, 11:04 AM - Casio DT-X10 | User Guide - Page 31
• This Handheld Terminal is capable of scanning bar codes at a distance of about 40-300 mm (15/8"-117/8"). Furthermore, the distance at which scanning is possible may vary according to the type of bar code. • The laser scanner models are not available in the USA and Canada. DT - Casio DT-X10 | User Guide - Page 32
into the laser light. • This product scans using laser light. Never look directly into the laser light or shine the laser light into the eyes. DT-X10_E_P14_36.p65 30 05.4.1, 11:04 AM - Casio DT-X10 | User Guide - Page 33
emit radio wave in the area where you are performing IR data communication. • If you need to use such a device, move away from the communicating Handheld Terminals. In case of a cellular phone, keep it at least 30cm (117⁄8") away. DT-X10_E_P14_36.p65 31 05.4.1, 11:04 AM E-31 - Casio DT-X10 | User Guide - Page 34
the distance at least 10 meters (32'103⁄4") or more between the Handheld Terminal and a Wireless LAN device, turn off the power of either the Handheld terminal or the Wireless LAN device. • Set the Wireless LAN mode of the Handheld Terminal to off. E-32 DT-X10_E_P14_36.p65 32 05.8.11, 10:46 AM - Casio DT-X10 | User Guide - Page 35
Handheld Terminal. This starts the reset operation. If reset does not find a memory problem The Handheld Terminal restarts, and normal operation is restored. If reset finds a memory problem memory. See the User's Guide for details about initializing DT-X10_E_P14_36.p65 33 05.4.1, 11:04 AM E-33 - Casio DT-X10 | User Guide - Page 36
to use the Handheld Terminal because you forgot your password. • When the Handheld Terminal does not operate normally due to a memory problem. • When the message "A problem with memory contents has RAM) are erased and the start-up screen is displayed. E-34 DT-X10_E_P14_36.p65 34 05.4.1, 11:04 AM - Casio DT-X10 | User Guide - Page 37
DT-X10 Specifications Model: DT-X10M30E, DT-X10M30U, DT-X10M30RC2, DT-X10M30URC2, DT-X10M10E, DT-X10M10RC2 CPU: Intel® PXA255 Application Processor (300MHz max.) Memory: 32MB RAM; 32MB Flash ROM (FlashFX built in) OS: Microsoft® Windows® CE.NET operating system, English - Casio DT-X10 | User Guide - Page 38
Wireless (2) Memory backup: Data Protection (RAM): 10 minutes (when no power is being supplied by the installed battery pack) Clock: 2 weeks (when no power is supplied by the battery pack) Operating Temperature: DT-X10M30E/M30U/M30RC2/M30URC2 : -20°C to 50°C (--4°F to 122°F) DT-X10M10E - Casio DT-X10 | User Guide - Page 39
an RS-232C connection or USB connection. You can also use the Bridge Satellite Cradle to charge the battery pack installed on the Handheld Terminal. An optionally available wall mount unit (DT-891WH) lets you mount the Bridge Satellite Cradle on a wall. General Guide Back 12 3 4 5 Top 7 Front - Casio DT-X10 | User Guide - Page 40
installation of a special driver on the PC. This port is used when connecting to another Bridge Satellite Cradle. Connect the AC adaptor here. The holes in this plate accept screws that secure the wall mount unit in place. This switch detects when the Handheld Terminal is not seated correctly - Casio DT-X10 | User Guide - Page 41
of data communication operation with the Handheld Terminal. The Handheld Terminal draws the power via the Bridge Satellite DT-887AXA) to the RS-232C port of the Bridge Satellite Cradle. Connect the other end to your computer's RS-232C port. USB Connection • Connect a USB cable (DT-380USB) to the USB - Casio DT-X10 | User Guide - Page 42
initiated, indicator 2 on the DT-X10 lights up in red. When charging has been completed, indicator 2 on the DT-X10 changes color from red to . If you need to use such a device, move away from the communicating Handheld Terminals. In case of a cellular phone, keep it at least 30cm (117⁄8") away - Casio DT-X10 | User Guide - Page 43
used (Always off) Host Computer Interface Setting RS-232C USB 6 OFF ON * Daisy Chain Setting Intermediate Unit Daisy Chain Disabled/Termination 5 OFF ON * Connection Type Setting Host Computer Daisy DIP settings other than those described above. DT-X10_E_P37_52.p65 41 05.4.1, 11:04 AM E-41 - Casio DT-X10 | User Guide - Page 44
unit. Screws 2. Affix the wall mount unit to the bottom of the Bridge Satellite Cradle, and secure it in place with the wall mount unit screws. Screws 3. Drive one of the provided screws into the upper wall mount unit hole onto the upper screw. E-42 DT-X10_E_P37_52.p65 42 05.4.1, 11:04 AM - Casio DT-X10 | User Guide - Page 45
on a wall, be sure to check the wall screws periodically for looseness. Tighten them as required. • Note use of the RS-232C cable is not supported by the wall-mounted configuration. Connect using a USB cable or daisy chain cable. DT-X10_E_P37_52.p65 43 05.4.1, 11:04 AM E-43 - Casio DT-X10 | User Guide - Page 46
to the C-IN port of the next unit that is sitting to the first unit with DT-888RSC cable (Daisy chain connection cable) as shown in the figure below. RS-232C cable or USB cable To host computer Daisy chain connection cables (DT-888RSC) Important! You can use optional daisy chain connection cables - Casio DT-X10 | User Guide - Page 47
limiter) Charge Time: Approximately 2.5 hours (standard battery pack) Approximately 5.0 hours (large-capacity battery pack) 6. Power Supply Power Requirement: AC adaptor (AD-S42120A) Power Consumption: DC12V approximately 1600mA Output Handheld Terminal: DC5V 2500mA (max.) 7. AC Adaptor - Casio DT-X10 | User Guide - Page 48
The optionally available Cradle-type Battery Charger (DT-169CHGE) lets you charge the Handheld Terminal's battery simply by placing the Handheld Terminal onto the charger. An optional wall mount unit lets you mount the Cradle-type Battery Charger on a wall. General Guide 1 Back 2 Top Front Right - Casio DT-X10 | User Guide - Page 49
the AC adaptor here. The holes in this plate accept screws that secure the wall mount unit in place. This switch detects when the Handled Terminal is not seated correctly on the Cradle. Power is supplied to the Handheld Terminal via these contacts. This lamp indicates the power status and the - Casio DT-X10 | User Guide - Page 50
contacts come into contact with each other, place the Handheld Terminal onto the Cradle-type Battery Charger. This causes the Cradletype Battery Charger power indicator lamp to light in green. When charging is initiated, indicator 2 on the DT-X10 lights up in red. When charging has been completed - Casio DT-X10 | User Guide - Page 51
limiter) Charge Time: Approximately 2.5 hours (standard battery pack) Approximately 5.0 hours (large-capacity battery pack) 2. Power Supply Power Requirement: AC adaptor (AD-S42120A) Power Consumption: 12V DC, approximately 1,400mA Output Handheld Terminal: 5V DC 2500mA (max.) 3. AC - Casio DT-X10 | User Guide - Page 52
Charger The optionally available Dual Battery Charger (DT-5022CHG) allows for serial charging of two rechargeable battery packs. General Guide Top 2 3 Front Back 3 4 4 1 Bundled Items Connection Bracket 2 screws 4 1 4 3 Option AC Adaptor E-50 DT-X10_E_P37_52.p65 50 MPC-577ADP - Casio DT-X10 | User Guide - Page 53
Holes This lamp indicates the charge status of the battery pack(s). Off: Not charging Red: Charging Red Flashing: Battery pack problem Green: Charging complete Connect the AC adaptor here. Use this port to connect multiple Dual Battery Chargers to each other. The connection bracket attaches here - Casio DT-X10 | User Guide - Page 54
, insert it into the Dual Battery Charger. This causes the Charge Indicator Lamp to light in red, indicating that charging has started. Charge Indicator Lamp Off: Not charging Red: Charging Red Flashing: Battery pack problem Green: Charging complete E-52 DT-X10_E_P37_52.p65 52 05.4.1, 11 - Casio DT-X10 | User Guide - Page 55
cover 2. Connect the two Dual Battery Chargers as shown below. 3. Turn over the connected Dual Battery Chargers and attach a connection bracket, securing it in place with screws. You can repeat the above steps to connect up to three Dual Battery Chargers. DT-X10_E_P53_59.p65 53 05.4.1, 11:04 - Casio DT-X10 | User Guide - Page 56
limiter) Approximately 2.5 hours for one battery pack Approximately 5.0 hours for one large-capacity battery pack Charging Two Battery Packs Approximately 5.0 hours for two battery packs (DT-5023BAT×2) Approximately 10 hours for two large-capacity battery packs (DT-5025LBAT×2) AC adaptor MPC-577ADP - Casio DT-X10 | User Guide - Page 57
Using PC Card (DT-X10M30E / M30U / M10E) Your Handheld Terminal supports use of PC cards (PCMCIA card, compact flash card lift up either end of the rubber PC card slot cover, and remove the four screws that secure it in place. Important! Be gentle when lifting up the ends of the PC card slot cover - Casio DT-X10 | User Guide - Page 58
into the Handheld Terminal. Make sure that the top surface of the card is facing in the same direction as the Handheld Terminal display. You cover. 4. Replace the PC card compartment cover, and secure it in place with its screws. Important! If you cannot DT-X10_E_P53_59.p65 56 05.4.1, 11:04 AM - Casio DT-X10 | User Guide - Page 59
Card Extension Unit (DT-894CFU) supports use of Compact flash (CF) Type I cards and Type II cards (3.3/5.0V). Bundled Item DT-894CFU Protector Large seals (2) on the back, and then firmly secure it by fastening all the way down on the back of the Handheld Terminal with the screws 1, 2, 3 and 4 - Casio DT-X10 | User Guide - Page 60
of any dirt, dust, or oil. 2. Remove the screws that secure CF Extension Unit in place, and then remove the card slot cover. 3. Making sure that the top surface of the card is facing in the same direction as the Handheld Terminal display, slide the card into the slot. You will not be - Casio DT-X10 | User Guide - Page 61
Using Rechargeable Battery Pack Your Handheld Terminal supports use of two battery pack types of different capacity. You can select the one that best suits your needs in terms of operating time, the type of options you need to use, etc. When using the large-capacity battery pack, you need to use - Casio DT-X10 | User Guide - Page 62
CASIO COMPUTER CO., LTD. 6-2, Hon-machi 1-chome Shibuya-ku, Tokyo 151-8543, Japan Printed on recycled paper. DT-X10_E_Hyo_1_4.p65 2 PN410369-005 MO0504-F Printed in Japan 05.4.1, 1:22 PM
-
 1
1 -
 2
2 -
 3
3 -
 4
4 -
 5
5 -
 6
6 -
 7
7 -
8
-
9
-
10
-
11
-
12
-
13
-
14
-
15
-
16
-
17
-
18
-
19
-
20
-
21
-
22
-
23
-
24
-
25
-
26
-
27
-
28
-
29
-
30
-
31
-
32
-
33
-
34
-
35
-
36
-
37
-
38
-
39
-
40
-
41
-
42
-
43
-
44
-
45
-
46
-
47
-
48
-
49
-
50
-
51
-
52
-
53
-
54
-
55
-
56
-
57
-
58
-
59
-
60
-
61
-
62
 |
 |
Fn
BL
ABC
DEF
GHI
JKL
MNO
PQRS
BS
Alpha
TUV
WXYZ
Handheld Terminal
User’s Guide
Series
Be sure to read
“Safety
Precautions” inside this
guide before trying to use
your Handheld Terminal.
After reading this guide,
keep it in a safe place for
future reference.
E
PN410369-005
DT-X10_E_Hyo_1_4.p65
05.4.1, 11:03 AM
3