Cisco WRVS4400N Administration Guide
Cisco WRVS4400N - Small Business Wireless-N Gigabit Security Router Manual
 |
UPC - 745883574797
View all Cisco WRVS4400N manuals
Add to My Manuals
Save this manual to your list of manuals |
Cisco WRVS4400N manual content summary:
- Cisco WRVS4400N | Administration Guide - Page 1
ADMINISTRATION GUIDE Cisco Small Business WRVS4400N Wireless-N Gigabit Security Router with VPN - Cisco WRVS4400N | Administration Guide - Page 2
, Inc. and/or its affiliates in the U.S. and other countries. A listing of Cisco's trademarks can be found at www.cisco.com/go/trademarks. Third party trademarks mentioned are the property of their respective owners. The use of the word partner does not imply a partnership relationship - Cisco WRVS4400N | Administration Guide - Page 3
Firewall Settings 88 Configuring the ProtectLink Web Service 104 Configuring the VPN Settings 105 Configuring the QoS Settings 118 Configuring the Administration Settings 123 Configuring IPS Settings 135 Cisco WRVS4400N Wireless-N Gigabit Security Router with VPN Administration Guide 3 - Cisco WRVS4400N | Administration Guide - Page 4
MAC and IP Addresses Windows 98 or Me Instructions Windows 2000 or XP Instructions For the Router's Web-based Utility 141 152 160 160 160 161 178 191 195 195 196 197 199 202 203 203 204 204 206 207 208 208 209 209 Cisco WRVS4400N Wireless-N Gigabit Security Router with VPN Administration Guide 4 - Cisco WRVS4400N | Administration Guide - Page 5
How to Use the Service Appendix F: Specifications General Performance Management Security QoS Layer 2 Environmental Appendix G: Where to Go From Here Contents 210 210 210 211 214 219 219 220 220 221 221 222 222 223 Cisco WRVS4400N Wireless-N Gigabit Security Router with VPN Administration Guide 5 - Cisco WRVS4400N | Administration Guide - Page 6
in different directions. The Cisco WRVS4400N Wireless-N Gigabit Security Router with VPN is equipped with advanced security technologies like Intrusion Prevention System (IPS), Stateful Packet Inspection (SPI) Firewall, IP based Access List (IP ACL), and Network Address Port Translation (NAPT, also - Cisco WRVS4400N | Administration Guide - Page 7
capability to allow users on your small office network to securely connect out to a corporate network. The QoS features of the Cisco WRVS4400N Wireless-N Gigabit Security Router with VPN provide consistent voice and video quality throughout your business. This administration guide gives you all the - Cisco WRVS4400N | Administration Guide - Page 8
Ethernet ports. The router inspects Internet port services like the web server, FTP server, or other Internet applications, and, if allowed, it will forward the packet to the appropriate personal computer on the LAN side. You can use multiple Cisco WRVS4400N Wireless-N Gigabit Security Routers to - Cisco WRVS4400N | Administration Guide - Page 9
IP Addresses 2 The second level router only forwards data packets through a wired network so you don't have to use the Cisco WRVS4400N Wireless-N Gigabit Security Router. You can use any wired router in the Cisco family such as RVS4000 that has 4 LAN ports and 1 WAN port. The Use of IP Addresses - Cisco WRVS4400N | Administration Guide - Page 10
only IP address that can be seen from the Internet for your network is the router's Internet IP address. However, even this Internet IP address can be blocked so the router and network seem invisible to the Internet. Cisco WRVS4400N Wireless-N Gigabit Security Router with VPN Administration Guide - Cisco WRVS4400N | Administration Guide - Page 11
Horse, Misc., P2P, IM, Virus, Worm, and Web Attacks. It is recommended that you update your IPS signature file regularly to thwart new attack types. The following diagram illustrates a number of IPS scenarios. Cisco WRVS4400N Wireless-N Gigabit Security Router with VPN Administration Guide 11 - Cisco WRVS4400N | Administration Guide - Page 12
Networking and Security Basics The Intrusion Prevention System (IPS) 2 Cisco WRVS4400N Wireless-N Gigabit Security Router with VPN Administration Guide 12 - Cisco WRVS4400N | Administration Guide - Page 13
your network, but once data moves outside of your network-when you send data to someone via e-mail or communicate with an individual over the Internet-the firewall will no longer protect that data. Cisco WRVS4400N Wireless-N Gigabit Security Router with VPN Administration Guide 13 - Cisco WRVS4400N | Administration Guide - Page 14
over the Internet will often pass through many different servers around the world before reaching its final destination. That's a long way to go for unsecured data and this is when a VPN serves its purpose. Cisco WRVS4400N Wireless-N Gigabit Security Router with VPN Administration Guide 14 - Cisco WRVS4400N | Administration Guide - Page 15
to Appendix C, "Configuring a Gateway-to-Gateway IPSec Tunnel."). Other versions of Microsoft operating systems require additional, third-party VPN client software applications that support IPSec to be installed. Cisco WRVS4400N Wireless-N Gigabit Security Router with VPN Administration Guide 15 - Cisco WRVS4400N | Administration Guide - Page 16
the VPN, the telecommuter now has a secure connection to the central office's network, as if he were physically connected. For more information, refer to Appendix C, "Configuring a Gatewayto-Gateway IPSec Tunnel." Cisco WRVS4400N Wireless-N Gigabit Security Router with VPN Administration Guide 16 - Cisco WRVS4400N | Administration Guide - Page 17
instructions about creating your own VPN, please visit www.cisco.com. You can also refer to Appendix B, "Using Cisco QuickVPN for Windows 2000, XP, or Vista", and Appendix C, "Configuring a Gateway-toGateway IPSec Tunnel." Cisco WRVS4400N Wireless-N Gigabit Security Router with VPN Administration - Cisco WRVS4400N | Administration Guide - Page 18
router. The following sections are included: • Front Panel, page 19 • Back Panel, page 20 • WRVS4400N Antennas, page 20 • Placement Options, page 21 • Installing the Router, page 24 • Configuring the Router, page 26 Cisco WRVS4400N Wireless-N Gigabit Security Router with VPN Administration Guide - Cisco WRVS4400N | Administration Guide - Page 19
the line speed of the device attached to the Internet port. If the router is connected to a cable or DSL modem, typically the 100 LED will be the only LED lit up, indicating 100 Mbps. Flashing indicates activity. Cisco WRVS4400N Wireless-N Gigabit Security Router with VPN Administration Guide 19 - Cisco WRVS4400N | Administration Guide - Page 20
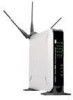
three non-detachable 1.8dBi omni-directional antennas. The three antennas have a base that can rotate 90 degrees when in the standing position. The three antennas support 2X3 MIMO diversity in wireless-N mode. Cisco WRVS4400N Wireless-N Gigabit Security Router with VPN Administration Guide 20 - Cisco WRVS4400N | Administration Guide - Page 21
horizontally on the rubber feet, mount it in the stand, or mount it on the wall. Desktop Option For desktop placement, place the Cisco WRVS4400N router horizontally on a surface so it sits on its four rubber feet. Cisco WRVS4400N Wireless-N Gigabit Security Router with VPN Administration Guide 21 - Cisco WRVS4400N | Administration Guide - Page 22
panel of the router. STEP 2 With the two large prongs of one of the stands facing outward, insert the short prongs into the little slots in the router and push the stand upward until the stand snaps into place. Cisco WRVS4400N Wireless-N Gigabit Security Router with VPN Administration Guide 22 - Cisco WRVS4400N | Administration Guide - Page 23
Cisco WRVS4400N router on the wall, follow these steps. STEP 1 Determine where you want to mount the router and install two screws (not supplied) router down until the screws fit snugly into the wall-mount slots. Cisco WRVS4400N Wireless-N Gigabit Security Router with VPN Administration Guide 23 - Cisco WRVS4400N | Administration Guide - Page 24
to one of the LAN ports (labeled 14) on the back of the router. Connect the other end to an Ethernet port on a PC. STEP 2 Repeat step 1 to connect up to four PCs, switches, or other network devices to the router. Cisco WRVS4400N Wireless-N Gigabit Security Router with VPN Administration Guide 24 - Cisco WRVS4400N | Administration Guide - Page 25
outlet. STEP 6 The Power and Internet LEDs on the front panel will light up green as soon as the power adapter is connected properly. STEP 7 Power on the PCs. The router hardware installation is now complete. Cisco WRVS4400N Wireless-N Gigabit Security Router with VPN Administration Guide 25 - Cisco WRVS4400N | Administration Guide - Page 26
PPPoE from the dropdown menu. Complete the User Name and Password fields. • PPTP: PPTP is a service used in Europe only. If you are using a PPTP connection, check with your ISP for the necessary setup information. Cisco WRVS4400N Wireless-N Gigabit Security Router with VPN Administration Guide 26 - Cisco WRVS4400N | Administration Guide - Page 27
to the Cisco WRVS4400N Wireless-N Gigabit Security Router with VPN Administration Guide on your CD-ROM. You can also access this guide and other related documentation on Cisco.com, as indicated in the next section. Cisco WRVS4400N Wireless-N Gigabit Security Router with VPN Administration Guide 27 - Cisco WRVS4400N | Administration Guide - Page 28
, page 105 • Configuring the QoS Settings, page 118 • Configuring the Administration Settings, page 123 • Configuring IPS Settings, page 135 • Configuring the L2 Switch Settings, page 141 • Viewing Status, page 152 Cisco WRVS4400N Wireless-N Gigabit Security Router with VPN Administration Guide 28 - Cisco WRVS4400N | Administration Guide - Page 29
. The Authentication Required dialog box appears. STEP 2 Enter admin in the User Name field, and enter your password (default password is admin) in the Password field. Then, click OK. The Summary window appears. Cisco WRVS4400N Wireless-N Gigabit Security Router with VPN Administration Guide 29 - Cisco WRVS4400N | Administration Guide - Page 30
WRVS4400N Wireless-N Router Navigating the Utility 5 Navigating the Utility The web-based utility consists of the following main windows: • Setup • Wireless • Firewall • ProtectLink • VPN • QoS • Administration • IPS • L2 Switch • Status Cisco WRVS4400N Wireless-N Gigabit Security Router with VPN - Cisco WRVS4400N | Administration Guide - Page 31
to automatically exchange routing information and establish the router's routing table. • Time-Sets up the router's time settings. • IP Mode-Provides options for the IPv4 mode or the Dual-Stack IPv4 and IPv6 mode. Cisco WRVS4400N Wireless-N Gigabit Security Router with VPN Administration Guide 31 - Cisco WRVS4400N | Administration Guide - Page 32
services or other specialized Internet applications on your network that use a range of ports. • Port Range Triggering-Sets up triggered ranges and forwarded ranges to allow special Internet applications to pass through this NAT router. Cisco WRVS4400N Wireless-N Gigabit Security Router with VPN - Cisco WRVS4400N | Administration Guide - Page 33
bandwidth management by selecting either the Rate Control or Priority setting. • QoS Setup-Allows users to configure the QoS Trust Mode for each LAN port. • DSCP Settings-Allows you to set the Differentiated Services Code Point (DSCP). Cisco WRVS4400N Wireless-N Gigabit Security Router with VPN - Cisco WRVS4400N | Administration Guide - Page 34
specific Peer-to-Peer (P2P) networks and Instant Messaging (IM) applications. • Report-Provides reports of network traffic and malicious attacks. • Information-Provides the signature file version and the protection scope of the IPS system. Cisco WRVS4400N Wireless-N Gigabit Security Router with VPN - Cisco WRVS4400N | Administration Guide - Page 35
Provides status information about the local network (four Ethernet ports). • Wireless LAN-Provides status information on Wireless LAN. • System Performance-Provides traffic statistics on LAN and Wireless LAN ports. Cisco WRVS4400N Wireless-N Gigabit Security Router with VPN Administration Guide 35 - Cisco WRVS4400N | Administration Guide - Page 36
without changing any of the default values. Some users may need to enter additional information to connect to the Internet through an ISP (Internet Service Provider) or broadband (DSL, cable modem) carrier. Cisco WRVS4400N Wireless-N Gigabit Security Router with VPN Administration Guide 36 - Cisco WRVS4400N | Administration Guide - Page 37
of security in the Wireless > Security Settings window and complete the options for the selected security mode. When the appropriate security mode is configured, disable SSID Broadcast on the Basic Settings window. Cisco WRVS4400N Wireless-N Gigabit Security Router with VPN Administration Guide 37 - Cisco WRVS4400N | Administration Guide - Page 38
up time-Displays the length of time that has elapsed since the router was last reset. - DRAM-Displays the amount of DRAM installed in the router. - Flash-Displays the amount of flash memory installed in the router. Cisco WRVS4400N Wireless-N Gigabit Security Router with VPN Administration Guide 38 - Cisco WRVS4400N | Administration Guide - Page 39
Status - IPSec VPN Summary-Displays the VPN > Summary window. - Tunnel(s) Used-Displays the number of VPN tunnels currently being used. - Tunnel(s) Available-Displays the number of VPN tunnels that are available. Cisco WRVS4400N Wireless-N Gigabit Security Router with VPN Administration Guide 39 - Cisco WRVS4400N | Administration Guide - Page 40
these connection types, see the following sections: • Automatic Configuration - DHCP Server on page 42 • Static IP on page 43 • PPPoE on page 44 • PPTP on page 45 • Heart Beat Signal on page 47 • L2TP on page 48 Cisco WRVS4400N Wireless-N Gigabit Security Router with VPN Administration Guide 40 - Cisco WRVS4400N | Administration Guide - Page 41
option is enabled. The recommended setting for this field is 1500 (standard MTU size on Ethernet media). STEP 6 To configure the DDNS service, see Configuring DDNS Service Settings on page 50. STEP 7 Click Save. Cisco WRVS4400N Wireless-N Gigabit Security Router with VPN Administration Guide 41 - Cisco WRVS4400N | Administration Guide - Page 42
have the router automatically get its IP address from your ISP's DHCP server, leave the connection type at its default setting of Automatic Configuration DHCP Server. Most cable modem ISPs use the default option. Cisco WRVS4400N Wireless-N Gigabit Security Router with VPN Administration Guide 42 - Cisco WRVS4400N | Administration Guide - Page 43
the router's default gateway to reach the Internet. • Primary DNS (Required) and Secondary DNS (Optional)-Enter the IP addresses of the primary and secondary DNS server your ISP provided you with. These servers resolve domain-name-to-IP address mappings. Cisco WRVS4400N Wireless-N Gigabit Security - Cisco WRVS4400N | Administration Guide - Page 44
your connection. To use this option, click the option next to Keep Alive. In the Redial Period field, you specify how often you want the router to check the Internet connection. This option is enabled by default Cisco WRVS4400N Wireless-N Gigabit Security Router with VPN Administration Guide 44 - Cisco WRVS4400N | Administration Guide - Page 45
the router's Subnet Mask. • Default Gateway-Enter the default gateway IP address provided by your ISP. • PPTP Server-Enter the IP address of the PPTP server. • User Name and Password-Enter the user name and password provided by your ISP. Cisco WRVS4400N Wireless-N Gigabit Security Router with VPN - Cisco WRVS4400N | Administration Guide - Page 46
the router to check the Internet connection. This option is enabled by default and the default Redial Period is 30 seconds. Use this option to minimize your Internet connection response time as it is always connected. Cisco WRVS4400N Wireless-N Gigabit Security Router with VPN Administration Guide - Cisco WRVS4400N | Administration Guide - Page 47
want to have elapsed before your Internet connection terminates in the Max Idle Time field. Use this option to minimize your DSL connection time if it is charged based on time. This option is disabled by default. Cisco WRVS4400N Wireless-N Gigabit Security Router with VPN Administration Guide 47 - Cisco WRVS4400N | Administration Guide - Page 48
mask provided by your ISP along with your IP address. This is the router's Subnet Mask. • Gateway-Enter the default gateway IP address provided by your ISP. • L2TP Server-Enter the IP address of the L2TP server. Cisco WRVS4400N Wireless-N Gigabit Security Router with VPN Administration Guide 48 - Cisco WRVS4400N | Administration Guide - Page 49
the router to check the Internet connection. This option is enabled by default and the default Redial Period is 30 seconds. Use this option to minimize your Internet connection response time as it is always connected. Cisco WRVS4400N Wireless-N Gigabit Security Router with VPN Administration Guide - Cisco WRVS4400N | Administration Guide - Page 50
b. Configure the DynDNS.org settings: • User Name, Password, and Host Name-Enter the User Name, Password, and Host Name of the account you set up with DynDNS.org. • Status-The status of the DDNS service connection. Cisco WRVS4400N Wireless-N Gigabit Security Router with VPN Administration Guide 50 - Cisco WRVS4400N | Administration Guide - Page 51
information, the router advises the DDNS service of your current WAN (Internet) IP address whenever this address changes. NOTE If you are using TZO, do not use the TZO software to perform this IP address update. Cisco WRVS4400N Wireless-N Gigabit Security Router with VPN Administration Guide 51 - Cisco WRVS4400N | Administration Guide - Page 52
.1.1. - Subnet Mask-Select the subnet mask from the drop-down menu. The default value is 255.255.255.0. - IP Reserved for Internal Usage-Enter a value between 1 and 254 to specify the IP address to use internally. Cisco WRVS4400N Wireless-N Gigabit Security Router with VPN Administration Guide 52 - Cisco WRVS4400N | Administration Guide - Page 53
want a DHCP client to keep the assigned IP address before it sends a renewal request to the DHCP server. The default value is 0, which actually means one day. - Static DNS 1-3-If applicable, enter the IP address(es) of your DNS servers. Cisco WRVS4400N Wireless-N Gigabit Security Router with VPN - Cisco WRVS4400N | Administration Guide - Page 54
- Router Advertisement-Enable this option to allow the router to send out IPv6 router advertisement packets periodically. This helps IPv6 hosts to learn their IPv6 prefix and setup their IPv6 address automatically. Cisco WRVS4400N Wireless-N Gigabit Security Router with VPN Administration Guide 54 - Cisco WRVS4400N | Administration Guide - Page 55
service, such as Internet gaming and video-conferencing. DMZ Hosting forwards traffic to all the ports for the specified personal computer simultaneously, unlike Port Range Forwarding that can only forward a maximum of 15 ranges of ports. Cisco WRVS4400N Wireless-N Gigabit Security Router with VPN - Cisco WRVS4400N | Administration Guide - Page 56
-conferencing, select Enable. - To disable the DMZ feature, select Disable. • DMZ Host IP Address-Enter (complete) the IP address of the computer to be exposed to the Internet, for DMZ hosting. STEP 3 Click Save. Cisco WRVS4400N Wireless-N Gigabit Security Router with VPN Administration Guide 56 - Cisco WRVS4400N | Administration Guide - Page 57
with your ISP. • Clone My PC's MAC button-When Mac Address Clone is enabled, click this button to copy the MAC address of the network adapter in the computer that you are using to connect to the Web-based utility. Cisco WRVS4400N Wireless-N Gigabit Security Router with VPN Administration Guide 57 - Cisco WRVS4400N | Administration Guide - Page 58
, Static Routing, and Inter-VLAN routing. To configure your router's advanced settings, follow these steps: STEP 1 Click Setup > Advanced Routing STEP 2 Fill in the settings for advanced routing configuration: Cisco WRVS4400N Wireless-N Gigabit Security Router with VPN Administration Guide 58 - Cisco WRVS4400N | Administration Guide - Page 59
paths. b. For RIP Send Packet Version, choose the version of RIP packets you want to send to peers (RIPv1 or RIPv2) to match the version supported by other routers on your LAN. Cisco WRVS4400N Wireless-N Gigabit Security Router with VPN Administration Guide 59 - Cisco WRVS4400N | Administration Guide - Page 60
the number of routers that a data packet passes through before reaching its destination. It is used to define the priority on which route to use if there is a conflict between a static route and dynamic route. Cisco WRVS4400N Wireless-N Gigabit Security Router with VPN Administration Guide 60 - Cisco WRVS4400N | Administration Guide - Page 61
Table button. STEP 6 Enable Inter-VLAN Routing if needed. Select Enable to allow packets to be routed between VLANs that are in different subnets. The default is Enable. STEP 7 Click Save. Cisco WRVS4400N Wireless-N Gigabit Security Router with VPN Administration Guide 61 - Cisco WRVS4400N | Administration Guide - Page 62
-If you wish to enter the time and date manually, select the Date from the drop-down fields and enter the hour, minutes, and seconds in the Time field using 24 hour format (example 10:00pm would be entered 22:0:0). Cisco WRVS4400N Wireless-N Gigabit Security Router with VPN Administration Guide 62 - Cisco WRVS4400N | Administration Guide - Page 63
the Enable option. - User Defined NTP Server-To use your own NTP server, select the Enabled option. The default is Disabled. - NTP Server IP Address-Enter the IP address of your own NTP server. STEP 3 Click Save. Cisco WRVS4400N Wireless-N Gigabit Security Router with VPN Administration Guide 63 - Cisco WRVS4400N | Administration Guide - Page 64
Setup > IP Mode. STEP 2 Configure the IP Mode settings: • IPv4 Only-Select this option to use IPv4 on the Internet and local network. • Dual-Stack IP-Select this option to use IPv4 on the Internet and IPv4 and IPv6 on the local network. Cisco WRVS4400N Wireless-N Gigabit Security Router with VPN - Cisco WRVS4400N | Administration Guide - Page 65
addresses of the remote 6to4 gateways. - Permit following sites-Allow only a limited set of 6to4 gateways to establish tunnel with the router. Up to 20 sites can be configured and they can send traffic simultaneously. Cisco WRVS4400N Wireless-N Gigabit Security Router with VPN Administration Guide - Cisco WRVS4400N | Administration Guide - Page 66
the WRVS4400N Wireless-N Router Setting Up Your Wireless-N Router 5 - Block following sites-Prevent a limited set of 6to4 gateways from establishing tunnels with the router. Up to 20 sites can be configured. . Cisco WRVS4400N Wireless-N Gigabit Security Router with VPN Administration Guide 66 - Cisco WRVS4400N | Administration Guide - Page 67
Your Wireless-N Router 5 • Static 6to4 DNS entry-Allow users to configure static DNS entry to map hostname to IPv6 address. This provides a convenient way for users to access remote IPv6 hosts. STEP 3 Click Save. Cisco WRVS4400N Wireless-N Gigabit Security Router with VPN Administration Guide 67 - Cisco WRVS4400N | Administration Guide - Page 68
The Wireless > Basic Settings window allows you to change the basic wireless network settings. . To change the basic wireless settings of the router, follow these steps: STEP 1 Click Wireless > Basic Settings Cisco WRVS4400N Wireless-N Gigabit Security Router with VPN Administration Guide 68 - Cisco WRVS4400N | Administration Guide - Page 69
be connected at their respective data rates. Wireless-B clients cannot be connected in this mode. - B/G/N-Mixed-All the wireless client devices can be connected at their respective data rates in this mixed mode. Cisco WRVS4400N Wireless-N Gigabit Security Router with VPN Administration Guide 69 - Cisco WRVS4400N | Administration Guide - Page 70
(see Configuring Advanced Wireless Settings on page 81), the router automatically selects the adjacent 20MHz channel to combine them into a wider channel. • Multiple BSSID-Select Enabled or Disabled as required. Cisco WRVS4400N Wireless-N Gigabit Security Router with VPN Administration Guide 70 - Cisco WRVS4400N | Administration Guide - Page 71
Click Disabled to increase network security and prevent the SSID from being seen on networked personal computers. The default is Enabled in order to help users configure their network before use. STEP 3 Click Save. Cisco WRVS4400N Wireless-N Gigabit Security Router with VPN Administration Guide 71 - Cisco WRVS4400N | Administration Guide - Page 72
for authentication, while RADIUS stands for Remote Authentication Dial-In User Service.) Refer to the appropriate instructions below after you select the Authentication Type and SSID Interoperability settings. Cisco WRVS4400N Wireless-N Gigabit Security Router with VPN Administration Guide 72 - Cisco WRVS4400N | Administration Guide - Page 73
the WRVS4400N Wireless-N Router Configuring Wireless Settings 5 The following section describes the detailed options for each Security Mode. • Disable-To disable wireless security completely, select Disable. Cisco WRVS4400N Wireless-N Gigabit Security Router with VPN Administration Guide 73 - Cisco WRVS4400N | Administration Guide - Page 74
encryption or 26 characters in length for 128-bit encryption. - Tx Key-Select one of the keys to be used for data encryption (when you manually enter multiple WEP keys). Cisco WRVS4400N Wireless-N Gigabit Security Router with VPN Administration Guide 74 - Cisco WRVS4400N | Administration Guide - Page 75
. - Shared Key-Enter a WPA Shared Key of 8-63 characters. - Key Renewal-Enter a Key Renewal Timeout period, which instructs the router how often it should change the encryption keys. The default is 3600 seconds. Cisco WRVS4400N Wireless-N Gigabit Security Router with VPN Administration Guide 75 - Cisco WRVS4400N | Administration Guide - Page 76
. - Shared Key-Enter a WPA Shared Key of 8-63 characters. - Key Renewal-Enter a Key Renewal Timeout period, which instructs the router how often it should change the encryption keys. The default is 3600 seconds. Cisco WRVS4400N Wireless-N Gigabit Security Router with VPN Administration Guide 76 - Cisco WRVS4400N | Administration Guide - Page 77
the Shared Secret key used by the router and RADIUS server. - Key Renewal-Enter a Key Renewal Timeout period, which instructs the router how often it should change the encryption keys. The default is 3600 seconds. Cisco WRVS4400N Wireless-N Gigabit Security Router with VPN Administration Guide 77 - Cisco WRVS4400N | Administration Guide - Page 78
the Shared Secret key used by the router and RADIUS server. - Key Renewal-Enter a Key Renewal Timeout period, which instructs the router how often it should change the encryption keys. The default is 3600 seconds. Cisco WRVS4400N Wireless-N Gigabit Security Router with VPN Administration Guide 78 - Cisco WRVS4400N | Administration Guide - Page 79
key used by the router and RADIUS server. - Key Renewal-Enter a Key Renewal Timeout period, which instructs the router how often it should change the encryption keys. The default is 3600 seconds. STEP 4 Click Save. Cisco WRVS4400N Wireless-N Gigabit Security Router with VPN Administration Guide 79 - Cisco WRVS4400N | Administration Guide - Page 80
specific wireless client devices connecting to (associating with) the wireless router: • Select SSID-Select the desired SSID. • Enabled/Disabled-Enable or disable wireless connection control. The default is Disabled. Cisco WRVS4400N Wireless-N Gigabit Security Router with VPN Administration Guide - Cisco WRVS4400N | Administration Guide - Page 81
new parameters to adjust the channel bandwidth and guard intervals to improve the data rate dynamically. It is recommended that you let your router automatically adjust the parameters for maximum data throughput. Cisco WRVS4400N Wireless-N Gigabit Security Router with VPN Administration Guide 81 - Cisco WRVS4400N | Administration Guide - Page 82
-G connections still use 20MHz channel. The default is Auto. • Guard Interval-Select the guard interval manually for Wireless-N connections. The two options are Short (400ns) and Long (800ns). The default is Auto. Cisco WRVS4400N Wireless-N Gigabit Security Router with VPN Administration Guide 82 - Cisco WRVS4400N | Administration Guide - Page 83
and reception to ensure efficient communication. This value should remain at its default setting of 2346. If you encounter inconsistent data flow, only minor modifications are recommended. STEP 3 Click Save. Cisco WRVS4400N Wireless-N Gigabit Security Router with VPN Administration Guide 83 - Cisco WRVS4400N | Administration Guide - Page 84
the router: • VLAN - Enable/Disable VLAN-Enable this feature only if the hubs/switches on your LAN support the VLAN standard. - AP Management VLAN-Define the VLAN ID used for management. - VLAN ID-Enter the VLAN ID. Cisco WRVS4400N Wireless-N Gigabit Security Router with VPN Administration Guide - Cisco WRVS4400N | Administration Guide - Page 85
maps the incoming packets to the appropriate queues based on QoS settings (in IP or layer 2 header). WMM provides the capability to prioritize traffic in your environment. The default is Enabled. STEP 3 Click Save. Cisco WRVS4400N Wireless-N Gigabit Security Router with VPN Administration Guide 85 - Cisco WRVS4400N | Administration Guide - Page 86
1 Click Wireless > WDS. STEP 2 Configure the WDS settings: • WDS MAC Address-Displays the read-only MAC address for the WDS. • Allow wireless signal to be repeated by a repeate-Select Auto or Manual as required. Cisco WRVS4400N Wireless-N Gigabit Security Router with VPN Administration Guide 86 - Cisco WRVS4400N | Administration Guide - Page 87
• Remote Access Point's MAC Address-Either enter the MAC address directly, or, if the other access point is on-line, you can click the Site Survey button and select from a list of available access points. STEP 3 Click Save. Cisco WRVS4400N Wireless-N Gigabit Security Router with VPN Administration - Cisco WRVS4400N | Administration Guide - Page 88
services to specific ports. Settings only work when NAT is enabled. NOTE For WAN traffic, NAPT settings are applied first, then the SPI Firewall settings, followed by IP based Access List (which requires more CPU power). Cisco WRVS4400N Wireless-N Gigabit Security Router with VPN Administration - Cisco WRVS4400N | Administration Guide - Page 89
PING Request from the Internet so it seems to be hidden. The default is Enable. • Remote Management-When enabled, the router allows the web-based utility to be accessed from the Internet. The default is Disable. Cisco WRVS4400N Wireless-N Gigabit Security Router with VPN Administration Guide 89 - Cisco WRVS4400N | Administration Guide - Page 90
access to WAN proxy servers, they may be able to circumvent the router's content filters and access Internet sites blocked by the router. Denying Proxy blocks access to any WAN proxy servers. STEP 3 Click Save. Cisco WRVS4400N Wireless-N Gigabit Security Router with VPN Administration Guide 90 - Cisco WRVS4400N | Administration Guide - Page 91
and if the date and time are matched. If any of the conditions are not met, the rule is not used to check against packets. Cisco WRVS4400N Wireless-N Gigabit Security Router with VPN Administration Guide 91 - Cisco WRVS4400N | Administration Guide - Page 92
(used together with Time). It can be set to Any Day. • Edit button-Use this button to go to Edit IP ACL Rule window and modify this rule. • Delete button-Use this button to delete the ACL rule from the list. Cisco WRVS4400N Wireless-N Gigabit Security Router with VPN Administration Guide 92 - Cisco WRVS4400N | Administration Guide - Page 93
IP ACL Rule. STEP 2 Fill in the fields defining the current rule: • Action-Select either Allow or Deny. Default is Allow. • Service-Select ALL or pre-defined (or user-defined) services from the drop-down menu. Cisco WRVS4400N Wireless-N Gigabit Security Router with VPN Administration Guide 93 - Cisco WRVS4400N | Administration Guide - Page 94
MAC- or IP- addresses of the personal computers to which to apply this policy • Whether to Deny or Allow Internet service for this policy • The time and date on which to enable this policy, and • The URLs or Keywords to apply this policy. Cisco WRVS4400N Wireless-N Gigabit Security Router with VPN - Cisco WRVS4400N | Administration Guide - Page 95
• Viewing all Policies on page 98 • Viewing or Changing the List of Personal Computers Covered by the Current Policy on page 98 STEP 3 Click Save. Cisco WRVS4400N Wireless-N Gigabit Security Router with VPN Administration Guide 95 - Cisco WRVS4400N | Administration Guide - Page 96
can select a personal computer by MAC address or IP address. You can also enter a range of IP addresses if you want this policy to range of hours and minutes during which the policy is in effect, or select 24 Hours. Cisco WRVS4400N Wireless-N Gigabit Security Router with VPN Administration Guide - Cisco WRVS4400N | Administration Guide - Page 97
of a web site, access to the site is blocked. NOTE Only the URL is checked, not the content of each Web page. STEP 8 Click Save. Cisco WRVS4400N Wireless-N Gigabit Security Router with VPN Administration Guide 97 - Cisco WRVS4400N | Administration Guide - Page 98
of PCs button. On the List of PCs window, you can define personal computers by MAC address or IP address. You can also enter a range of IP addresses if you want this policy to affect a group of personal computers. Cisco WRVS4400N Wireless-N Gigabit Security Router with VPN Administration Guide 98 - Cisco WRVS4400N | Administration Guide - Page 99
. • External Port-Port number used by the service or Internet application. Internet users must connect using this port number. Check with the software documentation of the Internet application for more information. Cisco WRVS4400N Wireless-N Gigabit Security Router with VPN Administration Guide 99 - Cisco WRVS4400N | Administration Guide - Page 100
WAN port IP address and the pre-defined port numbers. When users send these types of requests to your WAN port IP address via the Internet, the NAT router forwards those requests to the appropriate servers on your LAN. Cisco WRVS4400N Wireless-N Gigabit Security Router with VPN Administration Guide - Cisco WRVS4400N | Administration Guide - Page 101
IP Address-For each application, enter the IP address of the personal computer running the specific application. • Enabled-Select Enabled to enable port range forwarding for the relevant application. STEP 3 Click Save. Cisco WRVS4400N Wireless-N Gigabit Security Router with VPN Administration Guide - Cisco WRVS4400N | Administration Guide - Page 102
and 2000 for incoming packets. To configure port range triggering for the router, follow these steps: STEP 1 Click Firewall > Port Range Triggering. STEP 2 Configure port range triggering settings for the router: Cisco WRVS4400N Wireless-N Gigabit Security Router with VPN Administration Guide 102 - Cisco WRVS4400N | Administration Guide - Page 103
port number of the Forwarded Range. In the second field, enter the ending port number of the Forwarded Range. • Enabled-Select Enabled to enable port range triggering for the relevant application. STEP 3 Click Save. Cisco WRVS4400N Wireless-N Gigabit Security Router with VPN Administration Guide - Cisco WRVS4400N | Administration Guide - Page 104
email messages, filters website addresses (URLs), and blocks potentially malicious websites. For detailed information on how to configure the ProtectLink Service, go to Appendix E, "Cisco ProtectLink Web Service". Cisco WRVS4400N Wireless-N Gigabit Security Router with VPN Administration Guide 104 - Cisco WRVS4400N | Administration Guide - Page 105
of the IPSec tunnel status and VPN Clients status: To display a VPN Status Summary for the router, follow these steps: STEP 1 Click VPN > Summary. STEP 2 View the VPN Status Summary information for the router: Cisco WRVS4400N Wireless-N Gigabit Security Router with VPN Administration Guide 105 - Cisco WRVS4400N | Administration Guide - Page 106
VPN window. - Local Group-Displays the IP address and subnet of the local group. - Remote Group-Displays the IP address and subnet of the remote group. - Remote Gateway-Displays the IP address of the remote gateway. Cisco WRVS4400N Wireless-N Gigabit Security Router with VPN Administration Guide - Cisco WRVS4400N | Administration Guide - Page 107
Duration-Displays the total connection time of the latest VPN session. - Disconnect-Check the Disconnect box at the end of each row in the VPN Clients Table and click Disconnect to disconnect a VPN Client session. Cisco WRVS4400N Wireless-N Gigabit Security Router with VPN Administration Guide 107 - Cisco WRVS4400N | Administration Guide - Page 108
the selected tunnel. • Summary-Shows the settings and status of all enabled tunnels. • IPSec VPN Tunnel-Click Enable option to enable this tunnel. • Tunnel Name-Enter a name for this tunnel, such as "LA Office." Cisco WRVS4400N Wireless-N Gigabit Security Router with VPN Administration Guide 108 - Cisco WRVS4400N | Administration Guide - Page 109
. STEP 6 To establish a connection for the current VPN tunnel, click Connect. To break the connection, click Disconnect. STEP 7 To view the VPN log, which shows details of each tunnel established, click View Log. Cisco WRVS4400N Wireless-N Gigabit Security Router with VPN Administration Guide 109 - Cisco WRVS4400N | Administration Guide - Page 110
's Remote Secure Group. • IP Address-Enter the IP address on the local network. • Subnet Mask-If the Subnet option is selected, enter the mask to determine the IP addresses on the local network. STEP 3 Click Save. Cisco WRVS4400N Wireless-N Gigabit Security Router with VPN Administration Guide 110 - Cisco WRVS4400N | Administration Guide - Page 111
• Remote Security Gateway Type-There are two types. They are IP Only, IP + Domain Name (FQDN) Authentication. The type of Remote Security Gateway should match with the Local Security Gateway Type of VPN devices in the other end of tunnel. Cisco WRVS4400N Wireless-N Gigabit Security Router with VPN - Cisco WRVS4400N | Administration Guide - Page 112
. • Remote Security Gateway-Select the desired option - IP address. • IP-The IP address in this field must match the public IP address WAN IP address) of the remote gateway at the other end of this tunnel. STEP 3 Click Save. Cisco WRVS4400N Wireless-N Gigabit Security Router with VPN Administration - Cisco WRVS4400N | Administration Guide - Page 113
-Hellman key negotiation. There are 3 groups available for ISAKMP SA establishment, 768-bit, 1024-bit, 1536-bit represent different bits used in Diffie-Hellman mode operation. The default value is Group 768bit. Cisco WRVS4400N Wireless-N Gigabit Security Router with VPN Administration Guide 113 - Cisco WRVS4400N | Administration Guide - Page 114
SPI, and vice versa Viewing Connection Status The Status section of the VPN > IPSec VPN window shows the connection status for the selected tunnel. The state is either connected or disconnected. STEP 3 Click Save. Cisco WRVS4400N Wireless-N Gigabit Security Router with VPN Administration Guide 114 - Cisco WRVS4400N | Administration Guide - Page 115
the username using any combination of keyboard characters. • Password-Enter the password you would like to assign to this user. • Re-enter to Confirm-Retype the password to ensure that it has been entered correctly. Cisco WRVS4400N Wireless-N Gigabit Security Router with VPN Administration Guide - Cisco WRVS4400N | Administration Guide - Page 116
or click Browse to locate the file on your computer, then click Import. - Certificate Last Generated or Imported-Displays the date and time when a certificate was last generated or imported. STEP 3 Click Save. Cisco WRVS4400N Wireless-N Gigabit Security Router with VPN Administration Guide 116 - Cisco WRVS4400N | Administration Guide - Page 117
-Point-to-Point Tunneling Protocol (PPTP) allows the Point-to-Point Protocol (PPP) to be tunneled through an IP network. PPTP Passthrough is enabled by default. To disable PPTP Passthrough, select Disabled. Cisco WRVS4400N Wireless-N Gigabit Security Router with VPN Administration Guide 117 - Cisco WRVS4400N | Administration Guide - Page 118
119 • Configuring QoS on page 121 • Configuring DSCP on page 122 QoS allows you to perform bandwidth management, by either rate control or priority. You can also configure the QoS Trust Mode and DSCP settings. Cisco WRVS4400N Wireless-N Gigabit Security Router with VPN Administration Guide 118 - Cisco WRVS4400N | Administration Guide - Page 119
service you need, click Service Management to add the service. - IP-Enter the IP address or IP range you need to control. The default is 0 which includes all internal IP addresses to delete a rule from the list. Cisco WRVS4400N Wireless-N Gigabit Security Router with VPN Administration Guide 119 - Cisco WRVS4400N | Administration Guide - Page 120
the list. The list can contain a maximum of 15 entries. - Delete selected application-Click this button to delete a rule from the list. STEP 3 Click Save. Cisco WRVS4400N Wireless-N Gigabit Security Router with VPN Administration Guide 120 - Cisco WRVS4400N | Administration Guide - Page 121
Trust Mode is set to CoS, select the default CoS priority from 0 to 7 from the drop-down menu. • CoS Setup - Priority-The CoS priority from 0 to 7. - Queue-Select the traffic forwarding queue, 1 to 4, to which the CoS priority is mapped. Cisco WRVS4400N Wireless-N Gigabit Security Router with VPN - Cisco WRVS4400N | Administration Guide - Page 122
Services Code Point value in the incoming packet. • Queue-Select the traffic forwarding queue, 1 to 4, to which the DSCP priority is mapped. • Restore Defaults-Click this button to restore the default DSCP values. Cisco WRVS4400N Wireless-N Gigabit Security Router with VPN Administration Guide - Cisco WRVS4400N | Administration Guide - Page 123
Router Problems on page 129 • Backing Up and Restoring Configurations on page 131 • Restoring Factory Default Settings on page 132 • Rebooting the Router on page 133 • Upgrading the Router Firmware on page 134 Cisco WRVS4400N Wireless-N Gigabit Security Router with VPN Administration Guide - Cisco WRVS4400N | Administration Guide - Page 124
created by default. Other accounts are not created by default so you can leave them alone. NOTE Make sure to change the first user account username and password when you configure your router for the first time. Cisco WRVS4400N Wireless-N Gigabit Security Router with VPN Administration Guide 124 - Cisco WRVS4400N | Administration Guide - Page 125
use UPnP, keep the default setting, Enable. Otherwise, select Disable. • Management via WLAN-Control the access to the web-based utility from associated wireless clients. The default is Disable. STEP 3 Click Save. Cisco WRVS4400N Wireless-N Gigabit Security Router with VPN Administration Guide 125 - Cisco WRVS4400N | Administration Guide - Page 126
four categories of event logging (Firewall, VPN, System, and ACL). You can configure the router to send the event log to you through e-mail, upload the log to syslog server, or view the log locally on the router. Cisco WRVS4400N Wireless-N Gigabit Security Router with VPN Administration Guide 126 - Cisco WRVS4400N | Administration Guide - Page 127
IP, and Service/Port number. • Email Alerts - Email Alerts-If enabled, an e-mail is sent when the number of DoS events exceeds the defined threshold or the total events number exceed 100. If enabled, you must provide the e-mail address information. Cisco WRVS4400N Wireless-N Gigabit Security Router - Cisco WRVS4400N | Administration Guide - Page 128
Enable Syslog is checked. - Local Log-Enable this if you want to see the log locally on the router. - View Log button-If Local Log is enabled, click View Log to view the event log on the router. STEP 3 Click Save. Cisco WRVS4400N Wireless-N Gigabit Security Router with VPN Administration Guide 128 - Cisco WRVS4400N | Administration Guide - Page 129
of Pings-Enter the number of times you wish to ping the target device. - Ping Interval-Enter the time period (in milliseconds) between each ping. Cisco WRVS4400N Wireless-N Gigabit Security Router with VPN Administration Guide 129 - Cisco WRVS4400N | Administration Guide - Page 130
a specific pair (A, B, C, or D) in the cable. Each cable consists of 8 pins (4 pairs). - Cable Length-Displays the length of the cable in meters. - Status-Displays the status of the pair. STEP 3 Click Save. Cisco WRVS4400N Wireless-N Gigabit Security Router with VPN Administration Guide 130 - Cisco WRVS4400N | Administration Guide - Page 131
or manually enter the path to the file. b. Click Restore to start the restoration process. The could be helpful if you want to use the same configuration on a new hardware or after resetting to the factory defaults. Cisco WRVS4400N Wireless-N Gigabit Security Router with VPN Administration Guide - Cisco WRVS4400N | Administration Guide - Page 132
Factory Defaults to reset all configuration settings to their default values. If you click this button, all custom router settings are replaced by the default settings. STEP 3 When prompted, click OK to continue. Cisco WRVS4400N Wireless-N Gigabit Security Router with VPN Administration Guide - Cisco WRVS4400N | Administration Guide - Page 133
the router. To reboot the router, follow these steps: STEP 1 Click Administration > Reboot. STEP 2 Click Reboot to reboot the router. This operation does not cause the router to lose any of its stored settings. Cisco WRVS4400N Wireless-N Gigabit Security Router with VPN Administration Guide 133 - Cisco WRVS4400N | Administration Guide - Page 134
: STEP 1 Click Browse to locate the file firmware upgrade. Alternatively, enter the path to the file in the File field. STEP 2 Click Start to Upgrade and follow the on-screen instructions to upgrade your firmware. Cisco WRVS4400N Wireless-N Gigabit Security Router with VPN Administration Guide 134 - Cisco WRVS4400N | Administration Guide - Page 135
use IPS together with the firewall, IP-based ACL, and IPsec VPN to achieve maximum security. The IPS is hardware-accelerated on this router. Configuring IPS The IPS > Configuration window displays general IPS settings. Cisco WRVS4400N Wireless-N Gigabit Security Router with VPN Administration Guide - Cisco WRVS4400N | Administration Guide - Page 136
file from www.cisco.com to your personal computer. b. Click Browse to locate the signature file. Alternatively, enter the path to the file in the Signature Update field c. Click Update. STEP 5 Click Save. Cisco WRVS4400N Wireless-N Gigabit Security Router with VPN Administration Guide 136 - Cisco WRVS4400N | Administration Guide - Page 137
, the WAN port bandwidth are occupied. Click Block to enable the blocking of the following P2P software applications. The default is Non-Block. - GNUTELLA_EZPEER - FASTTRACK - KURO - EDONKEY2000 - BITTORRECT Cisco WRVS4400N Wireless-N Gigabit Security Router with VPN Administration Guide 137 - Cisco WRVS4400N | Administration Guide - Page 138
the bandwidth. Click Block to enable the blocking to the following IM software applications. The default is Non-Block. - MSN - ICQ - YAHOO_MESSENGER - IRC - ODIGO - REDIFF - GOOGLE TALK - IM_QQ STEP 3 Click Save. Cisco WRVS4400N Wireless-N Gigabit Security Router with VPN Administration Guide 138 - Cisco WRVS4400N | Administration Guide - Page 139
category (type) of attack and the frequency (number of times) of the attacks in a table. STEP 2 Click the View Log button to view the log. Cisco WRVS4400N Wireless-N Gigabit Security Router with VPN Administration Guide 139 - Cisco WRVS4400N | Administration Guide - Page 140
the router was last updated. • Protect Scope-Displays a list of the categories of attacks that the IPS feature in the router protects against. These attacks includes DoS/DDoS, Buffer Overflow, Web Attack, Scan, Trojan Horse, and IM / P2P. Cisco WRVS4400N Wireless-N Gigabit Security Router with VPN - Cisco WRVS4400N | Administration Guide - Page 141
Layer 2 Switch window provides configurations to the layer 2 switching features on the four Ethernet LAN ports of the router. They include VLAN, port configuration, cable diagnostics, and RADIUS authentication. Cisco WRVS4400N Wireless-N Gigabit Security Router with VPN Administration Guide 141 - Cisco WRVS4400N | Administration Guide - Page 142
are broadcast and multicast domains. Broadcast and multicast traffic is transmitted only in the VLAN in which the traffic is generated. The WRVS4400N router supports up to 4 VLANs, including the default VLAN. Cisco WRVS4400N Wireless-N Gigabit Security Router with VPN Administration Guide 142 - Cisco WRVS4400N | Administration Guide - Page 143
a range of ID numbers, enter the starting and ending ID numbers, then click Add Range. • Delete Selected VLAN-To delete a VLAN, select it form the VLAN list, then click Delete Selected VLAN. STEP 3 Click Save. Cisco WRVS4400N Wireless-N Gigabit Security Router with VPN Administration Guide 143 - Cisco WRVS4400N | Administration Guide - Page 144
in or going out of the switch port. Wireless port can be set to this mode only. - Trunk-All frames are tagged coming in or going out ofthe switch except for VLAN ID 1 (called native VLAN or default VLAN in Cisco) Cisco WRVS4400N Wireless-N Gigabit Security Router with VPN Administration Guide 144 - Cisco WRVS4400N | Administration Guide - Page 145
the General port mode, the options are tagged or untagged for PVID; tagged or excluded for all other VLAN IDs. STEP 4 To view a summary of the VLAN/Port assignments, see the table in the VLAN/Port Assignment Summary section of this window. Cisco WRVS4400N Wireless-N Gigabit Security Router with VPN - Cisco WRVS4400N | Administration Guide - Page 146
authentication. • RADIUS Secret-Enter the key string used for authenticating and encrypting all RADIUS communication between the router and the RADIUS server. This key must match the RADIUS server's configuration. Cisco WRVS4400N Wireless-N Gigabit Security Router with VPN Administration Guide 146 - Cisco WRVS4400N | Administration Guide - Page 147
(discard traffic). All connections are blocked. STEP 3 Click Save. Configuring Port Settings The L2 Switch > Port Settings window displays the settings for configuring the LAN ports of the router. Cisco WRVS4400N Wireless-N Gigabit Security Router with VPN Administration Guide 147 - Cisco WRVS4400N | Administration Guide - Page 148
port. Select the check box to enable flow control. The default is disabled. • MaxFrame-Configures the maximum Ethernet frame size sent or received on the port. The default and maximum value is 1518. STEP 3 Click Save. Cisco WRVS4400N Wireless-N Gigabit Security Router with VPN Administration Guide - Cisco WRVS4400N | Administration Guide - Page 149
of frames received on the selected port. • Tx Errors-Displays the number of error packets transmitted from the selected port. • Rx Errors-Displays the number of error packets received from the selected port. Cisco WRVS4400N Wireless-N Gigabit Security Router with VPN Administration Guide 149 - Cisco WRVS4400N | Administration Guide - Page 150
on a port, check the box next to that port. To disable source port mirroring on a port, leave the box unchecked. The default is disabled. • Mirror Port-Select the mirror destination port from the drop-down menu. Cisco WRVS4400N Wireless-N Gigabit Security Router with VPN Administration Guide 150 - Cisco WRVS4400N | Administration Guide - Page 151
tree. The default is 32768. • Hello Time-Enter a number from 1 to 10. The default is 2. • Max Age-Enter a number from 6 to 40. The default is 20. • Forward Delay-Enter a number from 4 to 30. The default is 15. Cisco WRVS4400N Wireless-N Gigabit Security Router with VPN Administration Guide 151 - Cisco WRVS4400N | Administration Guide - Page 152
you to view the current status on this router: • Viewing WAN/Gateway Status on page 153 • Viewing Local Network Status on page 155 • Viewing Wireless LAN Status on page 157 • Viewing System Performance on page 158 Cisco WRVS4400N Wireless-N Gigabit Security Router with VPN Administration Guide 152 - Cisco WRVS4400N | Administration Guide - Page 153
-Displays the current firmware version. - MAC Address-Displays the WAN port MAC address, as seen by your ISP. - Current Time-Displays the time on this router according to your settings on the Setup >Time window. Cisco WRVS4400N Wireless-N Gigabit Security Router with VPN Administration Guide 153 - Cisco WRVS4400N | Administration Guide - Page 154
the page from the Goto Page drop-down menu. To see the latest information, click Refresh. Click Close to return to the Status > Gateway window. Cisco WRVS4400N Wireless-N Gigabit Security Router with VPN Administration Guide 154 - Cisco WRVS4400N | Administration Guide - Page 155
the same MAC address. • Subnet Mask-Displays the LAN port IPv4 subnet mask. • IPv6 Address-Displays the LAN port IPv6 IP address, if IPv6 is enabled. • DHCP Server-Displays the status of the router's DHCP server. Cisco WRVS4400N Wireless-N Gigabit Security Router with VPN Administration Guide 155 - Cisco WRVS4400N | Administration Guide - Page 156
shows you the ARP/RARP Table on the router. The ARP/RARP Table provides IP address to MAC address mapping. On the ARP/RARP Table window, you see a list of address mapping between IP (layer 3) and MAC (layer 2). Cisco WRVS4400N Wireless-N Gigabit Security Router with VPN Administration Guide 156 - Cisco WRVS4400N | Administration Guide - Page 157
mode (for example, B/G/N-Mixed). • Wireless SSID-Displays the Wireless network name. • Channel Bandwidth-Displays the wireless channel bandwidth setting. • Wireless Channel-Displays the radio channel number used. Cisco WRVS4400N Wireless-N Gigabit Security Router with VPN Administration Guide - Cisco WRVS4400N | Administration Guide - Page 158
received. • Packets Sent-Shows the number of packets sent. • Bytes Received-Shows the number of bytes received. • Bytes Sent-Shows the number of bytes sent. Cisco WRVS4400N Wireless-N Gigabit Security Router with VPN Administration Guide 158 - Cisco WRVS4400N | Administration Guide - Page 159
of error packets received. • Drop Received Packets-Shows the number of packets being dropped after they were received. The All LAN ports column shows the aggregate traffic statistics from all four LAN ports. Cisco WRVS4400N Wireless-N Gigabit Security Router with VPN Administration Guide 159 - Cisco WRVS4400N | Administration Guide - Page 160
You Begin The VPN Setup Wizard works with the following routers: • Cisco RVS4000 4-Port Gigabit Security Router with VPN • Cisco WRVS4400N v1.1 Wireless-N 4-Port Gigabit Security Router with VPN • Cisco WRVS4400N v2 Wireless-N 4-Port Gigabit Security Router with VPN Use the following instructions to - Cisco WRVS4400N | Administration Guide - Page 161
from the Cisco Support site for your router. STEP 2 Go to the Start menu and click Run. In the field provided, enter D:\VPN Setup Wizard.exe STEP 3 The Welcome window appears. Click the Click Here to Start button. Cisco WRVS4400N Wireless-N Gigabit Security Router with VPN Administration Guide 161 - Cisco WRVS4400N | Administration Guide - Page 162
Using the VPN Setup Wizard Running the VPN Router Software Wizard Welcome Window 6 STEP 4 An informational window discussing the VPN Wizard appears. When you are ready, click Next to proceed. Cisco WRVS4400N Wireless-N Gigabit Security Router with VPN Administration Guide 162 - Cisco WRVS4400N | Administration Guide - Page 163
instructions. • If your PC is remote to the routers, choose Build VPN connection from Internet remotely, and see the"Building Your VPN Connection Remotely," on page 170 for instructions on this type of installation. Cisco WRVS4400N Wireless-N Gigabit Security Router with VPN Administration Guide - Cisco WRVS4400N | Administration Guide - Page 164
VPN Setup Wizard Running the VPN Router Software Wizard Build VPN Connection Remotely 6 STEP 6 If you picked Build VPN connection from Local LAN port of one router, enter the required data in the Configure VPN Tunnel window and click Next to continue. Cisco WRVS4400N Wireless-N Gigabit Security - Cisco WRVS4400N | Administration Guide - Page 165
2 WAN IP address: Enter the WAN IP address of Router 2. • Router 2 IP by DNS Resolved: Enter the DDNS Domain Name of Router 2 if it does not have a static IP address for its internet connection. STEP 7 The router configuration is checked. Cisco WRVS4400N Wireless-N Gigabit Security Router with VPN - Cisco WRVS4400N | Administration Guide - Page 166
Using the VPN Setup Wizard Running the VPN Router Software Wizard Check Router Configuration 6 STEP 8 The Summary window appears. Use the Click box to view the VPNC Summary window. Cisco WRVS4400N Wireless-N Gigabit Security Router with VPN Administration Guide 166 - Cisco WRVS4400N | Administration Guide - Page 167
Using the VPN Setup Wizard Running the VPN Router Software Wizard Summary Window 6 STEP 9 The VPNC Summary window appears showing the correct, click Go. Otherwise click Back to go back and make any corrections. Cisco WRVS4400N Wireless-N Gigabit Security Router with VPN Administration Guide 167 - Cisco WRVS4400N | Administration Guide - Page 168
Using the VPN Setup Wizard Running the VPN Router Software Wizard Configure the Router 6 STEP 11 Click Testing to make sure the connection is successfully established. Cisco WRVS4400N Wireless-N Gigabit Security Router with VPN Administration Guide 168 - Cisco WRVS4400N | Administration Guide - Page 169
Using the VPN Setup Wizard Running the VPN Router Software Wizard Test the Connection 6 STEP 12 When testing is done, click Exit to end the Wizard. Cisco WRVS4400N Wireless-N Gigabit Security Router with VPN Administration Guide 169 - Cisco WRVS4400N | Administration Guide - Page 170
Administrator Interface and see the results. Test Results Building Your VPN Connection Remotely This procedure continues from Step 5 on page 163. Use this procedure to build your VPN connection from a remote PC. Cisco WRVS4400N Wireless-N Gigabit Security Router with VPN Administration Guide 170 - Cisco WRVS4400N | Administration Guide - Page 171
STEP 1 Choose Build VPN connection from Internet remotely. Click Next to continue. Build VPN Connection Remotely STEP 2 Enter the required data in the Configure VPN Tunnel window and then clickNext to continue. Cisco WRVS4400N Wireless-N Gigabit Security Router with VPN Administration Guide 171 - Cisco WRVS4400N | Administration Guide - Page 172
for its internet connection. • Router 2 WAN IP address: Enter the WAN IP address of the Router 2. • Router 2 IP by DNS Resolved: Enter the DDNS Domain Name of Router 2 if it does not have a static IP address for its internet connection. Cisco WRVS4400N Wireless-N Gigabit Security Router with VPN - Cisco WRVS4400N | Administration Guide - Page 173
VPN Setup Wizard Running the VPN Router Software Wizard STEP 3 The router configuration is checked. Check Router Configuration 6 STEP 4 The Summary window appears. Use the Click box to view the VPNC Summary window. Cisco WRVS4400N Wireless-N Gigabit Security Router with VPN Administration Guide - Cisco WRVS4400N | Administration Guide - Page 174
Using the VPN Setup Wizard Running the VPN Router Software Wizard Summary Window 6 STEP 5 The VPNC Summary window appears showing the correct, click Go. Otherwise click Back to go back and make any corrections. Cisco WRVS4400N Wireless-N Gigabit Security Router with VPN Administration Guide 174 - Cisco WRVS4400N | Administration Guide - Page 175
Using the VPN Setup Wizard Running the VPN Router Software Wizard Configure the Router 6 STEP 7 Click Testing to make sure the connection is successfully established. Cisco WRVS4400N Wireless-N Gigabit Security Router with VPN Administration Guide 175 - Cisco WRVS4400N | Administration Guide - Page 176
Using the VPN Setup Wizard Running the VPN Router Software Wizard Test the Connection 6 STEP 8 When testing is done, click Exit to end the Wizard. Cisco WRVS4400N Wireless-N Gigabit Security Router with VPN Administration Guide 176 - Cisco WRVS4400N | Administration Guide - Page 177
Using the VPN Setup Wizard Running the VPN Router Software Wizard 6 Congratulations! Setup is now complete. You may now log into the Web Administrator Interface and see the results. View Test Results Cisco WRVS4400N Wireless-N Gigabit Security Router with VPN Administration Guide 177 - Cisco WRVS4400N | Administration Guide - Page 178
an IP address in the ranges 192.168.1.2 to 192.168.1.99 and 192.168.1.151 to 192.168.1.254. STEP 5 Enter the Subnet Mask, 255.255.255.0. STEP 6 Enter the Default Gateway, 192.168.1.1 (Router's default IP address). Cisco WRVS4400N Wireless-N Gigabit Security Router with VPN Administration Guide 178 - Cisco WRVS4400N | Administration Guide - Page 179
(provided by your ISP). Contact your ISP or go on its website to find the information. STEP 9 Click OK in the Internet Protocol (TCP/IP) Properties window. Click OK in the Local Area Connection Properties window. Cisco WRVS4400N Wireless-N Gigabit Security Router with VPN Administration Guide 179 - Cisco WRVS4400N | Administration Guide - Page 180
command. Press Enter or click OK. b. Windows 2000 and XP: Click Start and Run. In the Open field, type cmd. Press Enter or click OK. Cisco WRVS4400N Wireless-N Gigabit Security Router with VPN Administration Guide 180 - Cisco WRVS4400N | Administration Guide - Page 181
IP Address, or PPPoE (commonly used by DSL consumers). Please refer to Configuring Internet Connection Settings, page 40. STEP 4 Make sure you use the right cable. Check to see if the Internet LED is solidly lit. Cisco WRVS4400N Wireless-N Gigabit Security Router with VPN Administration Guide - Cisco WRVS4400N | Administration Guide - Page 182
same number used in the VPN IP address), the router will have difficulties routing information to the right location. If you change the router's IP address to 192.168.2.1, that should solve the problem. Change the Cisco WRVS4400N Wireless-N Gigabit Security Router with VPN Administration Guide 182 - Cisco WRVS4400N | Administration Guide - Page 183
Both Both IP Address 192.168.1.100 192.168.1.101 192.168.1.102 Enable X X X 192.168.1.102 X STEP 4 Configure as many entries as you like. STEP 5 When you have completed the configuration, click Save Settings. Cisco WRVS4400N Wireless-N Gigabit Security Router with VPN Administration Guide 183 - Cisco WRVS4400N | Administration Guide - Page 184
: STEP 1 Access the router's web-based utility by going to http://192.168.1.1 or the IP address of the router. Go to Firewall > Single Port Forwarding. STEP 2 Select the Service from the Application column. Cisco WRVS4400N Wireless-N Gigabit Security Router with VPN Administration Guide 184 - Cisco WRVS4400N | Administration Guide - Page 185
password in the Old Password field. STEP 3 Enter a different password in the New Password field, and enter the new password in the Confirm New Password field to confirm the password. STEP 4 Click Save Settings. Cisco WRVS4400N Wireless-N Gigabit Security Router with VPN Administration Guide 185 - Cisco WRVS4400N | Administration Guide - Page 186
and then release it. This will return the password, forwarding, and other settings on the router to the factory default settings. In other words, the router will revert to its original factory configuration. Cisco WRVS4400N Wireless-N Gigabit Security Router with VPN Administration Guide 186 - Cisco WRVS4400N | Administration Guide - Page 187
Start, All Programs, Cisco Small Business, RVS4400N Upgrade Utility, RVS4400N Upgrade Utility, or by double-clicking the icon on your desktop. STEP 5 Follow the on-screen instructions to perform the upgrade. Cisco WRVS4400N Wireless-N Gigabit Security Router with VPN Administration Guide 187 - Cisco WRVS4400N | Administration Guide - Page 188
continue. If your difficulties continue, change the Size to different values. Try this list of values, one value at a time, in this order, until your problem is solved: 1462, 1400, 1362, and 1300. Cisco WRVS4400N Wireless-N Gigabit Security Router with VPN Administration Guide 188 - Cisco WRVS4400N | Administration Guide - Page 189
more information on which incoming port services are required by the Internet application. STEP 7 Check the Enabled checkbox for the entry. STEP 8 When you have completed the configuration, click Save Settings. Cisco WRVS4400N Wireless-N Gigabit Security Router with VPN Administration Guide 189 - Cisco WRVS4400N | Administration Guide - Page 190
load new web pages, not cached ones. STEP 3 Click Tools. Click Internet Options. Click the Security tab. Click the Default level button. Make sure the security level is Medium or lower. Then click the OK button. Cisco WRVS4400N Wireless-N Gigabit Security Router with VPN Administration Guide 190 - Cisco WRVS4400N | Administration Guide - Page 191
preference => connections tab=>, and check I am behind a firewall or proxy. Then set the firewall time-out to 80 seconds in the firewall setting. The Internet user can then send a file to a user behind the router. Cisco WRVS4400N Wireless-N Gigabit Security Router with VPN Administration Guide 191 - Cisco WRVS4400N | Administration Guide - Page 192
(Please look at the Network Control Panel in your Ethernet adapter's Advanced Properties tab.) Make sure that your proxy setting is disabled in the browser. Check our website at www.cisco.com for more information. Cisco WRVS4400N Wireless-N Gigabit Security Router with VPN Administration Guide 192 - Cisco WRVS4400N | Administration Guide - Page 193
TCP/IP ports to be open. It is recommended that you set your computer with a static IP if you want to use DMZ Hosting. Q. If DMZ Hosting is used, does the exposed user share the public IP with the router? No. Cisco WRVS4400N Wireless-N Gigabit Security Router with VPN Administration Guide 193 - Cisco WRVS4400N | Administration Guide - Page 194
or DHCP IP addresses? Ask your ISP to find out. Q. How do I get mIRC to work with the router? From the Firewall > SIngle Port Forwarding menu, set port forwarding to 113 for the PC on which you are using mIRC. Cisco WRVS4400N Wireless-N Gigabit Security Router with VPN Administration Guide 194 - Cisco WRVS4400N | Administration Guide - Page 195
the following sections: • Before You Begin, page 196 • Installing the Cisco QuickVPN Software, page 197 • Using the Cisco QuickVPN Software, page 199 • Distributing Certificates to QuickVPN Users, page 202 Cisco WRVS4400N Wireless-N Gigabit Security Router with VPN Administration Guide 195 - Cisco WRVS4400N | Administration Guide - Page 196
the username in the Username field. STEP 3 Enter the password in the Password field, and enter it again in the Re-enter to confirm field. STEP 4 Click Add/Save. STEP 5 Click the Active check box for VPN Client No. 1. STEP 6 Click Save Settings. Cisco WRVS4400N Wireless-N Gigabit Security Router - Cisco WRVS4400N | Administration Guide - Page 197
.exe (if "D" is the letter of your CD-ROM drive). STEP 2 The License Agreement window appears. Click Yes to accept the agreement and the appropriate files are copied to the computer. License Agreement Cisco WRVS4400N Wireless-N Gigabit Security Router with VPN Administration Guide 197 - Cisco WRVS4400N | Administration Guide - Page 198
, XP, or Vista Installing the Cisco QuickVPN Software Copying Files B Finished Installing Files STEP 3 Click Finished to complete the installation. Proceed to "Using the Cisco QuickVPN Software," on page 199. Cisco WRVS4400N Wireless-N Gigabit Security Router with VPN Administration Guide 198 - Cisco WRVS4400N | Administration Guide - Page 199
will appear. STEP 2 In the QuickVPN Login window: a. In the Profile Name field, enter a name for your profile. b. In the User Name and Password fields, enter the User Name and Password that were assigned to you. Cisco WRVS4400N Wireless-N Gigabit Security Router with VPN Administration Guide 199 - Cisco WRVS4400N | Administration Guide - Page 200
Server Address field, enter the IP address or domain name of the Cisco 4-Port Gigabit Security Router with VPN. d. In the Port For QuickVPN field, enter the port number that the QuickVPN client will use to communicate with the remote VPN router, or keep the default setting, Auto. QuickVPN Login To - Cisco WRVS4400N | Administration Guide - Page 201
field. Then enter the new password again in the Confirm New Password field. Click OK to save your new password. Click Cancel to cancel your change. For information, click Help. Connect Virtual Private Connection Cisco WRVS4400N Wireless-N Gigabit Security Router with VPN Administration Guide 201 - Cisco WRVS4400N | Administration Guide - Page 202
and specify the User Name, Password, and Server Address (IP address or domain name). c. Click Connect. For more information on certificate management, go to section "Configuring VPN Client Accounts," on page 115. Cisco WRVS4400N Wireless-N Gigabit Security Router with VPN Administration Guide 202 - Cisco WRVS4400N | Administration Guide - Page 203
by example. In this example, two personal computers test the liveliness of the tunnel. You can think of VPN Router1, the Internet, and VPN Router2 as a big virtual router that connects PC1 on LAN1 and PC2 on LAN2. Cisco WRVS4400N Wireless-N Gigabit Security Router with VPN Administration Guide 203 - Cisco WRVS4400N | Administration Guide - Page 204
Click VPN > IPSec VPN. STEP 5 For the VPN Tunnel setting, select Enabled. STEP 6 Enter a name in the Tunnel Name field. STEP 7 For the Local Secure Group, select Subnet. Enter VPN Router 1's local network settings in the IP Address and Mask fields. Cisco WRVS4400N Wireless-N Gigabit Security Router - Cisco WRVS4400N | Administration Guide - Page 205
. Enter VPN Router 1's local network settings in the IP Address and Mask fields. STEP 10 For the Remote Secure Gateway, select IP Addr. Enter VPN Router 1's WAN IP address in the IP Address field. STEP 11 Click the Save Settings button. Cisco WRVS4400N Wireless-N Gigabit Security Router with VPN - Cisco WRVS4400N | Administration Guide - Page 206
drop-down menu. STEP 13 Keep the default Key Life Time value, 28800. STEP 14 Click the Save Settings button on the Advanced VPN Tunnel Setup window. STEP 15 Click the Save Settings button on the IPSec VPN window. Cisco WRVS4400N Wireless-N Gigabit Security Router with VPN Administration Guide 206 - Cisco WRVS4400N | Administration Guide - Page 207
can ping each other, then you know the VPN tunnel is configured correctly. You can select different algorithms for the encryption, authentication, and other key management settings for VPN Routers 1 and 2. Cisco WRVS4400N Wireless-N Gigabit Security Router with VPN Administration Guide 207 - Cisco WRVS4400N | Administration Guide - Page 208
address/Adapter Address is what you will use for MAC address cloning or MAC filtering. The following example shows the Ethernet adapter's IP address as 192.168.1.100. Your computer may show something different. Cisco WRVS4400N Wireless-N Gigabit Security Router with VPN Administration Guide 208 - Cisco WRVS4400N | Administration Guide - Page 209
For MAC address cloning, enter the MAC Address in the MAC Address field or select Clone My PCs MAC. Click Save Settings to save the MAC Cloning settings or click the Cancel Changes button to undo your changes. Cisco WRVS4400N Wireless-N Gigabit Security Router with VPN Administration Guide 209 - Cisco WRVS4400N | Administration Guide - Page 210
the Service, page 214 How to Access the Web-Based Utility STEP 1 For local access of the router's web-based utility, launch your web browser, and enter the router's default IP address, 192.168.1.1, in the Address field. Press the Enter key. Address Bar Cisco WRVS4400N Wireless-N Gigabit Security - Cisco WRVS4400N | Administration Guide - Page 211
, or activate the service using the ProtectLink window. ProtectLink Click the ProtectLink menu to display the ProtectLink window. The following window will display if ProtectLink has not yet been activated. Cisco WRVS4400N Wireless-N Gigabit Security Router with VPN Administration Guide 211 - Cisco WRVS4400N | Administration Guide - Page 212
Web service on Cisco.com. I have purchased ProtectLink Web and want to register it. If you already have a license, click this link. You will be redirected to the Cisco ProtectLink Web website. Then follow the on-screen instructions. Cisco WRVS4400N Wireless-N Gigabit Security Router with VPN - Cisco WRVS4400N | Administration Guide - Page 213
your license for the ProtectLink service to the new router. After you activate ProtectLink, the following window appears when you click ProtectLink > ProtectLink Purchase from the menu. ProtectLink (Active) Cisco WRVS4400N Wireless-N Gigabit Security Router with VPN Administration Guide 213 - Cisco WRVS4400N | Administration Guide - Page 214
Cisco ProtectLink Web Service How to Use the Service E How to Use the Service Configure the service to protect your network. router. Configure the website filtering settings on the ProtectLink > Web Protection window. Cisco WRVS4400N Wireless-N Gigabit Security Router with VPN Administration Guide - Cisco WRVS4400N | Administration Guide - Page 215
Cisco ProtectLink Web Service How to Use the Service ProtectLink > Web Protection E Cisco WRVS4400N Wireless-N Gigabit Security Router with VPN Administration Guide 215 - Cisco WRVS4400N | Administration Guide - Page 216
websites and does not create too many false positives. The default is Medium and is the recommended setting. Low This level blocks fewer potentially malicious websites and reduces the risk of false positives. Cisco WRVS4400N Wireless-N Gigabit Security Router with VPN Administration Guide 216 - Cisco WRVS4400N | Administration Guide - Page 217
bypass Cisco URL verification for requested URLs If there are too many URL requests, the overflow will be allowed without verification. Click Save Settings to save your changes, or click Cancel Changes to undo them. Cisco WRVS4400N Wireless-N Gigabit Security Router with VPN Administration Guide - Cisco WRVS4400N | Administration Guide - Page 218
type, Gateway Service, is automatically displayed. License expires on The date and time your license expires are displayed. Renew To renew your license, click Renew. Then follow the on-screen instructions. Cisco WRVS4400N Wireless-N Gigabit Security Router with VPN Administration Guide 218 - Cisco WRVS4400N | Administration Guide - Page 219
), RIPv2 (RFC1723) Ethernet, Power Reset UTP Cat 5e or better Power, Diag, IPS (blinks red in the case of an internal attack, blinks green in the case of an external attack), Wireless, LAN 1-4, Internet Linux Cisco WRVS4400N Wireless-N Gigabit Security Router with VPN Administration Guide 219 - Cisco WRVS4400N | Administration Guide - Page 220
Logging Web F/W upgrade Diagnostics SNMP Version 1, 2c Event logging: Local, Syslog, E-mail alerts Firmware upgradable through web browser DIAG LED for Flash and RAM failure; Ping Test for network diagnostics Cisco WRVS4400N Wireless-N Gigabit Security Router with VPN Administration Guide 220 - Cisco WRVS4400N | Administration Guide - Page 221
Port-based Radius authentication (EAP-MD5, EAP-PEAP) NAT PAT, NAPT, ALG support, NAT Traversal QoS Prioritization Types QoS Queues Port-based on LAN port, and application-based priority on WAN port 4 queues Cisco WRVS4400N Wireless-N Gigabit Security Router with VPN Administration Guide 221 - Cisco WRVS4400N | Administration Guide - Page 222
N 2.0 Operating Temp. 0 to 40°C (32 to 104°F) Storage Temp. -20 to 70°C (-4 to 158°F) Storage Humidity 5% to 90% Noncondensing Operating Humidity 10 to 85% Noncondensing Cisco WRVS4400N Wireless-N Gigabit Security Router with VPN Administration Guide 222 - Cisco WRVS4400N | Administration Guide - Page 223
/software Business Firmware Downloads Cisco Small Business Open Source Requests www.cisco.com/go/smallbiz_opensource_request Product Resources Cisco Small www.cisco.com/go/smallbizrouters Business Routers Cisco WRVS4400N Wireless-N Gigabit Security Router with VPN Administration Guide 223 - Cisco WRVS4400N | Administration Guide - Page 224
(Partner Login Required) www.cisco.com/web/partners/sell/smb Cisco Small Business Home www.cisco.com/smb Related Documentation For hardware setup for the Cisco WRVS4400N router, see the Cisco Small Business Model WRVS4400N Wireless-N Gigabit Security Router with VPN Quick Start Guide. For
-
 1
1 -
 2
2 -
 3
3 -
 4
4 -
 5
5 -
 6
6 -
 7
7 -
8
-
9
-
10
-
11
-
12
-
13
-
14
-
15
-
16
-
17
-
18
-
19
-
20
-
21
-
22
-
23
-
24
-
25
-
26
-
27
-
28
-
29
-
30
-
31
-
32
-
33
-
34
-
35
-
36
-
37
-
38
-
39
-
40
-
41
-
42
-
43
-
44
-
45
-
46
-
47
-
48
-
49
-
50
-
51
-
52
-
53
-
54
-
55
-
56
-
57
-
58
-
59
-
60
-
61
-
62
-
63
-
64
-
65
-
66
-
67
-
68
-
69
-
70
-
71
-
72
-
73
-
74
-
75
-
76
-
77
-
78
-
79
-
80
-
81
-
82
-
83
-
84
-
85
-
86
-
87
-
88
-
89
-
90
-
91
-
92
-
93
-
94
-
95
-
96
-
97
-
98
-
99
-
100
-
101
-
102
-
103
-
104
-
105
-
106
-
107
-
108
-
109
-
110
-
111
-
112
-
113
-
114
-
115
-
116
-
117
-
118
-
119
-
120
-
121
-
122
-
123
-
124
-
125
-
126
-
127
-
128
-
129
-
130
-
131
-
132
-
133
-
134
-
135
-
136
-
137
-
138
-
139
-
140
-
141
-
142
-
143
-
144
-
145
-
146
-
147
-
148
-
149
-
150
-
151
-
152
-
153
-
154
-
155
-
156
-
157
-
158
-
159
-
160
-
161
-
162
-
163
-
164
-
165
-
166
-
167
-
168
-
169
-
170
-
171
-
172
-
173
-
174
-
175
-
176
-
177
-
178
-
179
-
180
-
181
-
182
-
183
-
184
-
185
-
186
-
187
-
188
-
189
-
190
-
191
-
192
-
193
-
194
-
195
-
196
-
197
-
198
-
199
-
200
-
201
-
202
-
203
-
204
-
205
-
206
-
207
-
208
-
209
-
210
-
211
-
212
-
213
-
214
-
215
-
216
-
217
-
218
-
219
-
220
-
221
-
222
-
223
-
224
 |
 |

Cisco Small Business
WRVS4400N Wireless-N Gigabit Security Router
with VPN
ADMINISTRATION
GUIDE