Cisco WS-C3750G-24TS-S1U Getting Started Guide - Page 4
Running Express Setup - power supply
 |
UPC - 746320953410
View all Cisco WS-C3750G-24TS-S1U manuals
Add to My Manuals
Save this manual to your list of manuals |
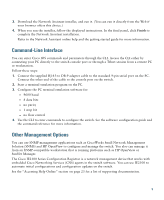
Page 4 highlights
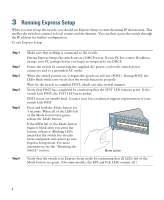
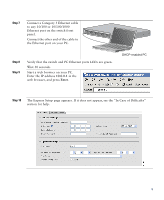
3 Running Express Setup When you first set up the switch, you should use Express Setup to enter the initial IP information. This enables the switch to connect to local routers and the Internet. You can then access the switch through the IP address for further configuration. To run Express Setup: Step 1 Step 2 Step 3 Step 4 Step 5 Step 6 Make sure that nothing is connected to the switch. During Express Setup, the switch acts as a DHCP server. If your PC has a static IP address, change your PC settings before you begin to temporarily use DHCP. Power the switch by connecting the supplied AC power cord to the switch power connector and to a grounded AC outlet. When the switch powers on, it begins the power-on self-test (POST). During POST, the LEDs blink while tests verify that the switch functions properly. Wait for the switch to complete POST, which can take several minutes. Verify that POST has completed by confirming that the SYST LED remains green. If the switch fails POST, the SYST LED turns amber. POST errors are usually fatal. Contact your Cisco technical support representative if your switch fails POST. Press and hold the Mode button for 3 seconds. When all of the LEDs left of the Mode button turn green, release the Mode button. If the LEDs left of the Mode button begin to blink after you press the button, release it. Blinking LEDs mean that the switch has already been configured and cannot go into Express Setup mode. For more information, see the "Resetting the Switch" section. SYST RPS STAT DUPLX SPEED PoE MODE 1 1X 23 45 67 8 9 10 11 12 13 14 15 16 15X 2X 16X Mode button Verify that the switch is in Express Setup mode by confirming that all LEDs left of the Mode button are green. (On some models, the RPS and PoE LEDs remain off.) 4
-
 1
1 -
 2
2 -
 3
3 -
 4
4 -
 5
5 -
 6
6 -
 7
7 -
 8
8 -
 9
9 -
 10
10 -
11
-
12
-
13
-
14
-
15
-
16
-
17
-
18
-
19
-
20
-
21
-
22
-
23
-
24
-
25
-
26
 |
 |
