Compaq Armada e500s Compaq ArmadaStation EM Maintenance and Service Guide - Page 44
Half-Height Bay
 |
View all Compaq Armada e500s manuals
Add to My Manuals
Save this manual to your list of manuals |
Page 44 highlights
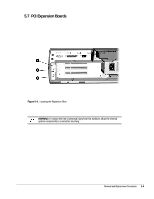
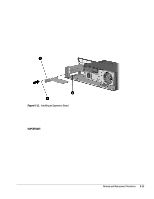
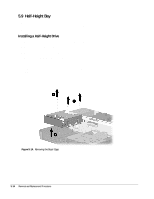
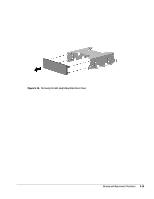
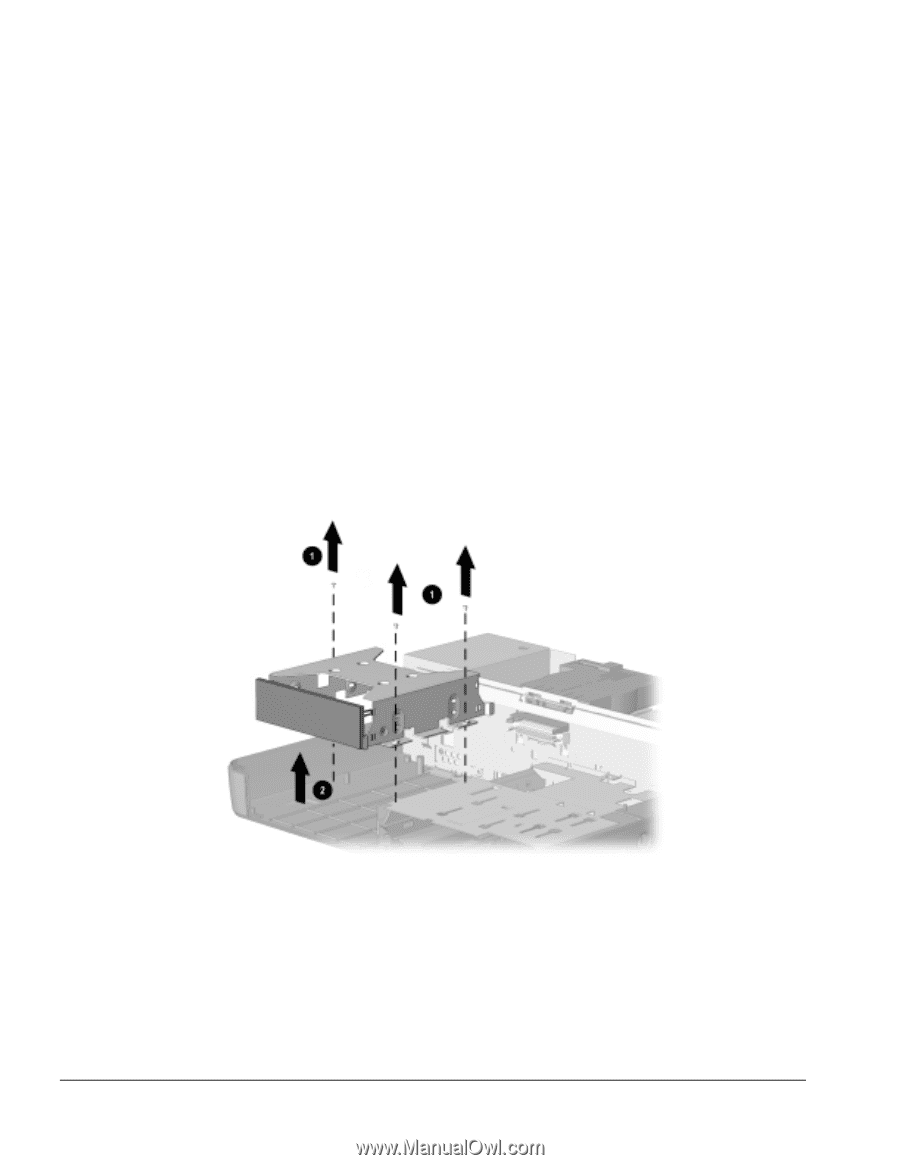
5.9 Half-Height Bay The expansion base features one standard half-height bay, located on the left side of the expansion base. This bay supports any standard half-height drive, such as a diskette or hard drive. Installing a Half-Height Drive 1. Prepare the expansion base for disassembly (Section 5.3). 2. Remove the tray (Section 5.4). 3. Remove the connector cover (Section 5.5). 4. Remove the rear bezel (Section 5.6). 5. Remove the top cover (Section 5.8). 6. Remove the three screws – that secure the bezel cage to the base cover (Figure 5-14). 7. Lift the bezel cage out of the base cover —. Figure 5-14. Removing the Bezel Cage 5-14 Removal and Replacement Procedures
-
 1
1 -
2
-
3
-
4
-
5
-
6
-
7
-
8
-
9
-
10
-
11
-
12
-
13
-
14
-
15
-
16
-
17
-
18
-
19
-
20
-
21
-
22
-
23
-
24
-
25
-
26
-
27
-
28
-
29
-
30
-
31
-
32
-
33
-
34
-
35
-
36
-
37
-
38
-
 39
39 -
 40
40 -
 41
41 -
 42
42 -
 43
43 -
 44
44 -
 45
45 -
 46
46 -
 47
47 -
 48
48 -
 49
49 -
50
-
51
-
52
-
53
-
54
-
55
-
56
-
57
-
58
-
59
-
60
-
61
-
62
-
63
-
64
-
65
-
66
-
67
-
68
-
69
-
70
-
71
-
72
-
73
-
74
 |
 |
5-14
Removal and Replacement Procedures
5.9
Half-Height Bay
The expansion base features one standard half-height bay, located on the left side of the
expansion base. This bay supports any standard half-height drive, such as a diskette or
hard drive.
Installing a Half-Height Drive
1. Prepare the expansion base for disassembly (Section 5.3).
2. Remove the tray (Section 5.4).
3. Remove the connector cover (Section 5.5).
4. Remove the rear bezel (Section 5.6).
5. Remove the top cover (Section 5.8).
6. Remove the three screws
that secure the bezel cage to the base cover
(Figure 5-14).
7. Lift the bezel cage out of the base cover
.
Figure 5-14.
Removing the Bezel Cage