Compaq Evo D300 Compaq Evo Family of Personal Computers, Small Form Factor Mod - Page 32
Installing an optional CD-ROM or DVD-ROM Drive, Installing Guide Screws in the CD-ROM or DVD-ROM Drive
 |
View all Compaq Evo D300 manuals
Add to My Manuals
Save this manual to your list of manuals |
Page 32 highlights
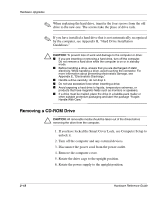
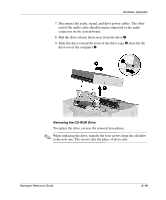
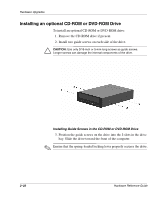
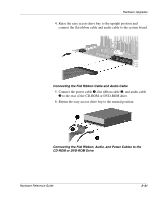
Hardware Upgrades Installing an optional CD-ROM or DVD-ROM Drive To install an optional CD-ROM or DVD-ROM drive: 1. Remove the CD-ROM drive if present. 2. Install two guide screws on each side of the drive. Ä CAUTION: Use only 3/16-inch or 5-mm long screws as guide screws. Longer screws can damage the internal components of the drive. Installing Guide Screws in the CD-ROM or DVD-ROM Drive 3. Position the guide screws on the drive into the J-slots in the drive bay. Slide the drive toward the front of the computer. ✎ Ensure that the spring-loaded locking lever properly secures the drive. 2-20 Hardware Reference Guide
-
 1
1 -
2
-
3
-
4
-
5
-
6
-
7
-
8
-
9
-
10
-
11
-
12
-
13
-
14
-
15
-
16
-
17
-
18
-
19
-
20
-
21
-
22
-
23
-
24
-
25
-
26
-
 27
27 -
 28
28 -
 29
29 -
 30
30 -
 31
31 -
 32
32 -
 33
33 -
 34
34 -
 35
35 -
 36
36 -
 37
37 -
38
-
39
-
40
-
41
-
42
-
43
-
44
-
45
-
46
-
47
-
48
-
49
-
50
-
51
-
52
-
53
-
54
-
55
-
56
-
57
-
58
-
59
-
60
 |
 |

2–20
Hardware Reference Guide
Hardware Upgrades
Installing an optional CD-ROM or DVD-ROM Drive
To install an optional CD-ROM or DVD-ROM drive:
1. Remove the CD-ROM drive if present.
2. Install two guide screws on each side of the drive.
Ä
CAUTION:
Use only 3/16-inch or 5-mm long screws as guide screws.
Longer screws can damage the internal components of the drive.
Installing Guide Screws in the CD-ROM or DVD-ROM Drive
3. Position the guide screws on the drive into the J-slots in the drive
bay. Slide the drive toward the front of the computer.
✎
Ensure that the spring-loaded locking lever properly secures the drive.