Craftsman 21513 Operation Manual
Craftsman 21513 - 2 x 42 in. Belt/6 Disc Sander Manual
 |
View all Craftsman 21513 manuals
Add to My Manuals
Save this manual to your list of manuals |
Craftsman 21513 manual content summary:
- Craftsman 21513 | Operation Manual - Page 1
Operator's Manual I x 42" Belt SANDER Model No. 351.215130 Sears, Roebuck and Co., Hoffman Estates, IL 60179 U.S.A. www.sears.com/craftsman 20067.01 Draft (11/07/03) - Craftsman 21513 | Operation Manual - Page 2
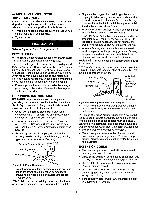
. Do not perform makeshift repairs. (Use parts list provided to order replacement parts.) KNOW HOW TO USE TOOL • Use right tool for job. Do not force tool or attachment to do a job for which it was not designed. • Disconnect tool when changing belt or abrasive disc. • Avoid accidental start-up. Make - Craftsman 21513 | Operation Manual - Page 3
instructions. ATTACH ABRASIVE DISC TO ALUMINUM DISC Refer to Figure 2. • Remove dust chute by looseningscrews and bolts, • Remove the adhesive cover from the back of the abrasive disc for: A Disc Table B Abrasive Disc C Miter Gauge Assembly D 1" Belt E Belt Table Parts bag (Part No. 21489.00 - Craftsman 21513 | Operation Manual - Page 4
side of belt housing. • Tighten hex nut. Refer to Figures 4, 5 and 6, pages 4 and 5. POWER SOURCE WARNING: Do not connect sander to the electrical shock. Equipment should be grounded while in use to protect operator from electrical shock. • Check with a qualified electrician if grounding instructions - Craftsman 21513 | Operation Manual - Page 5
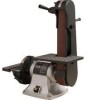
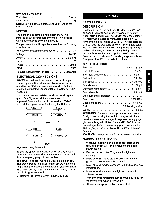
to Figures 7-15. DESCRIPTION Craftsman 2 x 6" Belt and Disc Sander has a 2" x 42" belt and 6" disc for deburring, beveling and sanding wood, plastic and metal. The sander has a fan-cooled 2/3 HP maximum developed motor. Belt speed is 4400 FPM and the disc rotates 3500 RPM. The belt table tilts 0 to - Craftsman 21513 | Operation Manual - Page 6
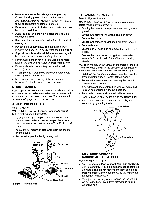
belt, disc and all moving parts. • For optimum performance, do not stall motor or reduce speed. Do not force the work into the abrasive. • Support workpiece with belt table when sanding with belt, with disc table when sanding with disc . MOUNT SANDER During operation the sander may have a tendency - Craftsman 21513 | Operation Manual - Page 7
with the 4ram hex wrench. Tighten locking nut to secure bolt position. ADJUSTING BELT PLATEN Refer to Figure 7. WARNING: Disconnect sander from power source before making any adjustments, The platen is used to properly support the workpiece when sanding. The platen is constructed of heavy steel to - Craftsman 21513 | Operation Manual - Page 8
, rubber parts and plastic guards. LUBRICATION The shielded ball bearings in this sander are permanently lubricated at the factory. They require no further lubrication, • When operation seems stiff, a light coat of automo- bile-type wax applied to the belt table and disc table will make it easier - Craftsman 21513 | Operation Manual - Page 9
it replaced immediately. • Replace worn abrasives when needed. • Replace any damaged or missing parts. Use parts list to order parts. Any attempt to repair motor may create a hazard unless repair is done by a qualified service technician. Repair service is available at your nearest Sears store. 9 - Craftsman 21513 | Operation Manual - Page 10
wiring diagram, see Installation section, "Electrical Connections" Motor fails to develop full belt runs off top whee, 1. Not tracking properly 2. Defective belt 3. Belt housing not set properly 5. Replace belt Ease up on pressure 1. See operation section "Tracking Abrasive Belt" 2. Replace belt - Craftsman 21513 | Operation Manual - Page 11
NOTES 11 - Craftsman 21513 | Operation Manual - Page 12
Model 351.215130 46 48 49 '_ 5 5O 52 5 65 66._ "_ 61 59 58 64 60 62 63 7 21 75 Figure 15 - Replacement Parts Illustration for Sander '_72 _r"_69 _t'_68 "_"67 12 \ 17 - Craftsman 21513 | Operation Manual - Page 13
1 1 x 42" Abrasive Belt 1 Parts Bag 1 Operator's Manual 1 Recommended Accessories Abrasive Belts 2 x 42" (Fine) Abrasive Belts 2 x 42" (Medium) t_ Abrasive Belts 2 x 42" (Coarse) Abrasive Disc 6" (Assorted) Abrasive Belts 1 x 42" (Fine) Abrasive Belts 1 x 42" (Medium) t, Abrasive Belts 1 x 42 - Craftsman 21513 | Operation Manual - Page 14
primera vez. Ingles Ilustracidn y lista de partes Garantfa Reglas de seguridad Desempaque Montaje Instalaci6n un ar_oa partirde la fecha de compra, Sears Io reparar&o reemplazar&,a su eleccidn,sincosto adicional ,tal cored se definenen este manual,aun cuandoest_ familiarizadocon el use de - Craftsman 21513 | Operation Manual - Page 15
una Ilave hexagonal extra larga de 3 ram. A C Refi_rase a las Figuras 2 y 3. PRECAUCION: No trate de montarla si hay partes que faltan. Use el manual del operadorpara ordenar las partes de repuesto. INSTALACION DEL DISCO ABRASIVe EN EL DISCO DE ALUMINIO Refi_rase a la Figura2. Retire el colector - Craftsman 21513 | Operation Manual - Page 16
Barra de retenci6n horizontal Mesa de la correa Tomacorrienteconectado a tierra correctamente Punta de conexi6na tierra \ 3 pantas Enchufede _ Pemo de cabezah/h_ueca" A_randelaplana Flgura 3 - Instalacl6n de la mesa de la correa INSTALACION DEL TOPE HORIZONTAL Refi_rase a la Figura 3. Se - Craftsman 21513 | Operation Manual - Page 17
sido instalado como una parte integralde la herramienta. disco de 5,1 x 15,2 em, Craftsman,cuenta con una correade 5,1 x 10⁷ pldstico y metal. La lijadoratiene un motorde % HP al m_,ximo,enfriadopor ventilador.La velocidadde la correa la correa 2 x 42", grano80 ,_rea de las tiendas Sears yen el - Craftsman 21513 | Operation Manual - Page 18
que avanzar hacia abajo. Evite el contragolpe lijando seg_n Io indican las flechas de direecibn. Mantenga las manos alejadas de la parte abrasiva, el disco y las partes en movimiento. • Para obtener el rendimiento dptimo no hage parar el motor ni reduzoa la velocidad. No fuerce el trabajo dentro - Craftsman 21513 | Operation Manual - Page 19
t 1. • Ajuete la mesa de la correa al dngulo de afilamientodeseado y apri_tela en forma segura. Use la lijadorade correapara rnuescarla parte trasera de unapieza de madera auxiliar. • Con unaabrazadera C, adjunte la pieza auxiliarde madera a la mesa. ActLiacoma soportecuandose estdafilando. • El - Craftsman 21513 | Operation Manual - Page 20
incendio. Aseg_rese de mantener el motor limpio y de pasarle la aspiradora frecuentementa para sacar el polvo. Use agua y jabbn pars limpiar las partas pintadas, las partes de goma y Iss protecciones de pldstico. 2O - Craftsman 21513 | Operation Manual - Page 21
desgastado, cortado o dai_ado, c&mbielo inrnediatamente. • Cambie los abrasivosdesgastadoscuandosea necesario. • Cambie cualquierparte dafiada o que falte. Use la lista de partes cuando las ordene. Todointento de repararel motor puede creer un peligro,a rnenosque la reparacidnla haga un t_cnioode - Craftsman 21513 | Operation Manual - Page 22
SINTOMA El motor no arranoa CAUSA(S) POSlBLE(S) 1, Voltaje bajo 2, Hay un circuito abierto en el motor o hay conexiones sueltas 3. Interrupter clefectuoso 4. Condensador defectuoso MEDIDA CORRECTIVA 1. Revise la energfa para ver si tiene el voltaje apropiado 2, Inspeccione todas las conexiones de - Craftsman 21513 | Operation Manual - Page 23
NOTAS 23 - Craftsman 21513 | Operation Manual - Page 24
parts, accessories and owner's manuals that you need to do-it-yourself. For Sears Sears Parts & Repair Center. 1 800 488 1222 Call anytime, day or night (U.S.A. only) www.sears.com To purchase a protection agreement (U.S.A,) or maintenance agreement (Canada) on a product serviced by Sears
-
 1
1 -
 2
2 -
 3
3 -
 4
4 -
 5
5 -
 6
6 -
 7
7 -
8
-
9
-
10
-
11
-
12
-
13
-
14
-
15
-
16
-
17
-
18
-
19
-
20
-
21
-
22
-
23
-
24
 |
 |
Operator's
Manual
I
x 42" Belt
SANDER
Model No.
351.215130
Sears, Roebuck
and Co., Hoffman
Estates,
IL 60179 U.S.A.
www.sears.com/craftsman
20067.01 Draft (11/07/03)