D-Link DCS-4701E User Manual
D-Link DCS-4701E Manual
 |
View all D-Link DCS-4701E manuals
Add to My Manuals
Save this manual to your list of manuals |
D-Link DCS-4701E manual content summary:
- D-Link DCS-4701E | User Manual - Page 1
Version 1.01 | 07/05/2016 User Manual Vigilance HD Outdoor PoE Mini Bullet Camera DCS-4701E - D-Link DCS-4701E | User Manual - Page 2
may become obsolete as our services and websites develop and change. Revision 1.0 1.01 Manual Revisions Date April 21, 2015 July 05, 2016 Description DCS-4701E Revision A1 with firmware version 1.00 Add Regulatory Information Trademarks D-Link and the D-Link logo are trademarks or registered - D-Link DCS-4701E | User Manual - Page 3
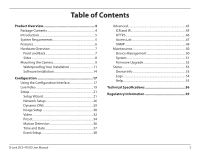
Back 7 Sides 8 Mounting the Camera 9 Waterproofing Your Installation 11 Software Installation 14 Configuration 17 Using the Configuration 51 Firmware Upgrade 52 Status 53 Device Info 53 Logs 54 Help 55 Technical Specifications 56 Regulatory Information 59 D-Link DCS-4701E User Manual 3 - D-Link DCS-4701E | User Manual - Page 4
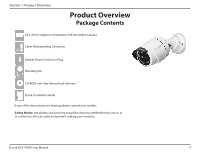
DCS-4701E Vigilance HD Outdoor PoE Mini Bullet Camera Cable Waterproofing Connector Rubber Power Connector Plug Mounting Kit CD-ROM with User Manual and software Quick Installation Guide If any of the above items are missing, please contact your reseller. Safety Notice: Installation and servicing - D-Link DCS-4701E | User Manual - Page 5
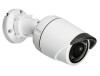
DCS-4701E Vigilance HD Outdoor PoE Mini Bullet Camera. The DCS-4701E is a professional surveillance and security solution for small, medium, and large enterprises alike. The DCS-4701E uses an HD -based network with an available 802.3af Power over Ethernet (PoE) port D-Link DCS-4701E User Manual 5 - D-Link DCS-4701E | User Manual - Page 6
. PoE (Power over Ethernet) for Flexible Installation The DCS-4701E can draw all the power it needs from a PoE switch or PoE injector for a simple and clutter-free installation. Remote Monitoring Utility The D-ViewCam application adds enhanced features and functionality for the Network Camera and - D-Link DCS-4701E | User Manual - Page 7
of view at night 3 Grounding Screw Can be attached to a grounding wire if desired 4 Reset Button Press and hold for 10 seconds to reset camera back to the factory default settings 5 Adjustment Ring Loosen to adjust camera angle and tighten to lock camera angle D-Link DCS-4701E User Manual 7 - D-Link DCS-4701E | User Manual - Page 8
Section 1: Product Overview Sides 12 1 Ethernet Jack RJ-45 connector for Ethernet, can also be used to power the camera using Power over Ethernet (PoE) 2 Power Connector Connects to an optional 12 V / 1.5 A power adapter (not included) D-Link DCS-4701E User Manual 8 - D-Link DCS-4701E | User Manual - Page 9
the wall, drill a hole in the center and pull the cables through the hole. Step 2 Use the screws provided to mount the camera to the wall. If you are running the camera cables out the side of the camera, guide the camera cables through the cable channel on the base. D-Link DCS-4701E User Manual 9 - D-Link DCS-4701E | User Manual - Page 10
, turn the adjustment ring counterclockwise to loosen it, then move the camera to the desired position and angle. When you are finished, turn the adjustment ring clockwise to tighten it. If you need to waterproof your installation, please continue to the next page. D-Link DCS-4701E User Manual 10 - D-Link DCS-4701E | User Manual - Page 11
Section 2: Assembly and Installation Waterproofing Your Installation To waterproof your camera installation, follow the instructions below. Round Ethernet cable, a crimping tool, and RJ-45 plugs are connector as shown, then crimp an RJ-45 plug onto the cable. D-Link DCS-4701E User Manual 11 - D-Link DCS-4701E | User Manual - Page 12
Section 2: Assembly and Installation Step 3 Connect the RJ-45 plug into the Ethernet connector, then there is a tight seal around the Ethernet cable. If you are using PoE to power your camera, use the included rubber power connector plug to the power connector. D-Link DCS-4701E User Manual 12 - D-Link DCS-4701E | User Manual - Page 13
Section 2: Assembly and Installation If you are using a power adapter(not included) to power your camera, wind waterproof tape around the connection in an overlapping manner to cover it. D-Link DCS-4701E User Manual 13 - D-Link DCS-4701E | User Manual - Page 14
Section 2: Assembly and Installation Software Installation Step 1 Insert the DCS-4701E CD into your computer's CD-ROM drive to begin the installation. If the Autorun function on your computer is disabled, or if the D-Link Launcher fails to start automatically, click the Start button and type D:\ - D-Link DCS-4701E | User Manual - Page 15
and password. When logging in for the first time, the default Admin ID is admin with the password left blank. Click the checkboxes if you wish to change the admin ID and password for the camera, and enter the new ID and password you wish to use. Click Next to continue. D-Link DCS-4701E User Manual - D-Link DCS-4701E | User Manual - Page 16
DHCP if your camera obtains an IP address automatically from a DHCP server such as a router. Select Static IP if you want to manually enter the IP settings for the camera. Click Next to continue. Step 6 Take a moment to confirm your settings and click Restart. D-Link DCS-4701E User Manual 16 - D-Link DCS-4701E | User Manual - Page 17
configure your DCS-4701E. At the end of the wizard, click Link, or enter the IP address of your camera into a web browser, such as Mozilla Firefox. To log in, use the User name admin and the password you created in the Installation Wizard. If you did not create a password, the default password is - D-Link DCS-4701E | User Manual - Page 18
Section 3: Configuration Step 3 Enter admin as the default username and leave the password blank. Click OK to continue. Step 4 This section displays your camera's live video. You can select your video profile and view or operate the camera. D-Link DCS-4701E User Manual 18 - D-Link DCS-4701E | User Manual - Page 19
(ePTZ) within the camera's predefined view area, if one has been defined. Starts the automatic panning function. The ROI will pan from back and forth within the FOV. Stops the camera ePTZ motion. Preset Path Starts the camera's motion along the predefined path. D-Link DCS-4701E User Manual 19 - D-Link DCS-4701E | User Manual - Page 20
is the fastest. Global View: This window indicates the total field of view (FOV) of the camera. The red box indicates the visible region of interest (ROI). Language: You may select the select them here to move the (Preset List) camera to the selected preset. D-Link DCS-4701E User Manual 20 - D-Link DCS-4701E | User Manual - Page 21
Setup" on page 26. To quickly configure your Network Camera's motion detection settings, click Motion Detection Setup Wizard. If you want to enter your settings without running the wizard, click Manual Motion Detection Setup and skip to"Motion Detection" on page 36. D-Link DCS-4701E User Manual 21 - D-Link DCS-4701E | User Manual - Page 22
within your home network. Enter the correct configuration information and click Next to continue. If you are using PPPoE, select Enable PPPoE and enter your user name and password. Click Next to continue. D-Link DCS-4701E User Manual 22 - D-Link DCS-4701E | User Manual - Page 23
. Click Next to continue. If you have selected DHCP, you will see a summary of your settings, including the camera's IP address. Please write down all of this information as you will need it in order to access your camera. Click Apply to save your settings. D-Link DCS-4701E User Manual 23 - D-Link DCS-4701E | User Manual - Page 24
Section 3: Configuration Motion Detection Setup Wizard This wizard will guide you through a step-by-step process to configure your camera's motion detection functions. Click Next to continue. Step You may also choose to always record whenever motion is detected. D-Link DCS-4701E User Manual 24 - D-Link DCS-4701E | User Manual - Page 25
This step allows you to specify how you will receive event notifications from your camera. You may choose not to receive notifications, or to receive notifications via e-mail to save them. Please wait a few moments while the camera saves your settings and restarts. D-Link DCS-4701E User Manual 25 - D-Link DCS-4701E | User Manual - Page 26
in a different subnet. Invalid gateway settings may cause the failure of transmissions to a different subnet. Primary DNS: The primary domain name server translates names to IP addresses. Secondary DNS: The secondary DNS acts as a backup to the primary DNS. D-Link DCS-4701E User Manual 26 - D-Link DCS-4701E | User Manual - Page 27
stream. For instance, live1.sdp can be accessed at rtsp://x.x.x.x/video1.sdp where the x.x.x.x represents the IP address of your camera. Enable CoS: Enabling the Class of Service setting implements a best-effort policy without making any bandwidth reservations. D-Link DCS-4701E User Manual 27 - D-Link DCS-4701E | User Manual - Page 28
a consistent Quality of Service during busy periods. If the Network Camera is connected to a defaults. Enable Bonjour: Enable this to allow other network devices to connect to this camera using Bonjour. Bonjour Name: Enter the name to identify this camera on Bonjour. D-Link DCS-4701E User Manual - D-Link DCS-4701E | User Manual - Page 29
or e-mail used to connect to your DDNS account. Password: Enter the password used to connect to your DDNS server account. Timeout: Enter the DNS timeout values you wish to use. Status: Indicates the connection status, which is automatically determined by the system. D-Link DCS-4701E User Manual 29 - D-Link DCS-4701E | User Manual - Page 30
frequency used by your power lines to avoid interference or distortion. White Balance: Use the drop-down box to change white balance settings to help balance colors for different environments. You can choose from Auto, Outdoor, Indoor, Fluorescent, and Push Hold. D-Link DCS-4701E User Manual 30 - D-Link DCS-4701E | User Manual - Page 31
the exposure mode. Use the drop-down box to set the camera for Indoor, Outdoor, or Night environments, or to Moving to capture moving objects. stronger levels of noise reduction. Reset Default: Click this button to reset the image to factory default settings. D-Link DCS-4701E User Manual 31 - D-Link DCS-4701E | User Manual - Page 32
Configuration Video You may configure up to 3 video profiles with different settings for your camera. Hence, you may set up different profiles for your computer and mobile display. After frame rate, which can be combined with the "Fixed quality" option to optimize D-Link DCS-4701E User Manual 32 - D-Link DCS-4701E | User Manual - Page 33
bit rate: The bps will affect the bit rate of the video recorded by the camera. Higher bit rates result in higher video quality. Fixed quality: Select the image quality level for the camera to try to maintain. High quality levels will result in increased bit rates. D-Link DCS-4701E User Manual 33 - D-Link DCS-4701E | User Manual - Page 34
to change the displayed camera view to the preset. Clicking the Remove button will delete the currently selected preset. Preset Sequence: This section allows you to create a preset sequence, which automatically moves the camera's view between a set of preset views. D-Link DCS-4701E User Manual 34 - D-Link DCS-4701E | User Manual - Page 35
from the dropdown box at the bottom of this window, set the Dwell time to determine how long the camera view will stay at that preset, then click the Add button. The preset name will appear in the from the list, enter a new dwell time, then click the Update button. D-Link DCS-4701E User Manual 35 - D-Link DCS-4701E | User Manual - Page 36
click on the camera image to bring up the following menu options: Select All: Draws a motion detection area over the entire screen. Clear All: Clears any motion detection areas that have been drawn. Restore: Restores the previously specified motion detection areas. D-Link DCS-4701E User Manual 36 - D-Link DCS-4701E | User Manual - Page 37
the DCS-4701E with an Internet time server. Choose the one that is closest to your location. Set the Date and Time Manually: This option allows you to set the time and date manually. Copy Your Computer's Time This will synchronize the time information from your PC. Settings: D-Link DCS-4701E User - D-Link DCS-4701E | User Manual - Page 38
(where to send) ex. Email, FTP To start plotting an event, it is suggested to configure server and media columns first so that the Network Camera will know what action shall be performed when a trigger is activated. D-Link DCS-4701E User Manual 38 - D-Link DCS-4701E | User Manual - Page 39
e-mail server account. FTP: Enter the configuration for the target FTP server account. Network Storage: Specify a network storage device. Only one network storage device is supported. D-Link DCS-4701E User Manual 39 - D-Link DCS-4701E | User Manual - Page 40
. 4 pic. 5 pic. 6 pic. 7 pic. 8 pic. 9 pic. The moment the trigger is activated. File name prefix: The prefix name will be added to the file name. D-Link DCS-4701E User Manual 40 - D-Link DCS-4701E | User Manual - Page 41
filename of saved video clips. System log: Select this option to set the media type to system logs. This will save the event to the camera system log, but will not record any snapshots or video. D-Link DCS-4701E User Manual 41 - D-Link DCS-4701E | User Manual - Page 42
created Server and Media entries, you will see them appear here. Select which Server you want to send to and which Media you want the camera to send. D-Link DCS-4701E User Manual 42 - D-Link DCS-4701E | User Manual - Page 43
example, if each recording file is 6MB, and the total cyclical recording size is 600MB, then the camera will record 100 files in the specified location (folder) and then will delete the oldest file and create save other files in the same folder as recording files. D-Link DCS-4701E User Manual 43 - D-Link DCS-4701E | User Manual - Page 44
separated based on the maximum length you specify. File Name Prefix: The prefix name will be added on the file name of the recording file(s). D-Link DCS-4701E User Manual 44 - D-Link DCS-4701E | User Manual - Page 45
the starting time and return to Night mode at the ending time. IR Light Control: The camera can enable or disable the IR (infrared) light according to your preferences. This setting provides additional turn on or off according to the schedule that you specify below. D-Link DCS-4701E User Manual 45 - D-Link DCS-4701E | User Manual - Page 46
certificate manually ƒƒ Create a certificate request and install Status: Displays the status of the certificate. Note: The certificate cannot be removed while HTTPS is still enabled. To remove the certificate, you must first uncheck Enable HTTPS secure connection. D-Link DCS-4701E User Manual 46 - D-Link DCS-4701E | User Manual - Page 47
. Deny list: The list of IP addresses that have no access rights to the camera. Delete deny list: Select an entry to remove from the Deny List, then click Delete. Note: All addresses in the Deny List will be denied access, even if they are also in the Allow List. D-Link DCS-4701E User Manual 47 - D-Link DCS-4701E | User Manual - Page 48
Password: Enter the authentication password used for your read/ write SNMP server. Encryption Password: Enter the encryption password used for your read/write SNMP server. Read Only Security Name Enter a name for the read-only community of your readonly SNMP server. D-Link DCS-4701E User Manual - D-Link DCS-4701E | User Manual - Page 49
Type: Enter the type of authentication used by your read-only SNMP server. Authentication Password: Enter the authentication password used for your readonly SNMP server. Encryption Password: Enter the encryption password used for your read-only SNMP server. D-Link DCS-4701E User Manual 49 - D-Link DCS-4701E | User Manual - Page 50
your camera. Label: Enter a label for the camera, which will be shown on the OSD when it is enabled. Show Time: Select this option to enable the time-stamp display on the video screen. LED: You may specify whether or not to illuminate the status LED on the camera. D-Link DCS-4701E User Manual 50 - D-Link DCS-4701E | User Manual - Page 51
Restore Factory Defaults. Reboot Device: This will restart your camera. Enable Schedule Reboot: If you want your camera to reboot on a regular schedule, check the Enable Schedule Reboot checkbox, then select the days and time you want the camera to reboot on. D-Link DCS-4701E User Manual 51 - D-Link DCS-4701E | User Manual - Page 52
Upgrade The camera's current firmware version will be displayed on this screen. You may visit the D-Link Support Website to check for the latest available firmware version. To upgrade the firmware on your DCS-4701E, please download and save the latest firmware version from the D-Link Support Page to - D-Link DCS-4701E | User Manual - Page 53
Section 3: Configuration Status Device Info This page displays detailed information about your device and network connection. D-Link DCS-4701E User Manual 53 - D-Link DCS-4701E | User Manual - Page 54
Section 3: Configuration Logs This page displays the log information of your camera. You may download the information by clicking Download. You may also click Clear to delete the saved log information. D-Link DCS-4701E User Manual 54 - D-Link DCS-4701E | User Manual - Page 55
Section 3: Configuration Help This page provides helpful information regarding camera operation. D-Link DCS-4701E User Manual 55 - D-Link DCS-4701E | User Manual - Page 56
ƒƒ FTP client Administrator and user group protection Password authentication ƒƒ HTTP / HTTPS ƒƒ Samba client ƒƒ PPPoE ƒƒ UPnP port forwarding ƒƒ RTP / RTSP/ RTCP ƒƒ IP filtering ƒƒ QoS ƒƒ CoS ƒƒ Multicast ƒƒ IGMP ƒƒ ONVIF compliant HTTP and RTSP authentication D-Link DCS-4701E User Manual 56 - D-Link DCS-4701E | User Manual - Page 57
provided in web interface ƒƒ Scheduled motion triggered, or manual recording options Output: 12 V DC 1.5 A Storage: -20° to 70° C (-4° to 158° F) Humidity Certifications Operating: 20% to 80% non-condensing CE CE LVD Storage: 5% to 95% non-condensing FCC C-Tick D-Link DCS-4701E User Manual 57 - D-Link DCS-4701E | User Manual - Page 58
Appendix A: Technical Specifications Dimensions 98.1 66.6 164.7 Ø 65 D-Link DCS-4701E User Manual 58 - D-Link DCS-4701E | User Manual - Page 59
Communication Commission Interference Statement: This equipment has been tested and found to comply with the limits for frequency energy and, if not installed and used in accordance with the instruction manual, may cause harmful interference to radio interference. D-Link DCS-4701E User Manual 59 - D-Link DCS-4701E | User Manual - Page 60
Do not attempt to service the product and never disassemble the product. For some products with a user replaceable battery, please read and follow the instructions in the user manual. • Do not und verwenden Sie dazu ausschließlich ein trockenes fusselfreies Tuch. D-Link DCS-4701E User Manual 60 - D-Link DCS-4701E | User Manual - Page 61
nunca. Para algunos productos con batería reemplazable por el usuario, lea y siga las instrucciones del manual de usuario. • No derrame comida o líquidos sobre el producto y nunca deje que caigan objetos red antes de limpiarlo y utilice solo un paño seco sin pelusa. D-Link DCS-4701E User Manual 61 - D-Link DCS-4701E | User Manual - Page 62
alcuni prodotti dotati di batteria sostituibile dall'utente, leggere e seguire le istruzioni riportate nel manuale dell'utente. • Non versare cibi o liquidi sul prodotto e non spingere mai alcun u het reinigt en gebruik uitsluitend een droge pluisvrije doek. D-Link DCS-4701E User Manual 62 - D-Link DCS-4701E | User Manual - Page 63
this manner you help to conserve the environment and protect human health. D-Link and the Environment At D-Link, we understand and are committed to reducing any impact our operations and products entsprechende Informationen im Internet unter www.dlinkgreen.com. D-Link DCS-4701E User Manual 63 - D-Link DCS-4701E | User Manual - Page 64
apagar o desenchufar los productos D-Link cuando no se estén utilizando. Al hacerlo, contribuirá a ahorrar energía y a reducir las emisiones de CO2. Para obtener más información acerca de nuestros productos y embalajes ecológicos, visite el sitio www.dlinkgreen.com. D-Link DCS-4701E User Manual 64 - D-Link DCS-4701E | User Manual - Page 65
Link producten uit te schakelen of uit de stekker te halen wanneer u ze niet gebruikt. Door dit te doen bespaart u energie en beperkt u de CO2-emissies. Breng een bezoek aan www.dlinkgreen.com voor meer informatie over onze milieuverantwoorde producten en verpakkingen. D-Link DCS-4701E User Manual - D-Link DCS-4701E | User Manual - Page 66
. Společnost D-Link doporučuje, abyste své výrobky značky D-Link vypnuli nebo vytáhli ze zásuvky vždy, když je nepoužíváte. Pomůžete tak šetřit energii a snížit emise CO2. Více informací o našich ekologických výrobcích a obalech najdete na adrese www.dlinkgreen.com. D-Link DCS-4701E User Manual 66 - D-Link DCS-4701E | User Manual - Page 67
at du alltid slår av eller frakobler D-Link-produkter når de ikke er i bruk. Ved å gjøre dette hjelper du å spare energi og å redusere CO2-utslipp. For mer informasjon angående våre miljøansvarlige produkter og forpakninger kan du gå til www.dlinkgreen.com. D-Link DCS-4701E User Manual 67 - D-Link DCS-4701E | User Manual - Page 68
D-Link-tuotteesi virtalähteestä tai sammutat ne aina, kun ne eivät ole käytössä. Toimimalla näin autat säästämään energiaa ja vähentämään hiilidioksiidipäästöjä. Lue lisää ympäristöystävällisistä D-Link-tuotteista ja pakkauksistamme osoitteesta www.dlinkgreen.com. D-Link DCS-4701E User Manual 68 - D-Link DCS-4701E | User Manual - Page 69
que desligue os seus produtos D-Link quando estes não se encontrarem em utilização. Com esta acção ajudará a poupar energia e reduzir as emissões de CO2. Para saber mais sobre os nossos produtos e embalagens responsáveis a nível ambiental visite www.dlinkgreen.com. D-Link DCS-4701E User Manual 69
-
 1
1 -
 2
2 -
 3
3 -
 4
4 -
 5
5 -
 6
6 -
 7
7 -
8
-
9
-
10
-
11
-
12
-
13
-
14
-
15
-
16
-
17
-
18
-
19
-
20
-
21
-
22
-
23
-
24
-
25
-
26
-
27
-
28
-
29
-
30
-
31
-
32
-
33
-
34
-
35
-
36
-
37
-
38
-
39
-
40
-
41
-
42
-
43
-
44
-
45
-
46
-
47
-
48
-
49
-
50
-
51
-
52
-
53
-
54
-
55
-
56
-
57
-
58
-
59
-
60
-
61
-
62
-
63
-
64
-
65
-
66
-
67
-
68
-
69
 |
 |
User Manual
Version 1.01 | 07/05/2016
DCS-4701E
Vigilance HD Outdoor PoE Mini Bullet Camera