D-Link DCS-5300G Product Manual - Page 9
Hardware Installation - wireless security camera
 |
UPC - 790069269530
View all D-Link DCS-5300G manuals
Add to My Manuals
Save this manual to your list of manuals |
Page 9 highlights
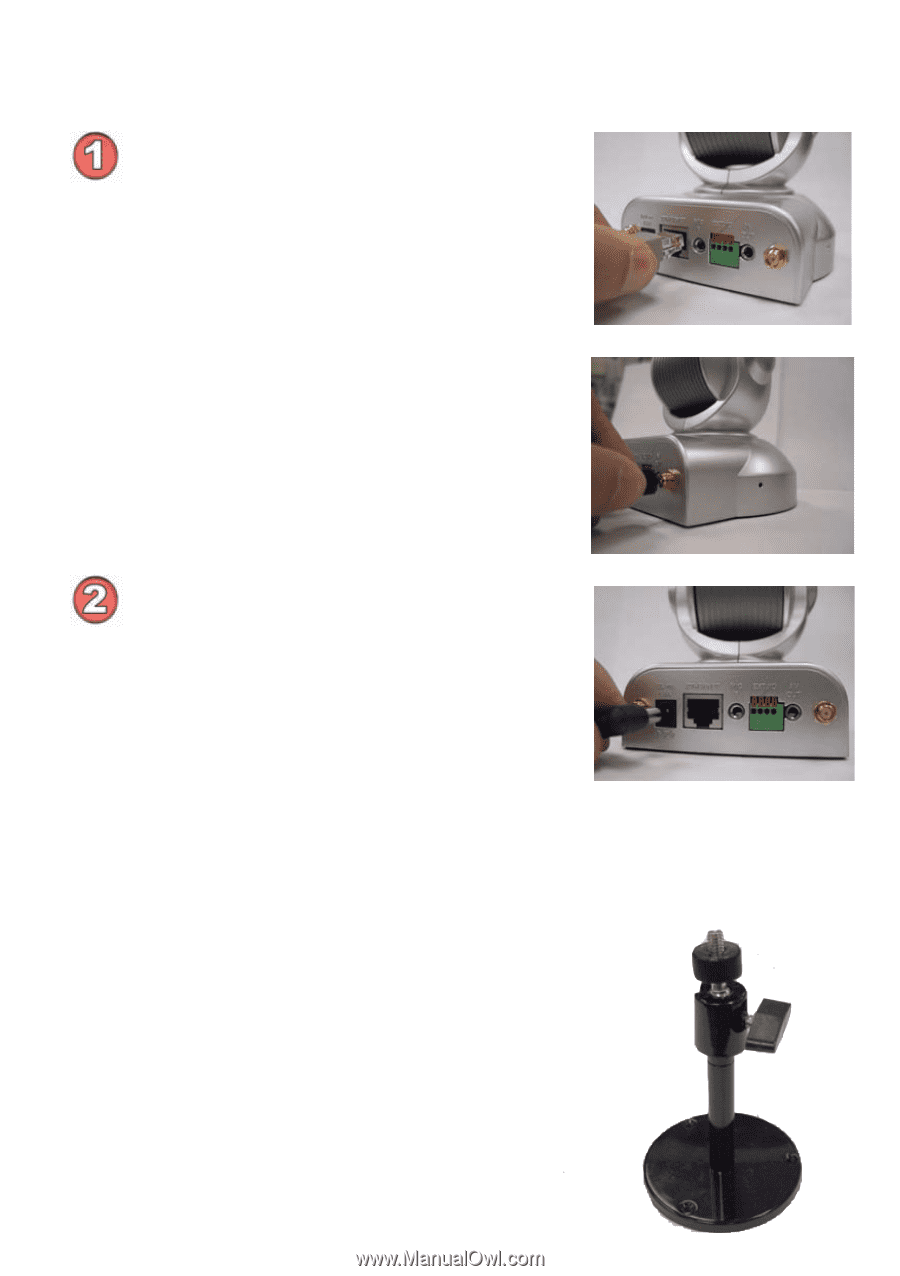
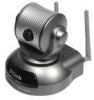
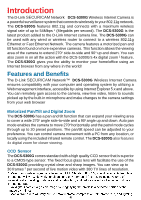
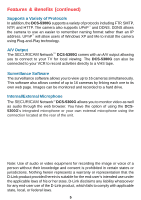
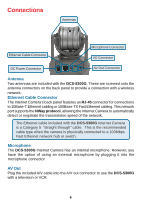
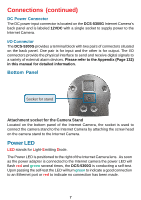
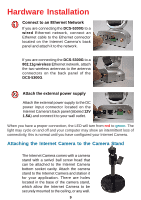
Hardware Installation Connect to an Ethernet Network If you are connecting the DCS-5300G to a wired Ethernet network, connect an Ethernet cable to the Ethernet connector located on the Internet Camera's back panel and attach it to the network. If you are connecting the DCS-5300G to a 802.11g wireless Ethernet network, attach the two wireless antennas to the antenna connectors on the back panel of the DCS-5300G. Attach the external power supply Attach the external power supply to the DC power input connector located on the Internet Camera's back panel (labeled 12V 1.5A) and connect it to your wall outlet. When you have a proper connection, the LED will turn from red to green. The light may cycle on and off and your computer may show an intermittent loss of connectivity, this is normal until you have configured your Internet Camera. Attaching the Internet Camera to the Camera Stand The Internet Camera comes with a camera stand with a swivel ball screw head that can be attached to the Internet Camera bottom socket cavity. Attach the camera stand to the Internet Camera and station it for your application. There are holes located in the base of the camera stand, which allow the Internet Camera to be securely mounted to the ceiling, or any wall. 9
-
 1
1 -
2
-
3
-
 4
4 -
 5
5 -
 6
6 -
 7
7 -
 8
8 -
 9
9 -
 10
10 -
 11
11 -
 12
12 -
 13
13 -
 14
14 -
15
-
16
-
17
-
18
-
19
-
20
-
21
-
22
-
23
-
24
-
25
-
26
-
27
-
28
-
29
-
30
-
31
-
32
-
33
-
34
-
35
-
36
-
37
-
38
-
39
-
40
-
41
-
42
-
43
-
44
-
45
-
46
-
47
-
48
-
49
-
50
-
51
-
52
-
53
-
54
-
55
-
56
-
57
-
58
-
59
-
60
-
61
-
62
-
63
-
64
-
65
-
66
-
67
-
68
-
69
-
70
-
71
-
72
-
73
-
74
-
75
-
76
-
77
-
78
-
79
-
80
-
81
-
82
-
83
-
84
-
85
-
86
-
87
-
88
-
89
-
90
-
91
-
92
-
93
-
94
-
95
-
96
-
97
-
98
-
99
-
100
-
101
-
102
-
103
-
104
-
105
-
106
-
107
-
108
-
109
-
110
-
111
-
112
-
113
-
114
-
115
-
116
-
117
-
118
-
119
-
120
-
121
-
122
-
123
-
124
-
125
-
126
-
127
-
128
-
129
-
130
-
131
-
132
-
133
-
134
-
135
-
136
-
137
-
138
-
139
-
140
-
141
-
142
-
143
-
144
-
145
 |
 |