D-Link DNR-312L User Manual
D-Link DNR-312L Manual
 |
View all D-Link DNR-312L manuals
Add to My Manuals
Save this manual to your list of manuals |
D-Link DNR-312L manual content summary:
- D-Link DNR-312L | User Manual - Page 1
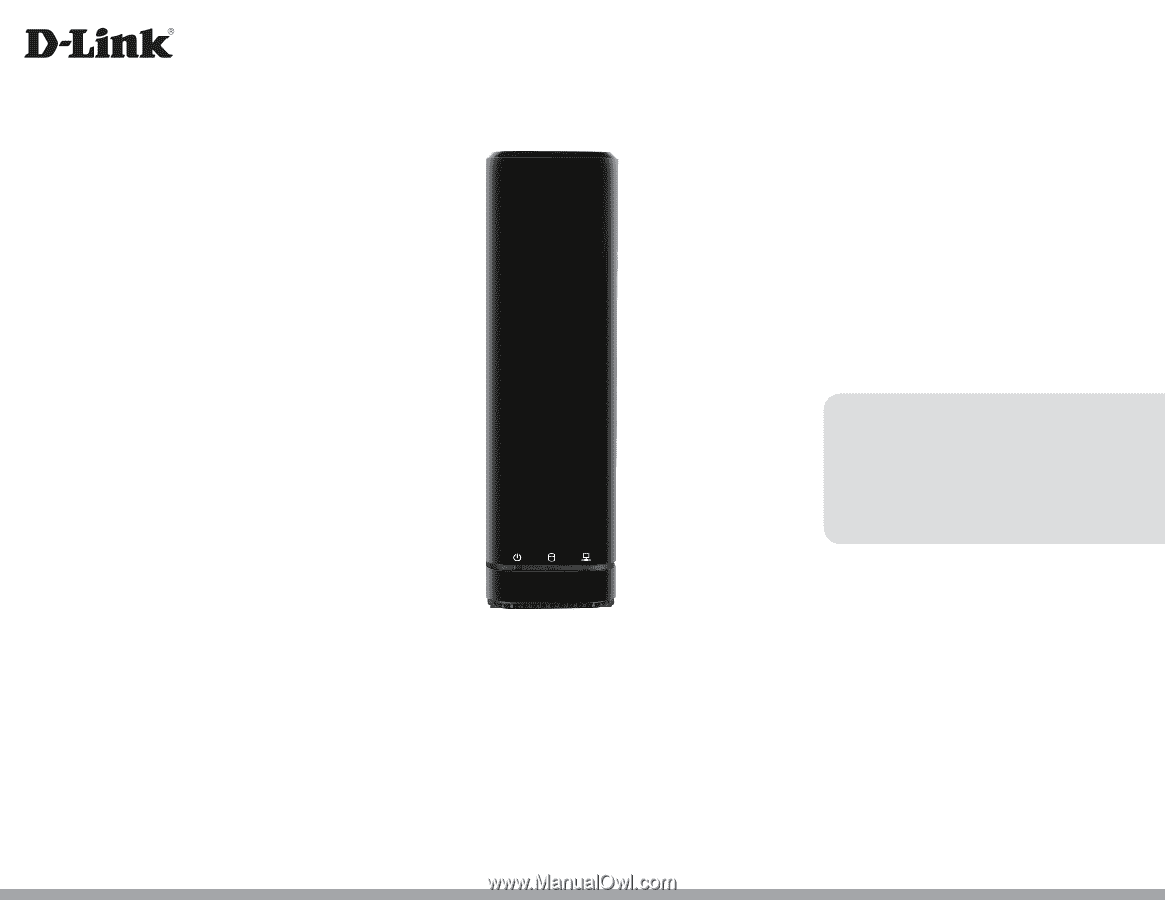
Version 1.0 | 5/23/14 User Manual mydlink™ Network Video Recorder with HDMI Out DNR-312L - D-Link DNR-312L | User Manual - Page 2
of D-Link Corporation or its subsidiaries. All other third-party marks mentioned herein may be trademarks of their respective owners. This publication may not be reproduced, in whole or in part, without prior express written permission from D-Link Systems, Inc. D-Link DNR-312L User Manual i - D-Link DNR-312L | User Manual - Page 3
60 Open Recording 61 Status 62 NVR Info 63 mydlink View - NVR App for Mobil Devices 64 First Use - Select Your NVR 65 Live View 66 Search Video Playback 69 Video Playback Control 70 Applications 71 Playback Manager 71 Remote Backup 72 Verification Tool 74 D-Link DNR-312L User Manual ii - D-Link DNR-312L | User Manual - Page 4
Table of Contents Troubleshooting 75 Technical Specifications 76 Contacting Technical Support 78 Warranty 79 Registration 85 D-Link DNR-312L User Manual iii - D-Link DNR-312L | User Manual - Page 5
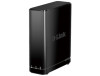
Section 1 - Product Overview Product Overview Package Contents DNR-312L mydlink Network Video Recorder with HDMI Out Power Adapter Ethernet Cable Quick Install Guide CD-ROM If any of the above items are missing, please contact your reseller. Note: Using a power supply with a different voltage - D-Link DNR-312L | User Manual - Page 6
Windows Users: Make sure you have the latest version of Java installed. Visit www.java.com to download the latest version. • One 3.5" SATA Hard Disk Drive • Television or Monitor with an HDMI Port • USB Mouse - to control the interface when connected to a TV or monitor D-Link DNR-312L User Manual - D-Link DNR-312L | User Manual - Page 7
hard disk. The NVR can record video from network cameras located in local or remote sites to a dedicated HDD storage without the need for a PC*. Powered by mydlink technology, the DNR-312L can be easily set up for Internet access, and you can view the NVR's output on any TV or monitor with an HDMI - D-Link DNR-312L | User Manual - Page 8
: The DNR-312L is a standalone network video recorder (NVR) capable of 24/7 recording without requiring a dedicated PC. The NVR can manage multiple network cameras, providing direct access to view live video and play recorded video using a web browser, from anywhere, anytime. • Easy to Use: A user - D-Link DNR-312L | User Manual - Page 9
can be backed up to additional storage locations periodically or whenever needed. Flexible Event Management • The NVR can monitor all of the cameras for motion detection. The NVR centrally controls the e-mail notification and recording from all the connected cameras. D-Link DNR-312L User Manual 5 - D-Link DNR-312L | User Manual - Page 10
can view the NVR's output on any TV or monitor with an HDMI port. • AVI Outputs: Raw video can be exported to AVI format. • Playback Speed Control: Playback speed control allows for fast forward or fast rewind. The step playback can display video one frame at a time. D-Link DNR-312L User Manual 6 - D-Link DNR-312L | User Manual - Page 11
this indicates the hard drive is installed but has failed. A solid green light indicates that the device is connected to your network properly. This light will blink during data transfer. If the light is off, this indicates the device is not connected to your network. D-Link DNR-312L User Manual 7 - D-Link DNR-312L | User Manual - Page 12
Cooling Fan Power Button USB Ports Audio In/Out Gigabit Ethernet Port HDMI Port Power Port Reset Button D-Link DNR-312L User Manual Reset Button DESCRIPTION The cooling fan cools the hard drives. Press the power button to turn the NVR on. Press and hold for five seconds to turn off. Connect a USB - D-Link DNR-312L | User Manual - Page 13
hard drive and connecting it to your network. Note: Running the Setup Wizard from the CD is not required. If you first install the hard drive, as described in "Step 1 - Install a Hard Drive and Connect" on page 12, you can set up the DNR-312L from your TV or Monitor. D-Link DNR-312L User Manual - D-Link DNR-312L | User Manual - Page 14
Search" on page 52 for instructions about adding cameras. Note: The computer used to access the NVR web-based configuration interface must be on the same subnet as the NVR. If your network is using a DHCP server, the NVR will automatically be in the same subnet. D-Link DNR-312L User Manual 10 - D-Link DNR-312L | User Manual - Page 15
the Skip button. Refer to "Camera Search" on page 52 for instructions about adding cameras. Note: The computer used to access the NVR must be on the same subnet as the NVR. If your network is using a DHCP server, the NVR will automatically be in the same subnet. D-Link DNR-312L User Manual 11 - D-Link DNR-312L | User Manual - Page 16
the two screws at the bottom of your NVR, and then slide the cover back. Click Next to continue. Slide the hard drive into the open hard drive bay of your DNR-312L, making sure the SATA connectors are aligned with the SATA socket at the base. Click Next to continue. D-Link DNR-312L User Manual 12 - D-Link DNR-312L | User Manual - Page 17
Use all six of the provided screws to attach the hard drive to the base unit. Click Next to continue. Once the hard drive is installed, reattach the top cover by aligning the hooks to the notches and snap the cover back into place. Click Next to continue. D-Link DNR-312L User Manual 13 - D-Link DNR-312L | User Manual - Page 18
screws at the base. Click Next to continue. Connect one end of the included Ethernet cable to the Ethernet port on the back of the NVR and the other end of the Ethernet cable to your router. Click Next to continue. D-Link DNR-312L User Manual 14 - D-Link DNR-312L | User Manual - Page 19
Section 2 - Installation First, connect the power adapter to the power port on the back of the NVR. Press the Power button to power on the NVR. Make sure the Power LEDs are illuminated before clicking Next to continue. D-Link DNR-312L User Manual 15 - D-Link DNR-312L | User Manual - Page 20
of your DNR-312L. If this is the first installation of this NVR, the Admin ID is admin and the Password field is blank by default. Since a password is required, you must create a password, and then enter it again to confirm your password. Click Next to continue. D-Link DNR-312L User Manual 16 - D-Link DNR-312L | User Manual - Page 21
2 - Installation The wizard will scan for attached storage devices and display Physical Disk Information. You will have the opportunity to format any devices found. Formatting the be erased. Do you wish to continue? Click Yes to proceed with formatting the hard drive. D-Link DNR-312L User Manual 17 - D-Link DNR-312L | User Manual - Page 22
or your network administrator for setup details. Click Next to continue. If the DHCP server (i.e. your router) running on your LAN (Local Area Network) was able to obtain IP address information, the Setup Wizard will display it on this screen. Click Next to continue. D-Link DNR-312L User Manual 18 - D-Link DNR-312L | User Manual - Page 23
network will include a red question mark (?) in the Password field for cameras that are not verified. Click on the red (?) icons to confirm/enter the password for each camera. Note: It is strongly advised that you set up passwords for all your cameras. Click Next to continue. D-Link DNR-312L User - D-Link DNR-312L | User Manual - Page 24
Section 2 - Installation You can preview each camera by clicking on the green camera icon in the last column. A preview window will open. When finished with the preview, click Close. Click Next to continue. D-Link DNR-312L User Manual 20 - D-Link DNR-312L | User Manual - Page 25
of the Setup Wizard will display a summary of your NVR settings. Make a note of the details. Your DNR-312L is now ready to use. For more configuration options, click Go to NVR and log in to the DNR-312L, and refer to "Configuration" on page 22. Or click Finish. D-Link DNR-312L User Manual 21 - D-Link DNR-312L | User Manual - Page 26
setup, when you see Setup is Complete, you have the option to Click Go to NVR to adjust additional NVR settings. If you click Go to NVR, you will see a login screen for the DNR-312L. For instructions on how to proceed, refer to "Configuration Interface" on page 25. D-Link DNR-312L User Manual - D-Link DNR-312L | User Manual - Page 27
. Note: The computer used to access the NVR web-based configuration interface must be on the same subnet as the NVR. If your network is using a DHCP server and the computer receives IP settings from the DHCP server, the NVR will automatically be in the same subnet. D-Link DNR-312L User Manual 23 - D-Link DNR-312L | User Manual - Page 28
, or Disable to use Static IP. Apply: Click Apply to save and activate the changes to the LAN Settings. About: Click About to view the software version of the NVR Search Utility. Exit: Click Exit to close the utility. D-Link DNR-312L User Manual 24 - D-Link DNR-312L | User Manual - Page 29
the interface. Live: Displays live video from your network cameras and controls PTZ (pan-tilt-zoom) plus various other functions. Play Back: Displays the recorded video and exports snapshots or video. Log Out: Logs you out of the NVR. Shut Down: Shuts down the NVR. D-Link DNR-312L User Manual 25 - D-Link DNR-312L | User Manual - Page 30
to "Album" on page 53 for details. 7. View Full Screen: Right-click on the video and select Full Screen. Press the ESC button on the keyboard to return to normal display. 8. Swap Channels: Right-click on the video and select Swap to display a different video channel. D-Link DNR-312L User Manual 26 - D-Link DNR-312L | User Manual - Page 31
normal display. Auto Scan: Activate auto scan to rotate the channels/cameras on the display screen. Actual Size: Switch the video to the actual size or fill the window. OSD: On-Screen Display of information. Manual record: Click to enable or disable manual recording D-Link DNR-312L User Manual 27 - D-Link DNR-312L | User Manual - Page 32
add any network cameras from the same local area network (LAN). PTZ Control: You can control the camera using the PTZ (pan-tilt-zoom) camera control panel to adjust the camera angle. This function is only available with cameras that support the PTZ function. D-Link DNR-312L User Manual 28 - D-Link DNR-312L | User Manual - Page 33
Section 3 - Configuration Interface System Info: Displays Storage Information, such as HDD and USB drive information. Log: Displays the System, NVR, and Event logs. E-Map: Check E-map to view the location of your cameras and connection status. D-Link DNR-312L User Manual 29 - D-Link DNR-312L | User Manual - Page 34
the top of the screen to access recorded videos. Display Single feed Use this button to switch to a single camera view in the video display area. Display 2 x 2 interval for saving recorded video. Click to pause the playback and move to next frame or previous frame. D-Link DNR-312L User Manual 30 - D-Link DNR-312L | User Manual - Page 35
. Available playback icons are described below: Select a camera/video and click to Play the video. Select a camera/video and click to Stop the video playback. Select a camera/video and click to Pause the video playback. Click to step forward. Click to step back. D-Link DNR-312L User Manual 31 - D-Link DNR-312L | User Manual - Page 36
Section 3 - Configuration Interface Click to fast forward. Click to rewind. Set the starting point (first frame) for the export file. Set the ending point (last frame) for the export file. Note: For playback of backed-up files, refer to "Playback Manager" on page 71. D-Link DNR-312L User Manual 32 - D-Link DNR-312L | User Manual - Page 37
taken by the NVR. Refer to "Album" on page 53. Click to back up the recordings stored on the NVR to a USB drive, Samba server, or FTP server. Refer to "Backup" on page 54. Click for more information about using the NVR. Refer to "Help" on page 56. Menu Bar Column D-Link DNR-312L User Manual 33 - D-Link DNR-312L | User Manual - Page 38
setting a password, choosing a time zone, setting a LAN connection type, and setting device information for your NVR. If you prefer to use a language other than English, click the drop-down menu and select one before proceeding. Click Next to launch the Setup Wizard. D-Link DNR-312L User Manual 34 - D-Link DNR-312L | User Manual - Page 39
If not, contact your ISP to obtain them. (The connection status will be determined automatically by the system.) DHCP server: Check the box to Enable DHCP Server. If your network doesn't have a DHCP server, you can enable this feature for easier local network setup. D-Link DNR-312L User Manual 35 - D-Link DNR-312L | User Manual - Page 40
. For example: myhost.mydomain.net. Name: Username: Enter the User Name for your dynamic DNS account. Password: Enter the Password for your dynamic DNS account. Timeout: Enter a Timeout in hours. Status: Displays the status as Active or Inactive. Click Save Setting. D-Link DNR-312L User Manual 36 - D-Link DNR-312L | User Manual - Page 41
to Enable allowed list This will allow access to your NVR, Allowed List: based on the range access to the specified IP addresses. Allowed List: Add to Blocked Click Add to Blocked List to block access to the specified IP addresses. List: Click Save to save your settings. D-Link DNR-312L User Manual - D-Link DNR-312L | User Manual - Page 42
automatically based on the maximum frame rate which the selected camera can support. Bitrate: Click Bitrate and select a bit rate from the drop-down menu. Quality: Click Quality and select a level of quality from the drop-down menu. Click Save to save your settings. D-Link DNR-312L User Manual 38 - D-Link DNR-312L | User Manual - Page 43
incoming audio to increase its volume.) Enable Check the box to enable audio out for the camera (if supported). Speaker: Audio Out Select a volume level from the drop-down menu to adjust the volume Volume Level adjust the sharpness. Click Save to save your settings. D-Link DNR-312L User Manual 39 - D-Link DNR-312L | User Manual - Page 44
Insert: Insert new schedules. Delete: Delete the selected schedule. Configure: Modify the schedule and recording setting. Copy: Copy the current Day Schedule to other channel(s), or copy the current Week Schedule to other day(s) of a week or to other channel(s). D-Link DNR-312L User Manual 40 - D-Link DNR-312L | User Manual - Page 45
the camera from the NVR and then re-connect it to update all of the changes. 3. Alternatively, you can drag the time bar to change the recording period. The red bar represents the Always Record feature and the blue bar represents the Event Recording feature. D-Link DNR-312L User Manual 41 - D-Link DNR-312L | User Manual - Page 46
the Test button and the system will send a test e-mail to verify whether or not your settings are correct. Click Save to save your settings. Adding Contacts: Step 1: Enter the name of a new contact. Step 2: Enter the e-mail address of this new contact. Step 3: Click Add. D-Link DNR-312L User Manual - D-Link DNR-312L | User Manual - Page 47
, the E-map event indicator will show the location of the event. You can upload your E-Map to the NVR. The maximum file size is 20 KB for both BMP and JPG file format. You can then drag and to delete the camera icon from the map. Click Save to save your settings. D-Link DNR-312L User Manual 43 - D-Link DNR-312L | User Manual - Page 48
is not enabled, the NVR will just stop recording when the HDD is full and send an alert. Hard Disk Check the box to send an alert when there is an error with the hard disk. Error: Fan Error: e-mail sent to a specified SMTP account after an event is triggered. D-Link DNR-312L User Manual 44 - D-Link DNR-312L | User Manual - Page 49
USB drive for backup. Clear: Clear NVR log. NVR Event Displays the event log information, such as the time and date of motion Log: detection, or when a camera is disconnected. Download: Download event log to an external USB drive for backup. Clear: Clear event log. D-Link DNR-312L User Manual 45 - D-Link DNR-312L | User Manual - Page 50
Language: You can select a language other than English (the default language). Device Name: You can enter a different device name for the NVR. Auto Scan The auto scan feature allows you to monitor and to display the frame rate. Click Save to save your settings. D-Link DNR-312L User Manual 46 - D-Link DNR-312L | User Manual - Page 51
be deleted. Login as Administrator to configure user accounts for the DNR-312L. The default password for admin is blank. Setting a password after the first login is required. If the administrator password is lost, you must reset the NVR*. Refer to "Troubleshooting" on page 75 for details. *Note - D-Link DNR-312L | User Manual - Page 52
audible alarm that sounds off when an event is triggered. Enable Auto Click to enable or disable auto plugin. Enabling auto plugin allows the Plugin: NVR to automatically detect any connected cameras. Click Save to save your settings. D-Link DNR-312L User Manual 48 - D-Link DNR-312L | User Manual - Page 53
Enable Daylight Saving. You can click Auto Daylight Saving, and the time will be adjusted automatically. Or click Manual set Daylight Saving and manually set the Month, Week, Day of week, Hour and Minute when Daylight Saving starts. Click Save to save your settings. D-Link DNR-312L User Manual 49 - D-Link DNR-312L | User Manual - Page 54
a USB drive, then connect it to the NVR's USB port. Click Browse to search the USB drive for the firmware update file. Click Update to upgrade firmware. The new version number will be displayed. You can check anytime for firmware updates on the D-Link Support Page. D-Link DNR-312L User Manual 50 - D-Link DNR-312L | User Manual - Page 55
hard drive. Under USB, click Format to format USB drive. Formatting will erase all data on the USB drive. Under USB, click Eject to eject the USB drive. Warning: Do not eject the USB drive without clicking Eject first, or the files on the USB drive may be damaged. D-Link DNR-312L User Manual 51 - D-Link DNR-312L | User Manual - Page 56
DNR-312L. You can also view camera information and preview the camera's live video. Follow the steps below to add cameras. Step 1: Click Search to search for network cameras. The system Step 3: Enter a Camera Name, User Name, and Password for the camera. Guidelines: 1. Link DNR-312L User Manual 52 - D-Link DNR-312L | User Manual - Page 57
hard drive. Click USB to access snapshots stored on your USB drive. Click on the check box below the snapshot, and then click Export to export a snapshot from this page. Click on a check box below the snapshot, and then click Delete to remove a snapshot from this page. D-Link DNR-312L User Manual - D-Link DNR-312L | User Manual - Page 58
videos recorded during a specified time period. You can set the DNR-312L to make daily backups using Auto Backup, or you can make a single backup immediately using Manual a manual backup using the settings specified, or click Stop to stop a currently running backup. D-Link DNR-312L User Manual 54 - D-Link DNR-312L | User Manual - Page 59
: Enter the port number used by your FTP server. Folder: Enter the folder path for the FTP server that you want to back up your recordings to. User Name: Enter the user name for your FTP server account. Password: Enter the password for your FTP server account. D-Link DNR-312L User Manual 55 - D-Link DNR-312L | User Manual - Page 60
Section 3 - Configuration Interface Help The DNR-312L ( ) Help page provides a list of support topics. Click a topic from the column on the left, and you will see helpful tips in the column on the right. D-Link DNR-312L User Manual 56 - D-Link DNR-312L | User Manual - Page 61
the NVR, you will see the Live Video page. (The available controls for live video are different from the controls you access from the Configuration Interface. Refer to "Live Video" on page 59 for more information about access to live video from the mydlink website.) D-Link DNR-312L User Manual 57 - D-Link DNR-312L | User Manual - Page 62
cannot access your NVR, reset your NVR and run the NVR Setup Wizard again from the CD-ROM included in your package. Note: If you do not have the CD-ROM, go to http://www.mydlink.com/support. Click the Storage tab, select your product, and download the Setup Wizard. D-Link DNR-312L User Manual 58 - D-Link DNR-312L | User Manual - Page 63
this button to start and stop recording live video. Use this option to save a snapshot image from the video. Use this option to toggle glance mode. (Glance mode means the NVR will cycle through each connected camera, displaying video from each for a brief interval.) D-Link DNR-312L User Manual 59 - D-Link DNR-312L | User Manual - Page 64
Use these controls to slow down or speed up playback of pre-recorded video. Click the + and - buttons to zoom in or to zoom out. Use this control to view pre-recorded video at its actual resolution. Use this option to save a snapshot image from the pre-recorded video D-Link DNR-312L User Manual 60 - D-Link DNR-312L | User Manual - Page 65
you access to the Date-Time panel, allowing you to search for video recordings from a specific date and time. 1 2 3 4 5 6 1 Date Selection Area 2 Time Period Selection 3 Video Preview 4 Timeline 5 Available Streams 6 Zoom Slider 7 Available Recordings 8 Selected Period D-Link DNR-312L User Manual - D-Link DNR-312L | User Manual - Page 66
attached to the HDD or USB Port. Status: This status indicates if the storage device attached to the HDD or USB port is currently being recorded on. Camera Status: The area below this heading will display information about cameras connected to the DNR-312L. D-Link DNR-312L User Manual 62 - D-Link DNR-312L | User Manual - Page 67
Address of your device. NVR activated on: Displays the time and date that your device was added to mydlink. Advanced Setting: Click this button to access the DNR-312L's web-based configuration Interface. After you log in, you can adjust advanced settings for the NVR. D-Link DNR-312L User Manual 63 - D-Link DNR-312L | User Manual - Page 68
the download has been completed, launch the mydlink View - NVR app and log in to your mydlink account. Select your DNR-312L from the device list to access the live video from the connected cameras. Now you have the ability to remotely access the live video, playback recorded videos, and manually - D-Link DNR-312L | User Manual - Page 69
your DNR-312L will be displayed in the device list. When you select this device from the list, the app will connect to your NVR, allowing you to view live video and playback recordings. Proceed to "Live View" on page 66 or skip to "Search Video Playback" on page 69. D-Link DNR-312L User Manual 65 - D-Link DNR-312L | User Manual - Page 70
to expand and shrink the device list for your mydlink account on the left-hand side of the screen. Tap on the DNR-312L to enter the Live View. Double-tap on one of the channels to view a single channel of live video. Double-tap again to return back to the grid view. D-Link DNR-312L User Manual 66 - D-Link DNR-312L | User Manual - Page 71
and the PTZ control panel will appear. To disable the PTZ control panel, use a two finger tap on the video stream again. Note: The PTZ control function must be enabled on the camera connected to the DNR-312L in order for mydlink View-NVR to control the PTZ function.) D-Link DNR-312L User Manual 67 - D-Link DNR-312L | User Manual - Page 72
will be saved to the DNR-312L's camera roll. While viewing video in grid view, you can tap Snapshot ( ) to take snapshots of all the channels. The images will be saved to the NVR's camera roll. Note: The mind before tapping Send, tap Cancel to cancel the operation.) D-Link DNR-312L User Manual 68 - D-Link DNR-312L | User Manual - Page 73
control bar at the bottom of the screen to bring up the playback selection panel. From the playback selection panel you can scroll through your video recordings archive. Scroll to the date and time for the recording you wish to playback, and tap Play. D-Link DNR-312L User Manual 69 - D-Link DNR-312L | User Manual - Page 74
backward for 1 second ( ) Play/pause toggle ( ) Step forward for 1 second ( ) Use the speed panel ( from x1 through x32 speed. ) to control the speed of video playback Note: The quality of display performance will vary according to network bandwidth availability. D-Link DNR-312L User Manual 70 - D-Link DNR-312L | User Manual - Page 75
up video recordings. Click to adjust OSD (on-screen display) settings. Click to save the recordings as AVI files, a portable format for viewing. Save as Image Click to create snapshots from recorded videos. Minimize Click to minimize the Playback Manager screen. D-Link DNR-312L User Manual 71 - D-Link DNR-312L | User Manual - Page 76
would like to back up (or highlight the video records that you would like to back up). The time period specified cannot exceed 24 hours. Step 7: Select the cameras you would like to back up and click OK. Step 8: Select the time period which you would like to back up. D-Link DNR-312L User Manual 72 - D-Link DNR-312L | User Manual - Page 77
Disk launch the computer's default web browser and access the remote backup application is on the same subnet as the NVR. If your network is using a DHCP server and the computer receives IP settings from the DHCP server, the NVR will automatically be in the same subnet. D-Link DNR-312L User Manual - D-Link DNR-312L | User Manual - Page 78
NVR are genuine . It's the process by which a digital watermark (a digital signature) is added to each recorded video frame to prove its authenticity. A missing watermark could indicate that the data created by the system the file type first before selecting files. D-Link DNR-312L User Manual 74 - D-Link DNR-312L | User Manual - Page 79
recorded data before resetting your NVR. To reset the device, make sure it is plugged in and turned on. Then press and hold the reset button on the bottom of the NVR for about 10 seconds, or until the Power LED flashes three times. The admin password will then be blank. D-Link DNR-312L User Manual - D-Link DNR-312L | User Manual - Page 80
+ D-Link DDNS server support SYSTEM TIME + Set the system time (D-Link NTP, input time) REMOTE BACKUP + Remote software can back up raw data to redundant storage + Auto back up video from the previous day to the FTP server SYSTEM STATUS + System status + EMAP support D-Link DNR-312L User Manual 76 - D-Link DNR-312L | User Manual - Page 81
+ Storage: -4 to 158 ˚F (-20 to 70 ˚C) HUMIDITY + Operating: 5% to 90% (non-condensing) PACKAGE CONTENTS + mydlink NVR with HDMI output + Power Adapter + Ethernet Cable + Quick Installation Guide + Power Cable Holder + CD-ROM with: - Software - Product Documentation D-Link DNR-312L User Manual 77 - D-Link DNR-312L | User Manual - Page 82
device). You can find software updates and user documentation on the D-Link website as well as frequently asked questions and answers to technical issues. For customers within the United States: Phone Support: (877) 453-5465 Internet Support: http://support.dlink.com D-Link DNR-312L User Manual 78 - D-Link DNR-312L | User Manual - Page 83
the defective Hardware will be refunded by D-Link upon return to D-Link of the defective Hardware. All Hardware or part thereof that is replaced by D-Link, or for which the purchase price is refunded, shall become the property of D-Link upon replacement or refund. D-Link DNR-312L User Manual 79 - D-Link DNR-312L | User Manual - Page 84
Link's option, to replace the non-conforming Software (or defective media) with software that substantially conforms to D-Link's functional specifications for the Software or to refund the portion of the actual purchase price Case ID Number at http://rma.dlink.com/. D-Link DNR-312L User Manual 80 - D-Link DNR-312L | User Manual - Page 85
damaged in transit, and the RMA number must be prominently marked on the outside of the package. Do not include any manuals or accessories in the shipping package. D-Link will only replace the defective portion of the product and will not ship back any accessories. D-Link DNR-312L User Manual 81 - D-Link DNR-312L | User Manual - Page 86
software, firmware or other products or services provided by anyone other than D-Link; and Products that have been purchased from inventory clearance or liquidation sales or other sales in which D-Link, PERFORMANCE OF THE PRODUCT IS WITH THE PURCHASER OF THE PRODUCT. D-Link DNR-312L User Manual 82 - D-Link DNR-312L | User Manual - Page 87
notice. Copyright ©2014 by D-Link Corporation/D-Link Systems, Inc. All rights reserved. CE Mark Warning: This is a Class B product. In a domestic environment, this product may cause radio interference, in which case the user may be required to take adequate measures. D-Link DNR-312L User Manual 83 - D-Link DNR-312L | User Manual - Page 88
Warranty FCC Statement: This equipment has been tested and found to comply with the limits and, if not installed and used in accordance with the instructions, may cause harmful interference to radio communication. However, there the corresponding local D-Link office. D-Link DNR-312L User Manual 84 - D-Link DNR-312L | User Manual - Page 89
Appendix D - Registration Registration Product registration is entirely voluntary and failure to complete or return this form will not diminish your warranty rights. Version 1.0 May 23, 2014 D-Link DNR-312L User Manual 85
-
 1
1 -
 2
2 -
 3
3 -
 4
4 -
 5
5 -
 6
6 -
 7
7 -
8
-
9
-
10
-
11
-
12
-
13
-
14
-
15
-
16
-
17
-
18
-
19
-
20
-
21
-
22
-
23
-
24
-
25
-
26
-
27
-
28
-
29
-
30
-
31
-
32
-
33
-
34
-
35
-
36
-
37
-
38
-
39
-
40
-
41
-
42
-
43
-
44
-
45
-
46
-
47
-
48
-
49
-
50
-
51
-
52
-
53
-
54
-
55
-
56
-
57
-
58
-
59
-
60
-
61
-
62
-
63
-
64
-
65
-
66
-
67
-
68
-
69
-
70
-
71
-
72
-
73
-
74
-
75
-
76
-
77
-
78
-
79
-
80
-
81
-
82
-
83
-
84
-
85
-
86
-
87
-
88
-
89
 |
 |
DNR-312L
User Manual
mydlink™ Network Video Recorder
with HDMI Out
Version 1.0 | 5/23/14