D-Link DNS-1550-04 Product Manual - Page 31
Iscsi
 |
View all D-Link DNS-1550-04 manuals
Add to My Manuals
Save this manual to your list of manuals |
Page 31 highlights
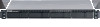
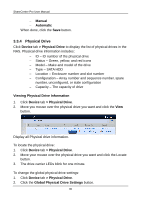
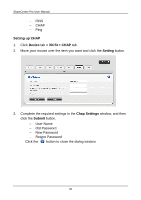
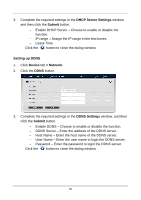
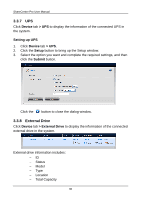
3. In the Global Physical Drive Settings window, check the boxes to enable or uncheck to disable. Enable Write Cache Enable Read Look Ahead Cache Enable Command Queuing To change the individual physical drive settings: 1. Click Device tab > Physical Drive. 2. Move your mouse over the physical drive you want and click the Settings button. 3. Make setting changes as required: enter, change, or delete the alias in the Alias field. 4. Click the Save button. Physical Drive Problems: Physical drives are the foundation of data storage. A physical drive Problem can affect your entire NAS. When a yellow icon or a red icon appears beside a physical drive, check the drive's operational status: 1. Click Device tab > Physical Drive. 2. Move your mouse over the physical drive you want and click the View button. 3. Check the status of the Operational Status item. 3.3.5 iSCSI Click Device tab > iSCSI to display the iSCSI (Internet Small Computer System Interface) information in the system. iSCSI information includes the following tabs: − Node − Portal − Port − Session 31
-
 1
1 -
2
-
3
-
4
-
5
-
6
-
7
-
8
-
9
-
10
-
11
-
12
-
13
-
14
-
15
-
16
-
17
-
18
-
19
-
20
-
21
-
22
-
23
-
24
-
25
-
 26
26 -
 27
27 -
 28
28 -
 29
29 -
 30
30 -
 31
31 -
 32
32 -
 33
33 -
 34
34 -
 35
35 -
 36
36 -
37
-
38
-
39
-
40
-
41
-
42
-
43
-
44
-
45
-
46
-
47
-
48
-
49
-
50
-
51
-
52
-
53
-
54
-
55
-
56
-
57
-
58
-
59
-
60
-
61
-
62
-
63
-
64
-
65
-
66
-
67
-
68
-
69
-
70
-
71
-
72
-
73
-
74
-
75
-
76
-
77
-
78
-
79
-
80
-
81
-
82
-
83
-
84
-
85
-
86
-
87
-
88
-
89
-
90
-
91
-
92
-
93
-
94
-
95
-
96
-
97
-
98
-
99
-
100
-
101
-
102
-
103
-
104
-
105
-
106
-
107
-
108
-
109
-
110
-
111
-
112
-
113
-
114
-
115
-
116
-
117
-
118
-
119
-
120
-
121
-
122
-
123
-
124
-
125
-
126
-
127
-
128
-
129
-
130
-
131
-
132
-
133
-
134
-
135
-
136
-
137
-
138
-
139
-
140
-
141
-
142
-
143
-
144
-
145
-
146
-
147
-
148
-
149
-
150
-
151
-
152
-
153
-
154
-
155
-
156
-
157
-
158
-
159
-
160
-
161
-
162
-
163
 |
 |
