D-Link DSL-302G Installation Guide - Page 2
Pre-Installation, USB Installation - driver
 |
View all D-Link DSL-302G manuals
Add to My Manuals
Save this manual to your list of manuals |
Page 2 highlights
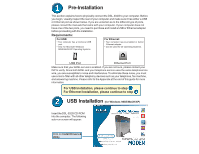
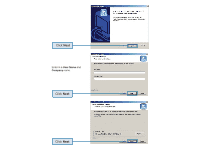
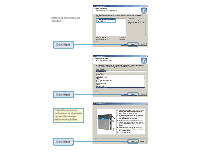
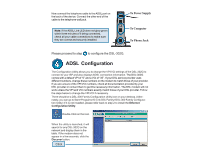
Pre-Installation This section explains how to physically connect the DSL-302G to your computer. Before you begin, visually inspect the rear of your computer and make sure it has either a USB or Ethernet port as shown below. If you are uncertain as to the different type of ports, please consult the manuals that came with your computer. If your computer does not have one of the two ports, you need to purchase and install a USB or Ethernet adapter before proceeding with the installation. Requirements: For USB: • Your computer has a functional USB port. • Only for Microsoft Windows 98SE/Me/2K/XP Operating Systems. For Ethernet: • Your computer has pre-installed or built-in Ethernet adapter. • Can be used for all Operating Systems. USB Port Ethernet Port Make sure that your ADSL service is enabled. If you are not sure, please contact your ISP to verify. Since both ADSL and your telephone service uses the same telephone line wire, you are susceptible to noise and interference. To eliminate these noise, you must use a micro-filter with all other telephony devices such as your telephone, fax machine, and answering machine. Please refer to the Appendix at the end of this guide for more information. For USB Installation, please continue to step For Ethernet Installation, please continue to step USB Installation (for Windows 98SE/Me/2K/XP) Insert the DSL-302G CD-ROM into the computer. The following auto-run screen will appear: Click on Install Drivers & Utility
-
 1
1 -
 2
2 -
 3
3 -
 4
4 -
 5
5 -
 6
6 -
 7
7 -
 8
8 -
9
-
10
-
11
-
12
 |
 |
