D-Link DSL-302G Installation Guide - Page 6
ADSL Configuration - dsl modem
 |
View all D-Link DSL-302G manuals
Add to My Manuals
Save this manual to your list of manuals |
Page 6 highlights
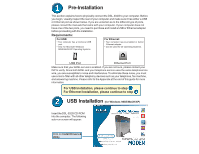
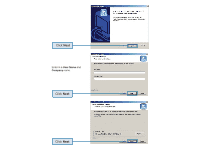
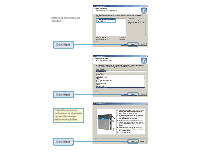
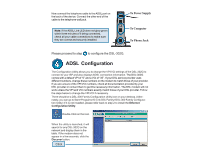
Now connect the telephone cable to the ADSL port on the back of the device. Connect the other end of the cable to the telephone wall jack. Note: If the ADSL Link LED does not glow green within three minutes of it being connected, check all your cable connections to make sure they are correct and securely installed. To Power Supply To Computer To Phone Jack Please proceed to step to configure the DSL-302G. ADSL Configuration The Configuration Utility allows you to change the VPI/VCI settings of the DSL-302G to connect to your ISP and also displays ADSL connection information. The DSL-302G comes with a default VPI of "0" and a VCI of "35". If your DSL service provider uses different numbers, change these numbers on the modem to match those of your provider. If you are unsure of the VPI/VCI numbers, check all documentation provided by your DSL provider or contact them to get this necessary information. The DSL modem will not work unless the VPI and VCI numbers exactly match those of your DSL provider. Follow the steps below to change the VPI/VCI if necessary. There should be a DSL-300 Family Configuration Utility icon on your desktop. (Alternately, you can go to Start>Programs>D-Link DSL Family>DSL-300 Family Configuration Utility) If it is not installed, please refer back to step 2 to install the Ethernet Configuration Utility. Double-Click on the icon. When the utility is launched, it will search for any DSL-302G on the network and display them in the table. If the modem does not appear in a few seconds, click the Discover button. Click
-
 1
1 -
 2
2 -
 3
3 -
 4
4 -
 5
5 -
 6
6 -
 7
7 -
 8
8 -
 9
9 -
 10
10 -
 11
11 -
 12
12
 |
 |
