D-Link DWL-520 Product Manual
D-Link DWL-520 - D Link AirPlus Wireless 22MBPS PCI Adapter Manual
 |
UPC - 790069244834
View all D-Link DWL-520 manuals
Add to My Manuals
Save this manual to your list of manuals |
D-Link DWL-520 manual content summary:
- D-Link DWL-520 | Product Manual - Page 1
D-Link AirPlus DWL-520+ Enhanced 2.4 GHz Wireless PCI Adapter Manual Building Networks for People - D-Link DWL-520 | Product Manual - Page 2
Contents 1. Package Contents 3 2. Introduction 4 3. Wireless Basics 6 4. Getting Started 9 5. Using the Configuration Utility 12 6. Troubleshooting 19 7. Networking Basics 23 8. Technical Specifications 51 9. Contacting Technical Support 53 10. Limited Warranty 54 2 - D-Link DWL-520 | Product Manual - Page 3
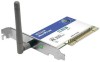
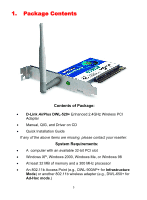
: • D-Link AirPlus DWL-520+ Enhanced 2.4GHz Wireless PCI Adapter • Manual, QIG, and Driver on CD • Quick Installation Guide If any of the above items are missing, please contact your reseller. System Requirements: • A computer with an available 32-bit PCI slot • Windows XP, Windows 2000, Windows Me - D-Link DWL-520 | Product Manual - Page 4
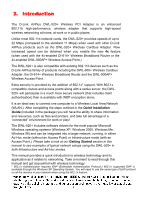
2. Introduction The D-Link AirPlus DWL-520+ Wireless PCI Adapter is an enhanced 802.11b high-performance, wireless adapter that supports high-speed wireless networking at home, at work or in public places. Unlike most 802.11b network cards, the DWL-520+ provides speeds of up to 22 Mbps (compared - D-Link DWL-520 | Product Manual - Page 5
Features and Benefits • Supports 802.1x authentication security • Now even faster performance with the new 4x feature, when used with 4x-enabled DI-614+ or 4x-enabled DWL-900AP+ • Speeds up to 2X faster, with data transfer rates up to 22Mbps, when used with other D-Link AirPlus products • Fully - D-Link DWL-520 | Product Manual - Page 6
based on industry standards to provide easy-to-use and compatible high-speed wireless connectivity within your home, business or wherever a wireless network is available. Strictly adhering to the IEEE standard, the D-Link AirPlus wireless family of products will allow you to access the data you want - D-Link DWL-520 | Product Manual - Page 7
with the DWL-520+: D-Link DWL-650+ Wireless Cardbus Adapters used with laptop computers D-Link DI-614+ Wireless Broadband Router D-Link DWL-900AP+ Wireless Access Point Standards - Based Technology The IEEE standard-based technology assures that the D-Link AirPlus Products are interoperable - D-Link DWL-520 | Product Manual - Page 8
follow these basic guidelines: 1. Keep the number of walls and ceilings between the wireless Access Point and your receiving device (i.e., the DWL-520+) to a minimum Each wall or ceiling can reduce your D-Link AirPlus Wireless product's range from 3-90 feet (1-30 meters.) Position your Access Points - D-Link DWL-520 | Product Manual - Page 9
contains the following D-Link network devices: A wireless Broadband Router - D-Link Air DI-614+ A laptop computer with a wireless network adapter - D-Link AirPlus DWL-650+ A desktop computer with a wireless network adapter - D-Link AirPlus DWL-520+ A Cable modem - D-Link DCM-201 DHCP stands - D-Link DWL-520 | Product Manual - Page 10
drivers for the wireless network adapter (such as the D-Link AirPlus DWL-650+) into the laptop computer. See the Quick Installation Guide included with the DWL-650+. If you are using the 802.1x protocol in your network, your setup may be different than that pictured above. Please refer to the manual - D-Link DWL-520 | Product Manual - Page 11
Getting Started Setting up a Wireless Ad Hoc Network Fig. 4.2 Install the D-Link AirPlus DWL-520+ Wireless Network adapter into the desktop computer. See the Quick Installation Guide included with the product for installation instructions. Install a wireless network adapter into the laptop computer. - D-Link DWL-520 | Product Manual - Page 12
its default settings, the DWL-520+ will associate with D-Link AirPlus wireless routers and access points (e.g., DI-614+, DWL-900AP+.) After the D-Link AirPlus DWL-520+ Utility window will appear. Link Info Configuration Fig. 5.2 After clicking on the Configuration Utility icon, the Link Info - D-Link DWL-520 | Product Manual - Page 13
Configuration Utility (continued) Link Info (continued) Status: Displays the MAC Address of the Access Point that is associated with the DWL-520+. SSID: The Service Set Identifier is the name assigned to the wireless network. The factory SSID setting is set to default. TxRate: The factory setting is - D-Link DWL-520 | Product Manual - Page 14
the D-Link AirPlus DWL-520+ Wireless PCI adapter in a peer-to-peer environment. Channel - The default channel setting is channel 6. However, the DWL520+ will automatically select the channel to match the channel setting for the selected Access Point. In Ad Hoc mode, the channel must be manually set - D-Link DWL-520 | Product Manual - Page 15
Link AirPlus Configuration Utility Fig. 5.5 Please note that all devices must share the same Encryption settings to communicate on the network. Data Encryption - enable Encryption by clicking on the box. The DWL520 adjust to the Authentication mode of the wireless client Network Key - enter a key in - D-Link DWL-520 | Product Manual - Page 16
Configuration Utility (continued) Site Survey D-Link AirPlus Configuration Utility Fig. 5.6 Available Networks The top section of the window displays the Available Networks. Scroll up and down the list and highlight the network to which you wish to connect. Click on the Connect button. - D-Link DWL-520 | Product Manual - Page 17
Utility (continued) Properties Current Setting Current Setting/Default Setting default Fig. 5.7 In this window you can configure all the properties of a profile in order to connect with a network of your choice. After you have entered your changes in this window, click OK to save the changes. 17 - D-Link DWL-520 | Product Manual - Page 18
Configuration Utility (continued) About D-Link AirPlus Configuration Utility PCI Card D-Link AirPlus Configuration Utility Fig. 5.8 The ABOUT screen gives you information about the Firmware and Utility Versions of the DWL-520+. 18 - D-Link DWL-520 | Product Manual - Page 19
6. Troubleshooting This chapter provides solutions to problems that can occur during the installation and operation of the DWL-520+ Wireless Adapter. Read the following descriptions if you are having problems. (The examples below are illustrated in Windows XP. If you have another operating system, - D-Link DWL-520 | Product Manual - Page 20
Troubleshooting • Double-click on Network Adapters • Right-click on D-Link AirPlus DWL-520+ Wireless PCI Adapter • Select Properties to check that the drivers are installed properly. D-Link AirPlus DWL-520+ Wireless PCI Adapter • Look under Device Status to check that the device is working - D-Link DWL-520 | Product Manual - Page 21
in this manual.) 5. The computer does not recognize the DWL-520+ Wireless Adapter. • Make sure that the DWL-520+ Wireless Adapter is properly seated in the computer's PCI slot. • If Windows does not detect the hardware upon insertion of the adapter, make sure to completely remove drivers that were - D-Link DWL-520 | Product Manual - Page 22
the INF and SYSTEM32 (DRIVERS) folders in the Windows directory. Note: Windows XP and Windows 2000 will rename .inf files that have not received WHQL certification into oem.inf files (e.g., oem1.inf.) 6. The computer with the DWL-520+ installed is unable to connect to the wireless network and/or the - D-Link DWL-520 | Product Manual - Page 23
To use the 4x feature, you must use a 4x-enabled DWL-900AP+ Wireless Access Point or a 4x-enabled DI-614+ Wireless Broadband Router in conjunction with the 4x-enabled DWL-520+. 7. Networking Basics Using the Network Setup Wizard in Windows XP In this section you will learn how to establish a network - D-Link DWL-520 | Product Manual - Page 24
Networking Basics Using the Network Setup Wizard in Windows XP Please follow all the instructions in this window: Fig. 7.2 Click Next In the following window, select the best description of your computer. If your computer connects to the Internet through a gateway/router, select the second option as - D-Link DWL-520 | Product Manual - Page 25
Networking Basics Enter a Computer description and a Computer name. Fig. 7.4 Click Next Enter a Workgroup name. All computers on your network should have the same Workgroup name. Fig. 7.5 Click Next 25 - D-Link DWL-520 | Product Manual - Page 26
Networking Basics Please wait while the wizard applies the changes. Fig. 7.6 When the changes are complete, click Next. Please wait while the wizard configures the computer. This may take a few minutes. Fig. 7.7 26 - D-Link DWL-520 | Product Manual - Page 27
Networking Basics In the window below, select the best option. In this example, Create a Network Setup Disk has been selected. You will run this disk on each of the computers on your network. Click Next. Fig. 7.8 Insert a disk into the Floppy Disk Drive, in this case drive A: Fig. 7.9 Format the - D-Link DWL-520 | Product Manual - Page 28
wizard copies the files. Fig. 7.10 Please read the information under Here's how in the screen below. After you complete the Network Setup Wizard you will use the Network Setup Disk to run the Network Setup Wizard once on each of the computers on your network. To continue, click Next Fig. 7.11 28 - D-Link DWL-520 | Product Manual - Page 29
. Click Yes to restart the computer. Fig. 7.13 You have completed configuring this computer. Next, you will need to run the Network Setup Disk on all the other computers on your network. After running the Network Setup Disk on all your computers, your new wireless network will be ready to use. 29 - D-Link DWL-520 | Product Manual - Page 30
name your computer, please follow these directions: In Windows XP: • Click Start (in the lower left corner of the screen) • Right-click on My Computer • Select Properties and click Fig. 7.14 • Select the Computer Name Tab in the System Properties window. You may enter a Computer description if you - D-Link DWL-520 | Product Manual - Page 31
Networking Basics Naming your Computer • In this window, enter the Computer name. • Select Workgroup and enter the name of the Workgroup. • All computers on your network must have the same Workgroup name. • Click OK Fig. 7.16 Checking the IP Address in Windows XP/2000 Go to Start > All Programs > - D-Link DWL-520 | Product Manual - Page 32
Networking Basics Checking the IP Address in Windows XP/2000 Type Command Fig. 7.18 Type ipconfig /all at the prompt. All the configuration settings are displayed as shown below. D-Link AirPlus DWL-520+ Wireless PCI car Fig. 7.19 Type ipconfig /renew at the prompt to get a new IP Address, shown - D-Link DWL-520 | Product Manual - Page 33
to assign Static IP Addresses. If you are not using a DHCP capable Gateway/Router, or you need to assign a Static IP Address, please follow these instructions: • Go to Start • Double-click on Control Panel Fig. 7.21 • Double-click on Network Connections Fig. 7.22 33 - D-Link DWL-520 | Product Manual - Page 34
Networking Basics Assigning a Static IP Address • Right-click on Local Area Connections. • Click Properties • Highlight Internet Protocol (TCP/IP) • Click Properties Fig. 7.23 D-Link AirPlus DWL-520+ Wireless PCI Adapter Fig. 7.24 34 - D-Link DWL-520 | Product Manual - Page 35
Use the following IP address in the Internet Protocol (TCP/IP) Properties window. • Input your IP address and subnet mask. (The IP Addresses on 255.255.255.0 Default Gateway: Enter the LAN IP address of the Wireless Router. (D-Link wireless routers have a LAN IP address of 192.168.0.1) 192 168 0 1 - D-Link DWL-520 | Product Manual - Page 36
Connection by Pinging For Windows XP and 2000: Go to Start > Run > type cmd. A window similar to Fig. 8.35 will appear. Type ping xxx.xxx.xxx.xxx, where xxx is the IP address of the Wireless Router or Access Point. A good wireless connection will show four replies from the wireless router or access - D-Link DWL-520 | Product Manual - Page 37
Adding and Sharing Printers in Windows XP After you have run the Network Setup Wizard on all the computers in your network (please see the Network Setup Wizard section at the beginning of Networking Basics,) you can use the Add Printer Wizard to add or share a printer on your network. Whether you - D-Link DWL-520 | Product Manual - Page 38
Networking Basics Adding a local printer (A printer connected directly to a computer) A printer that is not shared on the network and is connected directly to one computer is called a local printer. If you do not need to share your printer on a network, follow these directions to add the printer to - D-Link DWL-520 | Product Manual - Page 39
Networking Basics Adding a local printer • Click Next Fig. 7.30 • Select Local printer attached to this computer • (Deselect Automatically detect and install my Plug and Play printer if it has been selected.) • Click Next • Select Use the following port: • From the pull-down menu select the - D-Link DWL-520 | Product Manual - Page 40
Networking Basics Adding a local printer • Select and highlight the correct driver for your printer. • Click Next (If the correct driver is not displayed, insert the CD or floppy disk that came with your printer and click Have Disk.) • At this screen, you can change the - D-Link DWL-520 | Product Manual - Page 41
Networking Basics Adding a local printer This screen gives you information about your printer. Fig. 7.36 Click Finish When the test page has printed, Fig. 7.37 Click OK 41 - D-Link DWL-520 | Product Manual - Page 42
the printer icon as shown at right. You have successfully added a local printer. Fig. 7.38 Setting up a Network Printer After you have run the Network Setup Wizard on all the computers on your network, you can run the Add Printer Wizard on all the computers on your network. Please follow these - D-Link DWL-520 | Product Manual - Page 43
Networking Basics Setting up a network printer • Click on Add a Printer Fig. 7.40 • Click Next Fig. 7.41 • Select Network Printer • Click Next Fig. 7.42 43 - D-Link DWL-520 | Product Manual - Page 44
Networking Basics Setting up a network printer • Select Browse for a printer • Click Next • Select the printer you would like to share. Fig. 7.43 • Click Next Fig. 7.44 • Click Finish Fig. 7.45 44 - D-Link DWL-520 | Product Manual - Page 45
network: • Remember the printer name • Run the Add Printer Wizard on all the computers on your network. • Make sure you have already run the Network Setup Wizard on all the network computers. After you run the Add Printer Wizard on all the computers in the network, you can share the printer - D-Link DWL-520 | Product Manual - Page 46
an LPR printer (using a print server,) you will need a Print Server such as the DP-101P+. Please make sure that you have run the Network Setup Wizard on all the computers on your network. To share an LPR printer, please follow these directions: • Go to Start> Printers and Faxes • Click on - D-Link DWL-520 | Product Manual - Page 47
up an LPR printer • Select Create a new port • From the pull-down menu, select Standard TCP/IP Port, as shown. • Click Next • Please read the instructions on this screen. Fig. 7.50 • Click Next • Enter the Printer IP Address and the Port Name, as shown. Fig. 7.51 • Click Next Fig. 7.52 47 - D-Link DWL-520 | Product Manual - Page 48
Networking Basics Setting up an LPR printer • In this screen, select Custom. • Click Settings Fig. 7.53 • Enter the Port Name and the Printer Name or IP Address. • Select LPR • Enter a Queue Name. If there is more than one port on the print server, you must name the Queue. • Click OK Fig. 7.54 - D-Link DWL-520 | Product Manual - Page 49
• This screen will show you information about your printer. • Click Finish • Select the printer you are adding from the list of Printers. • Insert the printer driver disk that came with your printer. • Click Have Disk Fig. 7.55 Fig. 7.56 If the printer - D-Link DWL-520 | Product Manual - Page 50
Printer Wizard on all the computers on your network in order to share the printer. Fig. 7.59 Fig. 7.60 Note: You must run the Network Setup Wizard on all the computers on your network before you run the Add Printer Wizard. 50 - D-Link DWL-520 | Product Manual - Page 51
8. Technical Specifications Standards: • IEEE 802.11 • IEEE 802.11b • 802.1x Bus Type: • 32-bit PCI 2.2 Supported Operating Systems: • Windows XP • Windows 2000 • Windows ME • Windows 98 Data Security: • 256-bit WEP (Wired Equivalent Privacy) Encryption Data Rate: Mbps* • 22 • 11 • 5.5 • 2 • 1 Range - D-Link DWL-520 | Product Manual - Page 52
Power: • 15dBm ± 2dB External Antenna Type: • Detachable / Reverse SMA Over-Driving Levels: • Tolerates up to +17dBm at the Antenna Frequency Range: • 2.4 - • 3 year Weight: • 0.17 lb (77g) *Maximum wireless signal rate derived from IEEE Standard 802.11g specifications. Actual data throughput - D-Link DWL-520 | Product Manual - Page 53
over the Telephone: (877) 453-5465 24 hours a day, seven days a week. D-Link Technical Support over the Internet: http://support.dlink.com email:[email protected] Tech Support for customers within Canada: D-Link Technical Support over the Telephone: (800) 361-5265 Monday to Friday 8:30am to 9:00pm - D-Link DWL-520 | Product Manual - Page 54
to refund at D-Link's sole discretion. Such repair or replacement will be rendered by D-Link at an Authorized D-Link Service Office. The replacement to the terms and conditions of the license granted by D-Link for the Software. Software will be warranted for the remainder of the original Warranty - D-Link DWL-520 | Product Manual - Page 55
covered in the operating manual for the product, and normal maintenance; Damage that occurs in shipment, due to act of God, failures due to power surge, and cosmetic damage; Any hardware, software, firmware or other products or services provided by anyone other than D-Link; Products that have been - D-Link DWL-520 | Product Manual - Page 56
LINK FOR WARRANTY SERVICE) RESULTING FROM THE USE OF THE PRODUCT, RELATING TO WARRANTY SERVICE, OR ARISING OUT OF ANY BREACH OF THIS LIMITED WARRANTY, EVEN IF D-LINK , or adaptation without permission from D-Link Corporation/D-Link Systems, Inc accordance with the instructions, may cause harmful - D-Link DWL-520 | Product Manual - Page 57
(1) The devices are restricted to indoor operations within the 5.15 to 5.25GHz range. (2) For this device to operate in the 5.15 to 5.25GHz range, the devices must use integral antennas. This device complies with Part 15 of the FCC Rules. Operation is subject to the following two conditions: (1)
-
 1
1 -
 2
2 -
 3
3 -
 4
4 -
 5
5 -
 6
6 -
 7
7 -
8
-
9
-
10
-
11
-
12
-
13
-
14
-
15
-
16
-
17
-
18
-
19
-
20
-
21
-
22
-
23
-
24
-
25
-
26
-
27
-
28
-
29
-
30
-
31
-
32
-
33
-
34
-
35
-
36
-
37
-
38
-
39
-
40
-
41
-
42
-
43
-
44
-
45
-
46
-
47
-
48
-
49
-
50
-
51
-
52
-
53
-
54
-
55
-
56
-
57
 |
 |

D-Link
Air
Plus
DWL-520+
Enhanced 2.4 GHz Wireless PCI Adapter
Manual
Building Networks for People