Dell C1660W Dell Users Guide - Page 206
Clearing Paper Jams From the Back of the Printer
 |
View all Dell C1660W manuals
Add to My Manuals
Save this manual to your list of manuals |
Page 206 highlights
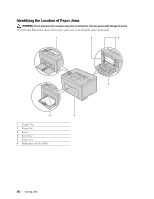
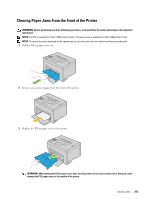
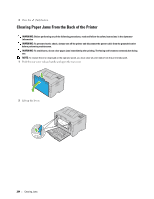
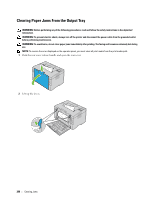
4 Press the (Set) button. Clearing Paper Jams From the Back of the Printer WARNING: Before performing any of the following procedures, read and follow the safety instructions in the Important Information. WARNING: To prevent electric shock, always turn off the printer and disconnect the power cable from the grounded outlet before performing maintenance. WARNING: To avoid burns, do not clear paper jams immediately after printing. The fusing unit becomes extremely hot during use. NOTE: To resolve the error displayed on the operator panel, you must clear all print media from the print media path. 1 Push the rear cover release handle and open the rear cover. 2 Lift up the levers. 204 Clearing Jams
-
 1
1 -
2
-
3
-
4
-
5
-
6
-
7
-
8
-
9
-
10
-
11
-
12
-
13
-
14
-
15
-
16
-
17
-
18
-
19
-
20
-
21
-
22
-
23
-
24
-
25
-
26
-
27
-
28
-
29
-
30
-
31
-
32
-
33
-
34
-
35
-
36
-
37
-
38
-
39
-
40
-
41
-
42
-
43
-
44
-
45
-
46
-
47
-
48
-
49
-
50
-
51
-
52
-
53
-
54
-
55
-
56
-
57
-
58
-
59
-
60
-
61
-
62
-
63
-
64
-
65
-
66
-
67
-
68
-
69
-
70
-
71
-
72
-
73
-
74
-
75
-
76
-
77
-
78
-
79
-
80
-
81
-
82
-
83
-
84
-
85
-
86
-
87
-
88
-
89
-
90
-
91
-
92
-
93
-
94
-
95
-
96
-
97
-
98
-
99
-
100
-
101
-
102
-
103
-
104
-
105
-
106
-
107
-
108
-
109
-
110
-
111
-
112
-
113
-
114
-
115
-
116
-
117
-
118
-
119
-
120
-
121
-
122
-
123
-
124
-
125
-
126
-
127
-
128
-
129
-
130
-
131
-
132
-
133
-
134
-
135
-
136
-
137
-
138
-
139
-
140
-
141
-
142
-
143
-
144
-
145
-
146
-
147
-
148
-
149
-
150
-
151
-
152
-
153
-
154
-
155
-
156
-
157
-
158
-
159
-
160
-
161
-
162
-
163
-
164
-
165
-
166
-
167
-
168
-
169
-
170
-
171
-
172
-
173
-
174
-
175
-
176
-
177
-
178
-
179
-
180
-
181
-
182
-
183
-
184
-
185
-
186
-
187
-
188
-
189
-
190
-
191
-
192
-
193
-
194
-
195
-
196
-
197
-
198
-
199
-
200
-
 201
201 -
 202
202 -
 203
203 -
 204
204 -
 205
205 -
 206
206 -
 207
207 -
 208
208 -
 209
209 -
 210
210 -
 211
211 -
212
-
213
-
214
-
215
-
216
-
217
-
218
-
219
-
220
-
221
-
222
-
223
-
224
-
225
-
226
-
227
-
228
-
229
-
230
-
231
-
232
-
233
-
234
-
235
-
236
-
237
-
238
-
239
-
240
 |
 |
4
1
2
Press the
(Set)
button.
Clearing Paper Jams From the Back of the Printer
WARNING:
Before performing any of the following procedures, read and follow the safety instructions in the
Important
Information
.
WARNING:
To prevent electric shock, always turn off the printer and disconnect the power cable from the grounded outlet
before performing maintenance.
WARNING:
To avoid burns, do not clear paper jams immediately after printing. The fusing unit becomes extremely hot during
use.
NOTE:
To resolve the error displayed on the operator panel, you must clear all print media from the print media path.
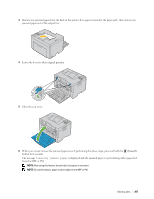
Push the rear cover release handle and open the rear cover.
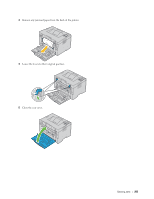
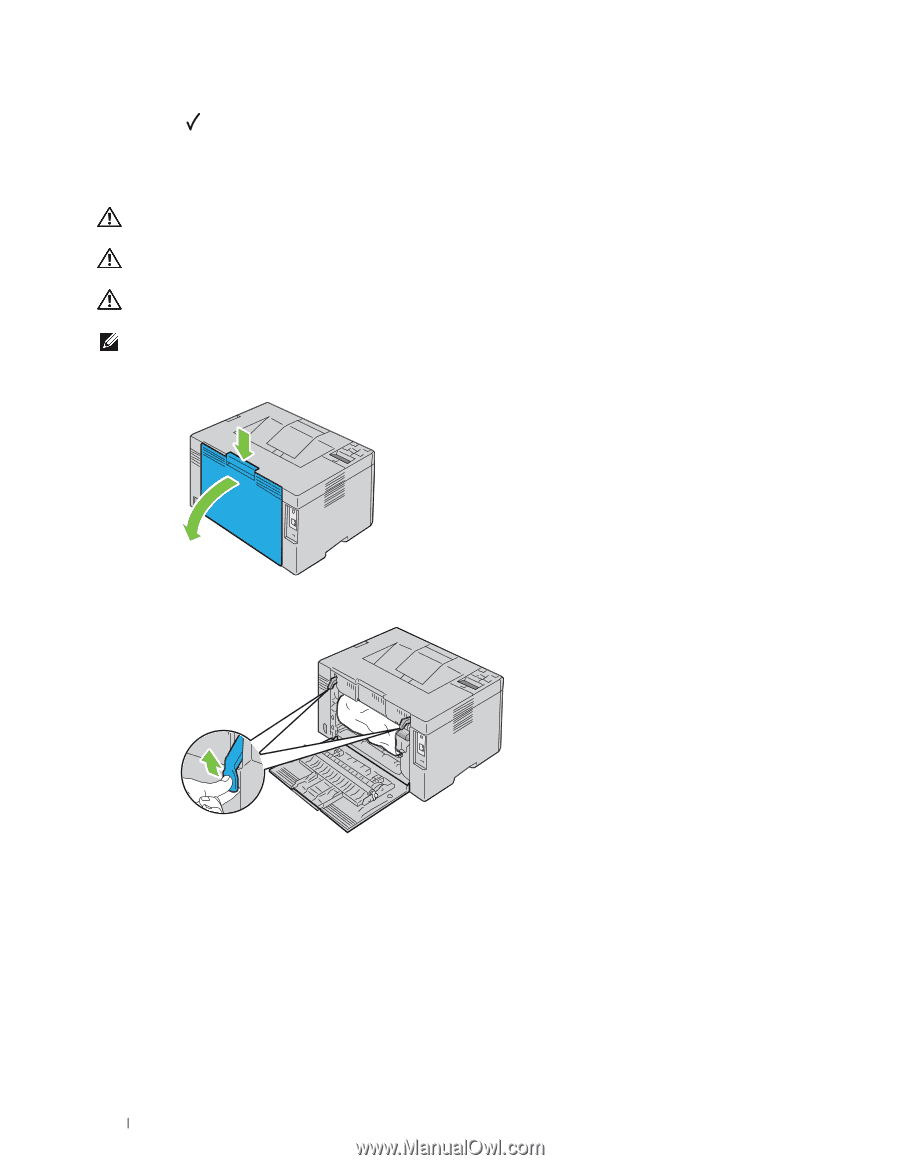
Lift up the levers.
Clearing Jams
204