Dell PowerConnect W-IAP3WN Dell Instant 6.1.2.3-2.0.0.0 User Guide - Page 51
Splash Type, Description and steps to set up, Percentage of Airtime
 |
View all Dell PowerConnect W-IAP3WN manuals
Add to My Manuals
Save this manual to your list of manuals |
Page 51 highlights
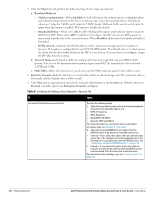
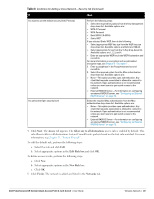
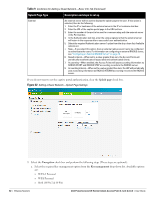
unicast and send directly to the associated client. When Disabled, all broadcast and multicast traffic is forwarded. DTIM interval: Indicates the DTIM (delivery traffic indication message) period in number of beacons. This option is configurable for each WLAN SSID profile. The default value is 1, which means the client will check for buffered data on the IAP at every beacon. You may choose to configure a larger DTIM value for power saving. b. Transmit Rates: Indicates the ability to configure the basic and supported rates per SSID for Dell Instant. Select to set the minimum and maximum legacy (non-802.11n) transmit rates for each band -2.4GHz and 5GHz. c. Bandwidth Limits: Here, you can specify three types of bandwidth limits. Percentage of Airtime: The aggregate amount of airtime that all clients on this Network can use to send/receive data. Each User: The throughput for any single user on this network. Each Radio: The amount of throughput each radio (some models of AP have multiple radios) is allowed to provide for all clients in aggregate connected to that radio. d. Band: Set the band at which the network will transmit radio signals. Available options are All, 2.4 GHz, and 5 GHz. The All option is selected by default. It is also the recommended option. e. Content Filtering: When enabled, all DNS requests to non-corporate domains on this wireless network are sent to OpenDNS. f. Hide SSID: Select this check box if you do not want the SSID (network name) to be visible to users. g. Inactivity timeout: Indicates the time in seconds after which an idle client ages out. The minimum value is 60 seconds and the default value is 1000 seconds. 4. Click Next. The Security tab appears. This tab allows you to configure the captive portal page for the Guest network. Select one of the following splash page type: Table 9 Conditions for Adding a Guest Network-Basic Info Tab Splash Page Type Description and steps to set up Internal-Authenticated Internal-Acknowledged A user has to accept the terms and conditions and enter a username and password on the captive portal page. If this option is selected, then add the users who are required to use the captive portal authentication to the user database. Click the Users link to add the users. For information about adding a user, see "Adding a User" on page 151. For information on customizing the splash page, see "Customizing a Splash Page" on page 87. A user has to accept the terms and conditions for this splash page type. For information on customizing the splash page, see "Customizing a Splash Page" on page 87. Dell PowerConnect W-Series Instant Access Point 6.1.2.3-2.0.0.0 | User Guide Wireless Network | 51
-
 1
1 -
2
-
3
-
4
-
5
-
6
-
7
-
8
-
9
-
10
-
11
-
12
-
13
-
14
-
15
-
16
-
17
-
18
-
19
-
20
-
21
-
22
-
23
-
24
-
25
-
26
-
27
-
28
-
29
-
30
-
31
-
32
-
33
-
34
-
35
-
36
-
37
-
38
-
39
-
40
-
41
-
42
-
43
-
44
-
45
-
 46
46 -
 47
47 -
 48
48 -
 49
49 -
 50
50 -
 51
51 -
 52
52 -
 53
53 -
 54
54 -
 55
55 -
 56
56 -
57
-
58
-
59
-
60
-
61
-
62
-
63
-
64
-
65
-
66
-
67
-
68
-
69
-
70
-
71
-
72
-
73
-
74
-
75
-
76
-
77
-
78
-
79
-
80
-
81
-
82
-
83
-
84
-
85
-
86
-
87
-
88
-
89
-
90
-
91
-
92
-
93
-
94
-
95
-
96
-
97
-
98
-
99
-
100
-
101
-
102
-
103
-
104
-
105
-
106
-
107
-
108
-
109
-
110
-
111
-
112
-
113
-
114
-
115
-
116
-
117
-
118
-
119
-
120
-
121
-
122
-
123
-
124
-
125
-
126
-
127
-
128
-
129
-
130
-
131
-
132
-
133
-
134
-
135
-
136
-
137
-
138
-
139
-
140
-
141
-
142
-
143
-
144
-
145
-
146
-
147
-
148
-
149
-
150
-
151
-
152
-
153
-
154
-
155
-
156
-
157
-
158
 |
 |
