Dell PowerVault LTO-5-140 Storage User's Guide - Page 46
Recovering a Tape Cartridge
 |
View all Dell PowerVault LTO-5-140 Storage manuals
Add to My Manuals
Save this manual to your list of manuals |
Page 46 highlights
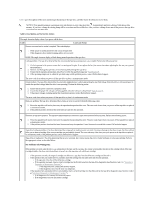
39 27h 51 33h 52 34h 53 35h Diagnostics required Tape directory invalid at unload Tape system area write failure Tape system area read failure "Specifications"). Set when the drive detects a failure that requires diagnostics to isolate the problem. See error code 6 in "Descriptions and Corrective Actions." Set when the tape directory on the tape cartridge that was previously unloaded is corrupted. The file-search performance is degraded. Rebuild the tape directory by reading all the data. Set when the tape cartridge that was previously unloaded could not write its system area successfully. Copy the data to another tape cartridge, then discard the old cartridge. Set when the tape system area could not be Copy the data to another tape cartridge, then discard the old read successfully at load time. cartridge. Recovering a Tape Cartridge If problem-determination procedures identify the tape drive as the source of the problem and you are unable to eject the tape cartridge using the eject button, perform the following steps to reset the drive to recover the cartridge: 1. Press and hold the eject button for 10 seconds, then release. ¡ The fault LED turns on and the drive starts through its hardware test process. ¡ When the hardware test completes, the ready/activity LED turns on. ¡ If a cartridge is in the drive, the ready/activity LED flashes green until the cartridge is rewound. ¡ The ready/activity LED turns on solid when the rewind is complete and the tape drive is ready. NOTE: Allow at least 10 minutes for the rewind process to complete. 2. To eject the cartridge, push the eject button one more time. If the tape cartridge still will not eject, contact trained service personnel for assistance. NOTICE: If you are not a trained service person, do not attempt to open the drive for repairs as this will void your warranty. Back to Contents Page
-
 1
1 -
2
-
3
-
4
-
5
-
6
-
7
-
8
-
9
-
10
-
11
-
12
-
13
-
14
-
15
-
16
-
17
-
18
-
19
-
20
-
21
-
22
-
23
-
24
-
25
-
26
-
27
-
28
-
29
-
30
-
31
-
32
-
33
-
34
-
35
-
36
-
37
-
38
-
39
-
40
-
 41
41 -
 42
42 -
 43
43 -
 44
44 -
 45
45 -
 46
46 -
 47
47 -
 48
48 -
 49
49 -
 50
50
 |
 |
