Dell Precision 530 Memory Riser Board Replacement
Dell Precision 530 Manual
 |
View all Dell Precision 530 manuals
Add to My Manuals
Save this manual to your list of manuals |
Dell Precision 530 manual content summary:
- Dell Precision 530 | Memory Riser Board Replacement - Page 1
Dell Precision™ WorkStation 530 MEMORY RISER BOARD REPLACEMENT Remplacement de la carte de montage vertical de mémoire Austausch der Speichersteckkarte Reemplazo de la tarjeta vertical de memoria www.dell.com support.dell.com - Dell Precision 530 | Memory Riser Board Replacement - Page 2
Contents English 5 Français 2 3 Deutsch 4 5 Español 6 7 - Dell Precision 530 | Memory Riser Board Replacement - Page 3
Dell Precision™ WorkStation 530 MEMORY RISER BOARD REPLACEMENT www.dell.com support.dell.com - Dell Precision 530 | Memory Riser Board Replacement - Page 4
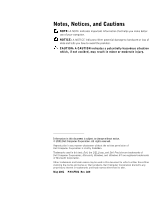
to hardware or loss of data and tells you how to avoid the problem. CAUTION: A CAUTION indicates a potentially hazardous situation which, if not avoided this text: Dell, the DELL logo, and Dell Precision are trademarks of Dell Computer Corporation; Microsoft, Windows, and Windows NT are registered - Dell Precision 530 | Memory Riser Board Replacement - Page 5
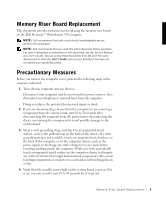
Memory Riser Board Replacement This document provides instructions on replacing the memory riser board on the Dell Precision™ WorkStation 530 computer. NOTE: Dell recommends that only a technically knowledgeable person perform this procedure. NOTE: Dell recommends that you read this entire document - Dell Precision 530 | Memory Riser Board Replacement - Page 6
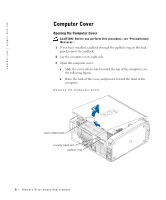
back of the cover, and pivot it toward the front of the computer. Opening the Computer Cover cover release latch security cable slot padlock ring 6 Memory Riser Board Replacement - Dell Precision 530 | Memory Riser Board Replacement - Page 7
Cover cover release latch security cable slot padlock ring 4 Stand the computer upright. 5 If you are using a padlock to secure your computer, install the padlock. Memory Riser Board Replacement 7 - Dell Precision 530 | Memory Riser Board Replacement - Page 8
p po rt. d ell. com System Memory Your computer supports dual-channel Rambus dynamic random-access memory (RDRAM) Rambus in-line memory modules (RIMMs) in 64-, 128-, 256-, and 512-megabyte (MB) capacities. See "System Memory Installation Guidelines" for instructions you must follow when installing - Dell Precision 530 | Memory Riser Board Replacement - Page 9
Memory Module L abel 128MB/16 ECC xxx number of memory devices in RIMM System Board Memory Components pair 2 pair 1 socket 4 socket 3 socket 2 socket 1 suspend-to-RAM (STR) light Memory Riser Board Replacement 9 - Dell Precision 530 | Memory Riser Board Replacement - Page 10
-to-RAM light riser board A suspend-to-RAM light riser board B Memory Riser Board Components socket 4 socket 3 pair 4 socket 2 pair 3 socket 1 pair 2 pair 1 socket 4 socket 3 socket 2 socket 1 System Memory Installation Guidelines Riser Board Installation When installing memory modules - Dell Precision 530 | Memory Riser Board Replacement - Page 11
function as non-ECC. • The optional memory riser boards only support PC800 memory modules. NOTE: For more information on upgrading system memory or on addressing memory with 4-GB configurations, see the User's Guide. You can access this document from the Dell Precision ResourceCD or from the User - Dell Precision 530 | Memory Riser Board Replacement - Page 12
i t h M e m o r y R i s e r B o a r d s (continued) Total Memory Riser Board A Riser Board B Socket 1 Socket 2 Socket 3 Socket 4 Socket 1 Socket 2 Socket 3 Socket 4 1536 MB 256 MB 256 MB MB 64 MB 64 MB 512 MB 512 MB 64 MB 64 MB 512 MB 512 MB Upgrading System Memory CAUTION: RIMMs can get - Dell Precision 530 | Memory Riser Board Replacement - Page 13
in which you plan to install upgrade modules. NOTE: See "Removing a Memory Module." 6 If you have the optional memory riser boards installed and you plan to install upgrade modules on the riser boards, remove the riser boards. NOTE: See "Removing Memory Riser Boards." M e mo r y R i s er B o a rd Re - Dell Precision 530 | Memory Riser Board Replacement - Page 14
7 Install the upgrade modules in system board or riser board sockets. NOTE: See "System Memory Installation Guidelines." NOTE: Without the optional memory riser boards installed, the computer supports a maximum of 64 memory devices on all installed RIMMs. With the memory riser boards installed, the - Dell Precision 530 | Memory Riser Board Replacement - Page 15
riser boards to ensure that they are seated properly in their sockets. Then repeat step 10 through step 13. 15 When the System Memory board memory sockets, it may be necessary to remove the fan for microprocessor 0. For instructions on removing and installing the processor fan, see the Service Manual - Dell Precision 530 | Memory Riser Board Replacement - Page 16
(see the following figure). 2 Align the slots on the bottom of the module with the ridges inside the socket. NOTICE: To avoid damage to the memory module, press the module straight down into the socket with equal force applied at each end of the module. 3 Press the module straight down into - Dell Precision 530 | Memory Riser Board Replacement - Page 17
the fan for microprocessor 0. For instructions on removing and installing the processor fan, see the Service Manual. a Press the securing clips of system board memory socket 1 outward simultaneously until riser board A pops out slightly from the socket. b Lift riser board A away from the retention - Dell Precision 530 | Memory Riser Board Replacement - Page 18
w w w.d el l.co m | su p po rt. d ell. com Removing Memory Riser Boards memory riser board retention bracket securing clips (2) 18 M em o r y Ri s e r B o a rd Rep l a c em e n t memory riser board A memory riser board B system board - Dell Precision 530 | Memory Riser Board Replacement - Page 19
ends of the riser board. 3 Install memory riser board A: a Align the edges of riser board A with the retention brackets on riser board B. b Align the slots on the bottom of riser board A with the ridges inside memory socket 1 on the system board. The memory sockets on the riser board will face away - Dell Precision 530 | Memory Riser Board Replacement - Page 20
w w w.d el l.co m | su p po rt. d ell. com Installing Memory Riser Boards memory riser board retention bracket memory sockets (4) 20 M em o r y Ri s e r B o a rd Rep l a c em e n t memory riser board A memory riser board B system board - Dell Precision 530 | Memory Riser Board Replacement - Page 21
Dell Precision™ WorkStation 530 REMPLACEMENT DE LA CARTE DE MONTAGE VERTICAL DE MÉMOIRE www.dell.com support.dell.com - Dell Precision 530 | Memory Riser Board Replacement - Page 22
Computer Corporation, est strictement interdite. Marques utilisées dans ce texte : Dell, le logo Dell et Dell Precision sont des marques de Dell Computer Corporation ; Microsoft Windows et Windows NT sont des marques déposées de Microsoft Corporation. D'autres marques et noms commerciaux peuvent - Dell Precision 530 | Memory Riser Board Replacement - Page 23
instructions sur le remplacement de la carte de montage vertical de mémoire de l'ordinateur Dell Precision™ WorkStation 530. REMARQUE : Dell au Guide technique et au Guide d'utilisation. Vous pouvez accéder à ces documents à partir du cédérom Dell Precision ResourceCD ou de l'icône Guides d' - Dell Precision 530 | Memory Riser Board Replacement - Page 24
w w w.d el l.co m | su p po rt. d ell. com à l'intérieur de l'ordinateur. Pendant que vous travaillez, touchez périodiquement une surface métallique non peinte sur le châssis de l'ordinateur afin de dissiper toute électricité statique susceptible d'endommager les composants internes. Évitez de - Dell Precision 530 | Memory Riser Board Replacement - Page 25
Ouverture du capot de l'ordinateur loquet d'éjection du capot logement pour câble de sécurité anneau pour cadenas Fermeture du capot de l'ordinateur 1 Vérifiez toutes les connexions des câbles, notamment celles qui ont pu se desserrer au cours de votre intervention. Rangez les câbles en les repliant - Dell Precision 530 | Memory Riser Board Replacement - Page 26
random-access memory [mémoire vive dynamique Rambus]) à double canal de capacité de 64, 128, 256 et 512 méga-octets (Mo). Reportez-vous à la section « Consignes d'installation de mémoire système » pour obtenir des instructions pour installer les modules de mémoire. Pour repérer les supports de - Dell Precision 530 | Memory Riser Board Replacement - Page 27
identifie le nombre d'unités de mémoire qu'il contient. Vous pouvez aussi déterminer le nombre d'unités de mémoire installées, grâce à l'option System Memory (Mémoire système) du programme de configuration du système. REMARQUE : L'ordinateur ne prend pas en charge les RIMM avec six unités de mémoire - Dell Precision 530 | Memory Riser Board Replacement - Page 28
w w w.d el l.co m | su p po rt. d ell. com support 4 paire 2 support 3 support 2 paire 1 support 1 Composants mémoire de la carte système voyant STR (Suspend-ToRAM [suspension sur RAM]) 28 Rem p l ac e m e nt d e l a c ar t e d e m on t ag e v er t i c al d e m é m oi r e - Dell Precision 530 | Memory Riser Board Replacement - Page 29
vertical de mémoire voyant suspension sur RAM carte de montage vertical A voyant suspension sur RAM carte de montage vertical B support 4 support 3 paire 4 support 2 paire 3 support 1 paire 2 paire 1 support 4 support 3 support 2 support 1 Consignes d'installation de mémoire système - Dell Precision 530 | Memory Riser Board Replacement - Page 30
ème et sur l'adressage de la mémoire avec des configurations de 4 Go, reportez-vous au Guide d'utilisation. Vous pouvez accéder à ce document à partir du cédérom Dell Precision ResourceCD ou de l'icône Guides d'utilisation de votre bureau si vous n'avez pas réinstallé votre système d'exploitation - Dell Precision 530 | Memory Riser Board Replacement - Page 31
Mo Carte de montage vertical A Carte de montage vertical B Support 1 Support 2 Support 3 Support 4 Support 1 Support 2 Support 3 Support 4 128 Mo C-RIMM vide vide 128 Mo C-RIMM vide Mo 128 Mo C-RIMM vide 128 Mo 128 Mo 64 Mo 64 Mo 128 Mo 128 Mo 64 Mo 64 Mo 128 Mo 128 Mo 128 Mo 128 Mo 128 - Dell Precision 530 | Memory Riser Board Replacement - Page 32
w w w.d el l.co m | su p po rt. d ell. com 4 Pour accéder aux supports de mémoire de la carte système, retirez le carénage de ventilation du microprocesseur : a Enfoncez et repoussez vers l'arrière les dentelures situées - Dell Precision 530 | Memory Riser Board Replacement - Page 33
». 7 Installez les modules d'extension dans les supports de la carte de montage vertical ou de ées, l'ordinateur prend en charge un maximum de 64 unités de mémoire sur tous les RIMM installés. mémoire installées, grâce à l'option System Memory (Mémoire système) du programme de configuration du syst - Dell Precision 530 | Memory Riser Board Replacement - Page 34
génère le message suivant : The amount of system memory has changed. (Le volume de la mémoire systè vérifier qu'ils sont installés correctement dans leur support. Répétez ensuite les step 10 à step 13. de votre système, reportez-vous à votre Guide d'utilisation. 16 Éteignez l'ordinateur et connectez - Dell Precision 530 | Memory Riser Board Replacement - Page 35
de la carte système, vous devrez peut-être retirer le ventilateur du microprocesseur 0. Pour les instructions de retrait et d'installation du ventilateur du processeur, consultez le Guide technique. 2 Soulevez le module pour l'écarter du support. Retrait d'un module de mémoire clips de fixation - Dell Precision 530 | Memory Riser Board Replacement - Page 36
w.d el l.co m | su p po rt. d ell. com Installation d'un module de mémoire 1 Poussez les clips de fixation vers l'extérieur à chaque extrémité du support jusqu'à ce qu'ils s'ouvrent avec un déclic (reportez-vous à la figure suivante). 2 Alignez les fentes de la partie inférieure du module avec les - Dell Precision 530 | Memory Riser Board Replacement - Page 37
système, vous devrez peut-être retirer le ventilateur du microprocesseur 0. Pour les instructions de retrait et d'installation du ventilateur du processeur, consultez le Guide technique. a Appuyez sur les clips de fixation du support de mémoire 1 de la carte système simultanément vers l'extérieur - Dell Precision 530 | Memory Riser Board Replacement - Page 38
w w w.d el l.co m | su p po rt. d ell. com Retrait des cartes de montage vertical de mémoire support de fixation de la carte de montage vertical de mémoire clips de fixation (2) carte de montage vertical de mémoire A carte de montage vertical de mémoire B - Dell Precision 530 | Memory Riser Board Replacement - Page 39
la carte de montage vertical. 3 Installez la carte de montage vertical de mémoire A : a Alignez les bords de la carte de montage vertical A avec les supports de retenue de la carte de montage vertical B. b Alignez les fentes au bas de la carte de montage vertical A avec les rainures situées à l'int - Dell Precision 530 | Memory Riser Board Replacement - Page 40
de montage vertical seront en direction opposée du (ou des ) microprocesseur(s). c Appuyez sur la carte de montage vertical A pour qu'elle rentre verticalement dans le support 1, jusqu'à ce que les clips de fixation s'enclenchent aux extrémités de la carte de montage vertical. 4 Installez le - Dell Precision 530 | Memory Riser Board Replacement - Page 41
Installation des cartes de montage vertical de mémoire support de fixation de la carte de montage vertical de mémoire supports de mémoire (4) carte de montage vertical de mémoire A carte de montage vertical de mémoire B carte système Re mp l a ce m e n t d e l a c a r te d e m on t a ge ve r t i - Dell Precision 530 | Memory Riser Board Replacement - Page 42
w w w.d el l.co m | su p po rt. d ell. com 42 Rem p l ac e m e nt d e l a c ar t e d e m on t ag e v er t i c al d e m é m oi r e - Dell Precision 530 | Memory Riser Board Replacement - Page 43
Dell Precision™ WorkStation 530 AUSTAUSCH DER SPEICHERSTECKKARTE www.dell.com support.dell.com - Dell Precision 530 | Memory Riser Board Replacement - Page 44
ohne die vorherige schriftliche Genehmigung der Dell Computer Corporation sind strengstens untersagt. Warenzeichen in diesem Text: Dell, das DELL Logo und Dell Precision sind Warenzeichen der Dell Computer Corporation; Microsoft, Windows und Windows NT sind eingetragene Warenzeichen der Microsoft - Dell Precision 530 | Memory Riser Board Replacement - Page 45
Dell Precision™ WorkStation 530-Computer. ANMERKUNG: Dell empfiehlt, dieses Verfahren nur von technisch erfahrenem Servicepersonal ausführen zu lassen. ANMERKUNG: Dell finden Sie im Service-Handbuch und im Benutzerhandbuch. Diese Dokumente sind auf der Dell Precision ResourceCD enthalten, können - Dell Precision 530 | Memory Riser Board Replacement - Page 46
w w w.d el l.co m | su p po rt. d ell. com Computers berühren. Berühren Sie während der Arbeit im Computer unbeschichtete Metallflächen am Computergehäuse, um statische Aufladung abzuleiten, die die internen Komponenten beschädigen könnte. Vermeiden Sie auch das Berühren von Komponenten oder - Dell Precision 530 | Memory Riser Board Replacement - Page 47
Computerabdeckung öffnen Abdeckungsfreigaberiegel Sicherheitskabeleinschub halbringförmiger Bügel für ein Vorhängeschloß Computerabdeckung schließen 1 Prüfen Sie alle Kabelverbindungen, besonders jene, die sich während der Arbeit im System gelockert haben könnten. Verlegen Sie Kabel so, daß sie die - Dell Precision 530 | Memory Riser Board Replacement - Page 48
Der Computer unterstützt Doppelkanal-RDRAM (Rambus Dynamic Random-Access Memory [Dynamischer Rambus-Direktzugriffsspeicher])Rambus-Speichermodule mit einer Kontaktanschlußreihe (RIMMs) mit einer Kapazität von 64, 128, 256 und 512 Megabyte (MB). Unter "Installationsrichtlinien für Systemspeicher - Dell Precision 530 | Memory Riser Board Replacement - Page 49
. ANMERKUNG: Der Computer unterstützt keine RIMMs mit sechs Speichergeräten. ANMERKUNG: Die unter den Betriebssystemen Microsoft® Windows NT® und Windows® 2000 zur Verfügung stehende Speichergröße liegt je nach Systemkonfiguration knapp unter 4 GB. ANMERKUNG: Die optionalen Speichersteckkarten - Dell Precision 530 | Memory Riser Board Replacement - Page 50
w w w.d el l.co m | su p po rt. d ell. com Sockel 4 Paar 2 Sockel 3 Sockel 2 Paar 1 Sockel 1 Speicherkomponenten der Systemplatine STR-Anzeige (Suspend-toRAM [RAM-Suspendier]) 50 A us t a us c h de r S pe i c h er s t ec k k a rt e - Dell Precision 530 | Memory Riser Board Replacement - Page 51
Speicherkomponenten der Steckkarten RAM-SuspendierAnzeige Steckkarte A RAM-SuspendierAnzeige Steckkarte B Sockel 4 Sockel 3 Paar 4 Sockel 2 Paar 3 Sockel 1 Paar 2 Paar 1 Sockel 4 Sockel 3 Sockel 2 Sockel 1 Au s t a us c h de r S pe i c h er s t ec k k a rt e 51 - Dell Precision 530 | Memory Riser Board Replacement - Page 52
dritte Paar mit CRIMMs belegt werden, wobei das vierte Paar nicht belegt sein muß. • Gemischte Paare (bestehend aus ECC-Modulen (Error Checking and Correction [Fehlerprüfung und -korrektur]) und aus Nicht-ECCModulen) funktionieren wie Nicht-ECC-Module. • Die optionalen Speichersteckkarten unterst - Dell Precision 530 | Memory Riser Board Replacement - Page 53
GBKonfigurationen sind im Benutzerhandbuch enthalten. Dieses Dokument befindet sich auf der Dell Precision ResourceCD; Sie können es auch über das Symbol Benutzerhandbücher 2048 MB 2304 MB 2560 MB 3072 MB 3584 MB 4096 MB Sockel 1 64 MB 64 MB 64 MB 64 MB 128 MB 128 MB 128 MB 128 MB 256 MB 256 MB 256 - Dell Precision 530 | Memory Riser Board Replacement - Page 54
w w w.d el l.co m | su p po rt. d ell. com Systemspeicher aufrüsten VORSICHTSHINWEIS: RIMMs können während des normalen Betriebs sehr heiß werden. Vor dem Berühren der RIMMs muß eine angemessene Abkühlzeit eingehalten werden. VORSICHTSHINWEIS: Le s en S i e b i t t e " V or si c h ts m aß na h m en - Dell Precision 530 | Memory Riser Board Replacement - Page 55
Luftstromverkleidung des Mikroprozessors entfernen Luftstromverkleidung obere Klammern (2) untere Klammern (2) b Heben Sie die Luftstromverkleidung aus dem Gehäuse. 5 Falls notwendig, entfernen Sie Speichermodule, die die Sockel auf der Systemplatine belegen, in die Sie die Erweiterungsmodule - Dell Precision 530 | Memory Riser Board Replacement - Page 56
tzt der Computer bis zu 128 Speichergeräte (64 Geräte auf jeder Steckkarte). Die Postition des öße nicht mit den vorhandenen Systemkonfigurationsdaten übereinstimmt und erzeugt folgende Meldung: The amount of system memory has changed. (Die Größe des Systemspeichers hat sich geändert.) 56 A us t - Dell Precision 530 | Memory Riser Board Replacement - Page 57
Strike the F1 key to continue, F2 to run the setup utility (Drücken Sie F1, um fortzufahren, F2, um das SetupDienstprogramm auszuführen) 13 Rufen Sie das System-Setup auf und überprüfen Sie die Einstellungen der Option Systemspeicher. Der Computer sollte die Einstellung von Systemspeicher bereits - Dell Precision 530 | Memory Riser Board Replacement - Page 58
w w w.d el l.co m | su p po rt. d ell. com Speichermodul entfernen VORSICHTSHINWEIS: Le s en S i e b i t t e " V or si c h ts m aß na h m en " , bevor Sie dieses Verfahren ausführen HINWEIS: Um Beschädigungen am Speichermodul zu vermeiden, drücken Sie die Sicherungsklammern mit gleichmäßigem Druck - Dell Precision 530 | Memory Riser Board Replacement - Page 59
Speichermodul installieren 1 Drücken Sie die Sicherungsklammern an beiden Enden des Sockels nach außen, bis sie aufschnappen (siehe folgende Abbildung). 2 Richten Sie die Steckplätze an der Unterseite des Moduls auf die Nasen innerhalb des Sockels aus. HINWEIS: Um Beschädigungen am Speichermodul zu - Dell Precision 530 | Memory Riser Board Replacement - Page 60
w w w.d el l.co m | su p po rt. d ell. com Speichersteckkarten entfernen VORSICHTSHINWEIS: Le s en S i e b i t t e " V or si c h ts m aß na h m en " , bevor Sie dieses Verfahren ausführen. 1 Entfernen Sie die Luftstromverkleidung des Mikroprozessors. 2 Entfernen Sie den Halterungsträger der - Dell Precision 530 | Memory Riser Board Replacement - Page 61
Speichersteckkarten entfernen Halterungsträger der Speichersteckkarte Sicherungsklammern (2) Speichersteck karte A Speichersteck karte B Systemplatine Au s t a us c h de r S pe i c h er s t ec k k a rt e 61 - Dell Precision 530 | Memory Riser Board Replacement - Page 62
w w w.d el l.co m | su p po rt. d ell. com Speichersteckkarten einbauen HINWEIS: Die Speichersockel 3 und 4 der Systemplatine können entweder gar nicht oder aber mit CRIMMs belegt sein. Sockel 3 und 4 dürfen nicht mit RIMMs belegt sein, wenn in den Sockeln 1 und 2 Speichersteckkarten installiert - Dell Precision 530 | Memory Riser Board Replacement - Page 63
4 Installieren Sie den Halterungsträger der Speichersteckkarte: a Setzen Sie die Halterung in das Gehäuse, so daß die zwei Halterungsklammern in die Gehäuseschlitze führen. b Drücken Sie die Halterung gerade nach unten, bis diese im Gehäuse gesichert ist. Au s t a us c h de r S pe i c h er s t ec k - Dell Precision 530 | Memory Riser Board Replacement - Page 64
w w w.d el l.co m | su p po rt. d ell. com Speichersteckkarten einbauen Halterungsträger der Speichersteckkarte Speichersockel (4) 64 A us t a us c h de r S pe i c h er s t ec k k a rt e Speichersteck karte A Speichersteck karte B Systemplatine - Dell Precision 530 | Memory Riser Board Replacement - Page 65
Dell Precision™ WorkStation 530 REEMPLAZO DE LA TARJETA VERTICAL DE MEMORIA www.dell.com support.dell.com - Dell Precision 530 | Memory Riser Board Replacement - Page 66
del equipo. AVISO: Un AVISO indica la posibilidad de daños al hardware o pérdida de datos y le explica cómo Dell Computer Corporation. Marcas comerciales utilizadas en este texto: Dell, el logotipo DELL y Dell Precision son marcas comerciales de Dell Computer Corporation; Microsoft Windows y Windows - Dell Precision 530 | Memory Riser Board Replacement - Page 67
equipo de la estación de trabajo Dell Precision™ WorkStation 530. NOTA : Dell recomienda que este procedimiento sea realizado ú procedimientos descritos en este manual, consulte el Manual de servicio y la Guía del usuario. Puede acceder a estos documentos desde el Dell Precision ResourceCD o desde el - Dell Precision 530 | Memory Riser Board Replacement - Page 68
w w w.d el l.co m | su p po rt. d ell. com Conforme trabaje, toque periódicamente una superficie metálica sin pintura en el chasis del equipo para disipar cualquier electricidad estática que podría dañar los componentes internos. Asimismo, evite tocar los componentes o contactos de una tarjeta y - Dell Precision 530 | Memory Riser Board Replacement - Page 69
Apertura de la cubierta de la PC pestillo de liberación de la cubierta ranura para cable de seguridad anillo del candado Cómo cerrar la cubierta de la PC 1 Verifique todas las conexiones de cables, especialmente las que puedan haberse soltado durante su trabajo. Coloque los cables de manera que no - Dell Precision 530 | Memory Riser Board Replacement - Page 70
. Memoria del sistema Su equipo admite módulos de memoria en línea RDRAM (Rambus dynamic random-access memory [memoria de acceso aleatorio dinámica Rambus]) de dos canales (RIMM) con 64-, 128-, 256- y 512-megabytes (MB) de capacidad. Consulte "Directrices de instalación de memoria del sistema" para - Dell Precision 530 | Memory Riser Board Replacement - Page 71
. NOTA : El equipo no soporta los RIMM con seis dispositivos de memoria. NOTA : La cantidad de memoria disponible con Microsoft® Windows NT® y Windows® 2000 será ligeramente inferior a 4 GB, en función de la configuración del sistema. NOTA : Las tarjetas verticales de memoria solamente aceptan - Dell Precision 530 | Memory Riser Board Replacement - Page 72
w w w.d el l.co m | su p po rt. d ell. com par 2 par 1 Zócalo 4 Zócalo 3 Zócalo 2 Zócalo 1 Componentes de memoria de la placa base luz de suspensión a RAM (STR) 72 Ree m p la z o d e l a t a rj e t a v e r t ic a l de m em o r ia - Dell Precision 530 | Memory Riser Board Replacement - Page 73
de memoria de la tarjeta vertical luz de suspensión a RAM tarjeta vertical A luz de suspensión a RAM tarjeta vertical B Zócalo 4 Zócalo 3 par 4 Zócalo . Los zócalos de memoria 3 y 4 de la placa base pueden estar vacíos o contener módulos RIMM de continuidad (CRIMM). Los zócalos 3 y 4 no pueden - Dell Precision 530 | Memory Riser Board Replacement - Page 74
error checking and correction [código de corrección de errores Dell Precision 64 MB CRIMM vacío vacío 64 MB CRIMM vacío vacío 64 MB 64 MB CRIMM vacío 64 MB 64 MB CRIMM vacío 64 MB 64 MB 64 MB CRIMM 64 MB 64 MB 64 MB CRIMM 64 MB 64 MB 64 MB 64 MB 64 MB 64 MB 64 MB 64 - Dell Precision 530 | Memory Riser Board Replacement - Page 75
256 MB CRIMM vacío 256 MB 256 MB CRIMM vacío 256 MB 256 MB 64 MB 64 MB 256 MB 256 MB 64 MB 64 MB 256 MB 256 MB 128 MB 128 MB 256 MB 256 MB 128 MB MB CRIMM vacío 512 MB 512 MB CRIMM vacío 512 MB 512 MB 64 MB 64 MB 512 MB 512 MB 64 MB 64 MB 512 MB 512 MB 128 MB 128 MB 512 MB 512 MB 128 MB - Dell Precision 530 | Memory Riser Board Replacement - Page 76
w w w.d el l.co m | su p po rt. d ell. com 4 Para acceder a los zócalos de memoria de la placa base, desmonte la cubierta para flujo de aire del microprocesador. a Presione hacia abajo y hacia atrás sobre las cavidades ubicadas en las esquinas superiores de la cubierta. Las lengüetas de retención - Dell Precision 530 | Memory Riser Board Replacement - Page 77
memoria en todos los RIMM instalados. Con las tarjetas verticales de memoria instaladas, el equipo acepta un máximo de 128 dispositivos de memoria (64 dispositivos en cada tarjeta vertical). Consulte "Etiqueta del módulo de memoria" para obtener la ubicación de la etiqueta en el RIMM que identifica - Dell Precision 530 | Memory Riser Board Replacement - Page 78
). El equipo detecta que la nueva memoria no coincide con la información de configuración del equipo y genera el mensaje siguiente: The amount of system memory has changed. (La cantidad de memoria del sistema ha cambiado.) Strike the F1 key to continue, F2 to run the setup utility (Presione la tecla - Dell Precision 530 | Memory Riser Board Replacement - Page 79
ser necesario desmontar el ventilador del microprocesador 0. Para obtener instrucciones sobre cómo desmontar e instalar el ventilador del procesador, consulte el Manual de servicio. 2 Levante el módulo separándolo del zócalo. Desmontaje de un módulo de memoria Sujetadores (2) zócalo de memoria Re - Dell Precision 530 | Memory Riser Board Replacement - Page 80
w w w.d el l.co m | su p po rt. d ell. com Instalación de un módulo de memoria 1 Presione los sujetadores ubicados en cada extremo del zócalo hacia afuera hasta que se abran (consulte la siguiente figura). 2 Alinee las ranuras en la parte inferior del módulo con los bordes en el interior del zócalo - Dell Precision 530 | Memory Riser Board Replacement - Page 81
, puede ser necesario desmontar el ventilador del microprocesador 0. Para obtener instrucciones sobre cómo desmontar e instalar el ventilador del procesador, consulte el Manual de servicio. a Oprima simultáneamente los sujetadores del zócalo de la memoria 1 de la placa base hacia afuera hasta que la - Dell Precision 530 | Memory Riser Board Replacement - Page 82
w w w.d el l.co m | su p po rt. d ell. com Desmontaje de tarjetas verticales de memoria soporte de retención de tarjeta vertical de memoria Sujetadores (2) 82 Ree m p la z o d e l a t a rj e t a v e r t ic a l de m em o r ia tarjeta vertical de memoria A tarjeta vertical de memoria B placa base - Dell Precision 530 | Memory Riser Board Replacement - Page 83
Instalación de tarjetas verticales de memoria AVISO: Los zócalos de memoria 3 y 4 de la placa base pueden estar vacíos o contener módulos CRIMM. Los zócalos 3 y 4 no pueden contener módulos RIMM con tarjetas verticales de memoria instaladas en los zócalos 1 y 2. 1 Si hay módulos RIMM ocupando zó - Dell Precision 530 | Memory Riser Board Replacement - Page 84
w w w.d el l.co m | su p po rt. d ell. com 4 Instale el soporte de retención de la tarjeta vertical de memoria: a Baje el soporte hasta el chasis de manera que las dos lengüetas del soporte se inserten en las ranuras del chasis. b Presione el soporte hacia abajo hasta que quede fijo en el chasis. - Dell Precision 530 | Memory Riser Board Replacement - Page 85
Instalación de tarjetas verticales de memoria soporte de retención de tarjeta vertical de memoria zócalos de memoria (4) tarjeta vertical de memoria A tarjeta vertical de memoria B placa base Re e mp l a z o de l a t ar j e t a v er t i c al de me m o ri a 85 - Dell Precision 530 | Memory Riser Board Replacement - Page 86
w w w.d el l.co m | su p po rt. d ell. com 86 Ree m p la z o d e l a t a rj e t a v e r t ic a l de m em o r ia - Dell Precision 530 | Memory Riser Board Replacement - Page 87
06F506 A00 P/N 6F506 Rev. A00 Printed in the U.S.A. Imprimé aux U.S.A. Gedruckt in den USA. Impreso en los EE.UU. www.dell.com support.dell.com
-
 1
1 -
 2
2 -
 3
3 -
 4
4 -
 5
5 -
 6
6 -
 7
7 -
8
-
9
-
10
-
11
-
12
-
13
-
14
-
15
-
16
-
17
-
18
-
19
-
20
-
21
-
22
-
23
-
24
-
25
-
26
-
27
-
28
-
29
-
30
-
31
-
32
-
33
-
34
-
35
-
36
-
37
-
38
-
39
-
40
-
41
-
42
-
43
-
44
-
45
-
46
-
47
-
48
-
49
-
50
-
51
-
52
-
53
-
54
-
55
-
56
-
57
-
58
-
59
-
60
-
61
-
62
-
63
-
64
-
65
-
66
-
67
-
68
-
69
-
70
-
71
-
72
-
73
-
74
-
75
-
76
-
77
-
78
-
79
-
80
-
81
-
82
-
83
-
84
-
85
-
86
-
87
 |
 |

www.dell.com
support.dell.com
Dell Precision™ WorkStation 530
MEMORY RISER BOARD
REPLACEMENT
Remplacement de la carte de montage vertical de mémoire
Austausch der Speichersteckkarte
Reemplazo de la tarjeta vertical de memoria