Dell XPS Gen 3 Owner's Manual
Dell XPS Gen 3 Manual
 |
View all Dell XPS Gen 3 manuals
Add to My Manuals
Save this manual to your list of manuals |
Dell XPS Gen 3 manual content summary:
- Dell XPS Gen 3 | Owner's Manual - Page 1
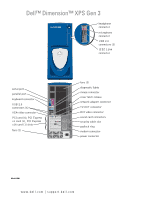
PCI Express x16 card (1) slots fans (2) fans (2) diagnostic lights mouse connector cover latch release network adapter connector TV-OUT connector DVI video connector sound card connectors security cable slot padlock ring modem connector power connector Model WHL www.dell.com | support.dell.com - Dell XPS Gen 3 | Owner's Manual - Page 2
rights reserved. Reproduction in any manner whatsoever without the written permission of Dell Inc. is strictly forbidden. Trademarks used in this text: Dell, the DELL logo, Inspiron, Dell Precision, Dimension, OptiPlex, Latitude, PowerEdge, PowerVault, PowerApp, DellNet, PowerConnect, and Axim are - Dell XPS Gen 3 | Owner's Manual - Page 3
With a DVI Connector 16 Connecting a TV 16 Changing the Display Settings 17 About Serial ATA Drives 17 About Your RAID Configuration 17 RAID Level 0 18 RAID Level 1 18 Configuring Your Computer 2 Optimizing Performance Hyper-Threading 29 Overclocking 29 PCI Express Cards 30 Contents 3 - Dell XPS Gen 3 | Owner's Manual - Page 4
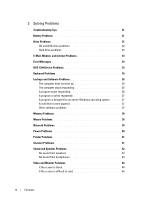
3 Solving Problems Troubleshooting Tips 31 Battery Problems 31 Drive Problems 31 CD and DVD drive problems 32 Hard drive problems 33 E-Mail, Modem, and Internet Problems 33 Error Messages 34 IEEE 1394 Device Problems 35 Keyboard Problems 35 Lockups and Software Problems 36 The computer - Dell XPS Gen 3 | Owner's Manual - Page 5
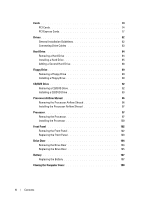
Troubleshooting Diagnostic Lights 47 Dell Diagnostics 50 When to Use the Dell Diagnostics 50 Drivers 53 What Is a Driver 53 Identifying Drivers 53 Reinstalling Drivers 54 Using Microsoft® Windows® XP System Board Components 69 Memory 70 Installing Memory 71 Removing Memory 73 Contents 5 - Dell XPS Gen 3 | Owner's Manual - Page 6
82 Connecting Drive Cables 83 Hard Drive 84 Removing a Hard Drive 84 Installing a Hard Drive 85 Adding a Second Hard Drive 88 Floppy Drive 89 Removing a Floppy Drive 89 Installing a Floppy Drive 90 CD/DVD Drive 92 Removing a CD/DVD Drive 92 Installing a CD/DVD Drive 93 Processor Airflow - Dell XPS Gen 3 | Owner's Manual - Page 7
System Setup 114 System Setup Options 115 Boot Sequence 118 Clearing Forgotten Passwords 119 Clearing CMOS Settings 120 Dell Technical Support Policy (U.S. Only 121 Definition of "Dell-Installed" Software and Peripherals 121 Definition of "Third-Party" Software and Peripherals 121 FCC - Dell XPS Gen 3 | Owner's Manual - Page 8
8 Contents - Dell XPS Gen 3 | Owner's Manual - Page 9
users. • Additional information about setting up my computer • How to troubleshoot and solve problems • How to remove and install parts • Technical specifications • How to contact Dell Dimension Owner's Manual NOTE: This document is available as a PDF at support.dell.com. Finding Information 9 - Dell XPS Gen 3 | Owner's Manual - Page 10
How to use standby mode and hibernate mode • How to change my display resolution • How to clean my computer The Dell Dimension Help file 1 Click the Start button and click Help and Support. 2 Click User and system guides and click User's guides. 3 Click Dell Dimension Help. 10 Finding Information - Dell XPS Gen 3 | Owner's Manual - Page 11
. The Dell Support website provides several online tools, including: • Solutions - Troubleshooting hints and tips, articles from technicians, and online courses • Community - Online discussion with other Dell customers • Upgrades - Upgrade information for components, such as memory, the hard drive - Dell XPS Gen 3 | Owner's Manual - Page 12
www.dell.com | support.dell.com What Are You Looking For? • How to reinstall my operating system Find it Here Operating System CD The operating system is already installed on your computer. To reinstall your operating system, use the Operating System CD. See "Reinstalling Microsoft® Windows® XP" - Dell XPS Gen 3 | Owner's Manual - Page 13
Setting Up and Using Your Computer Opening the Drive Door Changing the Backlight Color You can use this exclusive Dell™ Dimension™ XPS Gen 3 feature either to change the color of the backlight that illuminates the Dell name and displays around the badge on the front of your computer, or to turn off - Dell XPS Gen 3 | Owner's Manual - Page 14
www.dell.com | support.dell.com backlight badge There are several color choices: • Ruby • Emerald • Sapphire (default) • Amber • Amethyst • Topaz • Diamond CAUTION: Before you begin any of the procedures in this section, follow the safety instructions located in the Product Information Guide. - Dell XPS Gen 3 | Owner's Manual - Page 15
purchased a graphics card that supports dual monitors, follow these instructions to connect and enable your monitors. The instructions tell you integrated video, do not connect either monitor to the integrated video connector. If the integrated video connector is covered by a cap, do not remove the - Dell XPS Gen 3 | Owner's Manual - Page 16
www.dell.com | support.dell.com optional DVI adapter DVI (white) connector TV-OUT connector : To connect a TV to your computer, you must purchase an S-video cable, which is available at most consumer electronics stores. An S-video cable is not included with your computer. 1 Follow the procedures in - Dell XPS Gen 3 | Owner's Manual - Page 17
the Start button, click Help and Support, click User and system guides, click Device guides, and then click the guide for your graphics card). About Serial ATA Drives Your Dell™ Dimension™ XPS computer supports up to three serial ATA hard drives. Serial ATA drives provide the following benefits by - Dell XPS Gen 3 | Owner's Manual - Page 18
www.dell.com | support.dell.com RAID Level 0 RAID level 0 uses a storage technique known as "data striping" to provide a high data access rate. Data striping is a method of writing consecutive segments, or stripes, of data sequentially across the physical drives to create a large virtual drive. - Dell XPS Gen 3 | Owner's Manual - Page 19
for RAID if you did not select a RAID configuration when you purchased your computer. You must have at least two hard drives installed in your computer to set up a RAID configuration. For instructions on how to install a hard drive, see page 85. You can use one of two methods to configure RAID - Dell XPS Gen 3 | Owner's Manual - Page 20
dell.com | support.dell.com 5 Use the left- and right-arrow keys to highlight Save/Exit, and press to exit system setup and resume the boot process. Configuring for RAID Using the Intel(R) Option ROM Utility NOTE: Although any size drives hard drives Microsoft® Windows® XP" on page 57 - Dell XPS Gen 3 | Owner's Manual - Page 21
"Reinstalling Microsoft® Windows® XP" on page 57). Deleting a RAID Volume NOTE: When you perform this operation, all data on the RAID drives will be lost. NOTE: have one hard drive with the operating system installed on it, and you want to add a second hard drive and reconfigure both drives into a - Dell XPS Gen 3 | Owner's Manual - Page 22
www.dell.com | support.dell.com Creating a RAID 0 Volume NOTE: When you perform this operation, all data on the RAID drives will be lost. click the first hard drive you want to use to create your RAID 0 volume, and then click the right arrow. Click a second hard drive until two drives appear in the - Dell XPS Gen 3 | Owner's Manual - Page 23
size. 7 Select the appropriate strip size from the drop-down box, and then click Next. NOTE: Select the hard drive that you want to use as your source hard drive (it should be the hard drive containing the data or operating system files that you want to keep on the RAID volume). 8 On the Select - Dell XPS Gen 3 | Owner's Manual - Page 24
www.dell.com | support.dell.com 11 Click Finish to start migrating, or click Back down box, select RAID 1 as the RAID level. NOTE: Select the hard drive that you want to use as your source hard drive (it should be the hard drive containing the data or operating system files that you want to keep on - Dell XPS Gen 3 | Owner's Manual - Page 25
To Remove Spare Marking From a Spare Hard Drive: 1 Right-click the spare hard drive icon. 2 Click Reset Hard Drive to Non-RAID Rebuilding a Degraded RAID 1 Volume If your computer does not have a spare hard drive, and the computer has reported a degraded RAID 1 volume, you can manually rebuild the - Dell XPS Gen 3 | Owner's Manual - Page 26
and you experience recording problems, check for available software patches at the Sonic support website at support.sonic.com. Currently, five DVD-writable disc formats available: DVD+R, DVD+RW, DVD-R, DVD-RW and DVD-RAM. The DVD-writable drives installed in Dell™ computers will write to DVD+R and - Dell XPS Gen 3 | Owner's Manual - Page 27
either the audio tab or hard drive. When prompted, insert a blank CD or DVD into the CD or DVD drive and click OK. • If you have two CD or DVD drives, select the drive update data on CDs. Your DVD writable drive can write to four different types of recording media-CD-Rs, CD-RWs (including High-Speed - Dell XPS Gen 3 | Owner's Manual - Page 28
you record the project permanently to a blank CD-R. • See the Sonic support website at support.sonic.com for additional information. Network Setup Wizard The Microsoft® Windows® XP operating system provides a Network Setup Wizard to guide you through the process of sharing files, printers, or an - Dell XPS Gen 3 | Owner's Manual - Page 29
113. For more information on Hyper-Threading, search the Knowledge Base on the Dell Support website at support.dell.com. Overclocking Dell locks the processor multiplier options in system setup to prevent processor overclocking. The first and most important reason for preventing overclocking is that - Dell XPS Gen 3 | Owner's Manual - Page 30
www.dell.com | support.dell.com PCI Express Cards PCI Express is the next generation technology for graphics cards and PCI cards. The dimensions of PCI Express card slots are different from PCXI card slots, and the cards are not interchangeable (you cannot install a PCI card in a PCI Express card - Dell XPS Gen 3 | Owner's Manual - Page 31
start-up, replace the battery (see page 107). If the battery still does not work properly, contact Dell (see page 123). Drive Problems CAUTION: Before you begin any of the procedures in this section, follow the safety instructions located in the Product Information Guide. ENSURE THAT MICROSOFT - Dell XPS Gen 3 | Owner's Manual - Page 32
. CLEAN THE DRIVE OR DISK - See "The Dell Dimension Help file" on page 10. CHECK THE CABLE CONNECTIONS RUN THE HARDWARE TROUBLESHOOTER - See page 57. RUN THE DELL DIAGNOSTICS - See page 50. CD and DVD drive problems NOTE: High-speed CD or DVD drive vibration is normal and may cause noise, which does - Dell XPS Gen 3 | Owner's Manual - Page 33
Hard drive problems RUN CHECK Problems CAUTION: Before you begin any of the procedures in this section, follow the safety instructions located in the Product Information Guide click Security. 2 Click Do not allow attachments to remove the checkmark. CHECK THE TELEPHONE LINE CONNECTION - CHECK THE - Dell XPS Gen 3 | Owner's Manual - Page 34
to it, click the checkmark to remove it and connect to the Internet. For help, contact your Internet service provider. Error Messages CAUTION: Before you begin any of the procedures in this section, follow the safety instructions located in the Product Information Guide. If the message is not listed - Dell XPS Gen 3 | Owner's Manual - Page 35
that you want to use first. OPERATING SYSTEM NOT FOUND - Contact Dell (see page 123). IEEE 1394 Device Problems CAUTION: Before you begin any of the procedures in this section, follow the safety instructions located in the Product Information Guide. ENSURE THAT THE CABLE FOR THE IEEE 1394 DEVICE IS - Dell XPS Gen 3 | Owner's Manual - Page 36
TROUBLESHOOTER - See page 57. Lockups and Software Problems CAUTION: Before you begin any of the procedures in this section, follow the safety instructions located in the Product Information Guide. The computer does not start up CHECK THE DIAGNOSTIC LIGHTS - See page 47. ENSURE THAT THE POWER - Dell XPS Gen 3 | Owner's Manual - Page 37
or moving your mouse, press and hold the power button for at least 8 to 10 seconds until the computer turns off. Then restart your computer. Other software problems CHECK THE SOFTWARE DOCUMENTATION OR CONTACT THE SOFTWARE MANUFACTURER FOR TROUBLESHOOTING INFORMATION - • Ensure that the program is - Dell XPS Gen 3 | Owner's Manual - Page 38
about the type of memory supported by your computer, see "Memory" on page 109. • Run the Dell Diagnostics (see page 50). Mouse Problems CAUTION: Before you begin any of the procedures in this section, follow the safety instructions located in the Product Information Guide. CHECK THE MOUSE CABLE - Dell XPS Gen 3 | Owner's Manual - Page 39
DRIVER - See page 54. RUN THE HARDWARE TROUBLESHOOTER - See page 57. Network Problems CAUTION: Before you begin any of the procedures in this section, follow the safety instructions located in the Product Information Guide cable. For a description of network lights, see "Connectors" on page 111. - Dell XPS Gen 3 | Owner's Manual - Page 40
.com | support.dell.com Power Problems CAUTION: Before you begin any of the procedures in this section, follow the safety instructions located in the Product Information Guide. IF THE POWER LIGHT IS GREEN AND THE COMPUTER IS NOT RESPONDING - See "Diagnostic Lights" on page 47. IF THE POWER LIGHT IS - Dell XPS Gen 3 | Owner's Manual - Page 41
, follow the safety instructions located in the Product Information Guide. NOTE: If you need technical assistance for your scanner, contact the scanner's manufacturer. CHECK THE SCANNER DOCUMENTATION - See the scanner documentation for setup and troubleshooting information. Solving Problems 41 - Dell XPS Gen 3 | Owner's Manual - Page 42
recognizes the scanner. REINSTALL THE SCANNER DRIVER - See the scanner documentation for instructions. Sound and Speaker Problems CAUTION: Before you begin any of the procedures in this section, follow the safety instructions located in the Product Information Guide. No sound from speakers NOTE: The - Dell XPS Gen 3 | Owner's Manual - Page 43
INTERFERENCE - Turn off nearby fans, fluorescent lights, or halogen lamps to check for interference. RUN THE SPEAKER DIAGNOSTICS REINSTALL THE SOUND DRIVER - See page 53. RUN THE HARDWARE TROUBLESHOOTER - See page 57. No the volume is turned up and that the sound is not muted. Solving Problems 43 - Dell XPS Gen 3 | Owner's Manual - Page 44
www.dell.com | support.dell.com Video and Monitor Problems CAUTION: Before you begin any of the procedures in this section, follow the safety instructions located in the Product Information Guide. If the screen is blank NOTE: See the monitor documentation for troubleshooting procedures. CHECK THE - Dell XPS Gen 3 | Owner's Manual - Page 45
ADJUST THE WINDOWS DISPLAY SETTINGS - 1 Click the Start button, click Control Panel, and then click Appearance and Themes. 2 Click Display and click the Settings tab. 3 Try different settings for Screen resolution and Color quality. Solving Problems 45 - Dell XPS Gen 3 | Owner's Manual - Page 46
www.dell.com | support.dell.com 46 Solving Problems - Dell XPS Gen 3 | Owner's Manual - Page 47
Advanced Troubleshooting Diagnostic Lights CAUTION: Before you begin any of the procedures in this section, follow the safety instructions located in the Product Information Guide. To help you troubleshoot a problem, your computer has four lights labeled "A," "B," "C," and "D" on the back panel ( - Dell XPS Gen 3 | Owner's Manual - Page 48
.dell.com | support.dell.com Light Pattern ABCD ABCD ABCD Problem Description Memory modules are detected, but a memory failure has occurred. A possible graphics card failure has occurred. A possible floppy or hard drive failure has occurred. Suggested Resolution • If you have two or more memory - Dell XPS Gen 3 | Owner's Manual - Page 49
• Verify that the memory modules that you are installing are compatible with your computer (see page 70). • If the problem persists, contact Dell (see page 123). A possible expansion card failure has occurred. 1 Determine if a conflict exists by removing a card (not a graphics card) and restarting - Dell XPS Gen 3 | Owner's Manual - Page 50
Problems" (see page 31) and run the Dell Diagnostics before you contact Dell for technical assistance. NOTICE: The Dell Diagnostics works only on Dell™ computers. Start the Dell Diagnostics from either your hard drive (see page 50) or from the Dell Dimension ResourceCD. 50 Advanced Troubleshooting - Dell XPS Gen 3 | Owner's Manual - Page 51
Starting the Dell Diagnostics From Your Hard Drive 1 Turn on (or restart) your computer. 2 When the DELL™ logo appears, press immediately. NOTE: If you see a message stating that no diagnostics utility partition has been found, run the Dell Diagnostics from your ResourceCD (see page 51). If - Dell XPS Gen 3 | Owner's Manual - Page 52
Write down the error code and problem description and follow the instructions on the screen. If you cannot resolve the error condition, contact Dell (see page 123). NOTE: The Service Tag for your computer is located at the top of each test screen. If you contact Dell, technical support will ask for - Dell XPS Gen 3 | Owner's Manual - Page 53
, if you are running the Dell Diagnostics from the ResourceCD, remove the CD. 5 Close the test screen to return to the Main Menu screen. To exit the Dell Diagnostics and restart the computer, close the Main Menu screen. Drivers What Is a Driver? A driver is a program that controls a device - Dell XPS Gen 3 | Owner's Manual - Page 54
at support.dell.com and your Dell Dimension ResourceCD provide approved drivers for Dell™ computers. If you install drivers obtained from other sources, your computer might not work correctly. Using Windows XP Device Driver Rollback If a problem occurs on your computer after you install or update - Dell XPS Gen 3 | Owner's Manual - Page 55
that you want to reinstall and follow the instructions on the screen. If a particular driver is not listed, then that driver is not required by your operating system. Manually Reinstalling Drivers 1 After extracting the driver files to your hard drive as described in the previous section, click the - Dell XPS Gen 3 | Owner's Manual - Page 56
www.dell.com | support.dell.com Creating a Restore Point 1 Click the Start button and click Help and Support. 2 Click System Restore. 3 Follow the instructions on the screen. Restoring the Computer to an Earlier Operating State If problems occur after you install a device driver, use Device Driver - Dell XPS Gen 3 | Owner's Manual - Page 57
state it was in before you installed the new device driver. NOTICE: Before performing the installation, back up all data files on your primary hard drive. For conventional hard drive configurations, the primary hard drive is the first drive detected by the computer. Advanced Troubleshooting 57 - Dell XPS Gen 3 | Owner's Manual - Page 58
can overwrite files and possibly affect programs installed on your hard drive. Therefore, do not reinstall Windows XP unless a Dell technical support representative instructs you to do so. NOTICE: To prevent conflicts with Windows XP, disable any virus protection software installed on your computer - Dell XPS Gen 3 | Owner's Manual - Page 59
follow the instructions on the screen. The Windows XP Setup screen appears, and the operating system begins to copy files and install the devices. The computer automatically restarts multiple times. NOTE: The time required to complete the setup depends on the size of the hard drive and the speed of - Dell XPS Gen 3 | Owner's Manual - Page 60
www.dell.com | support.dell.com 19 Reinstall the appropriate drivers with the ResourceCD (see page 54). 20 Reinstall your virus protection software. 21 Reinstall your programs. NOTE: number located on the back of the Microsoft Office or Microsoft Works Suite CD sleeve. 60 Advanced Troubleshooting - Dell XPS Gen 3 | Owner's Manual - Page 61
in your Dell™ Product Information Guide. • A component can be replaced by performing the removal procedure in reverse order. Recommended Tools The procedures in this document may require the following tools: • Small flat-blade screwdriver • Phillips screwdriver • Flash BIOS update program floppy - Dell XPS Gen 3 | Owner's Manual - Page 62
this section, follow the safety instructions located in the Product Information Guide. CAUTION: Handle components and cards with care. Do not touch the components or contacts on a card. Hold a card by its edges or by its metal mounting bracket. Hold a component such as a processor by its edges, not - Dell XPS Gen 3 | Owner's Manual - Page 63
Front and Back View of the Computer Front View 1 2 3 4 1 hard-drive activity light 2 power button 3 drive door 4 front-panel door The hard-drive light is on when the computer reads data from or writes data to the hard drive. The light might also be on when a device such as your CD player is - Dell XPS Gen 3 | Owner's Manual - Page 64
www.dell.com | support.dell.com Front View (Doors Open) 1 2 3 4 1 headphone connector 2 microphone connector 3 USB 2.0 connectors remain connected, such as printers and keyboards. Attach high-speed serial multimedia devices, such as digital video cameras. 64 Removing and Installing Parts - Dell XPS Gen 3 | Owner's Manual - Page 65
1 processor fans (2) For optimal cooling, two processor fans are card, use the connector on the card. It is recommended that you use Category 5 wiring and connectors for your network. If you must use Category 3 wiring, force the network speed to 10 Mbps to ensure reliable operation. Removing - Dell XPS Gen 3 | Owner's Manual - Page 66
. If you have a USB printer, plug it into a USB connector. 14 diagnostic lights (4) Use the lights to help you troubleshoot a computer problem based on the diagnostic code. For more information, see "Diagnostics Lights" on page 47. 15 keyboard connector If you have a standard keyboard, plug - Dell XPS Gen 3 | Owner's Manual - Page 67
begin any of the procedures in this section, follow the safety instructions located in the Product Information Guide. CAUTION: To prevent static damage to components inside your computer, the computer. cover release latch security cable slot padlock ring Removing and Installing Parts 67 - Dell XPS Gen 3 | Owner's Manual - Page 68
www.dell.com | support.dell.com Inside View of Your Computer floppy drive CD/DVD drive processor airflow shroud hard drive shroud PCI card shroud and fan processor fan power supply fans (2) system board power supply 68 Removing and Installing Parts - Dell XPS Gen 3 | Owner's Manual - Page 69
4) memory module connectors (1, 3) processor fan (CPU FAN) processor and heatsink connector serial ATA connectors (SATA-0, SATA-1, SATA-2, SATA-3) password jumper (PASS) SCSI LED header (SCSI LED) front-panel connector (FRONT PANEL) internal speaker (SPKR) card fan connector (PCI_FAN) clear CMOS - Dell XPS Gen 3 | Owner's Manual - Page 70
3200 (DDR2 400-MHz) and PC2-4200 (DDR2 533-MHz) memory, the modules function at the slowest speed installed. • Be sure to install a single memory module in DIMM connector 1, the connector closest to the processor, before you install modules in the other connectors. 70 Removing and Installing Parts - Dell XPS Gen 3 | Owner's Manual - Page 71
pair of modules in DIMM connectors 1 and 2 (white securing clips) NOTE: Memory purchased from Dell is covered under your computer warranty. NOTICE: If you remove your original memory modules from the computer during a memory upgrade, keep them separate from any new modules that you may have, even if - Dell XPS Gen 3 | Owner's Manual - Page 72
dell.com | support.dell.com 3 Press out the securing clip at each end of the memory module connector. memory connector closest to processor securing clips (2) connector 4 Align the notch on the bottom of the module with the crossbar in the connector. notch memory . 72 Removing and Installing Parts - Dell XPS Gen 3 | Owner's Manual - Page 73
the General tab. 10 To verify that the memory is installed correctly, check the amount of memory (RAM) listed. Removing Memory CAUTION: Before you begin any of the procedures in this section, follow the safety instructions located in the Product Information Guide. NOTICE: To prevent static damage to - Dell XPS Gen 3 | Owner's Manual - Page 74
support.dell.com Your Dell™ computer provides the following slots for PCI and PCI Express cards: • Four PCI card slots • One PCI Express x16 card slot • One PCI Express x1 card slot PCI Cards If you are installing or replacing a card, follow the procedures in the next section. If you are removing - Dell XPS Gen 3 | Owner's Manual - Page 75
within slot bracket caught outside of slot 7 Before you lower the retention arm, ensure that: • The tops of all cards and filler brackets are flush with the alignment bar. • The notch in the top of the card or filler bracket fits around the alignment guide. Removing and Installing Parts 75 - Dell XPS Gen 3 | Owner's Manual - Page 76
www.dell.com | support.dell.com 8 Press the retention arm into place, securing the card(s) in the computer. retention arm alignment bar alignment guide filler bracket NOTICE: Do not route card cables over or behind the cards. Cables routed over the cards can prevent the computer cover from closing - Dell XPS Gen 3 | Owner's Manual - Page 77
the computer. 7 Close the computer cover, reconnect the computer and devices to electrical outlets, and turn them on. 8 Remove the card's driver from the operating system. 9 If you removed an add-in network connector and want to enable the integrated network adapter: a Enter system setup, select - Dell XPS Gen 3 | Owner's Manual - Page 78
www.dell.com | support.dell.com Installing a PCI Express Card 1 Follow the procedures in "Before You Begin" on page 61. 2 Press the lever on the card retention arm and raise the retention arm. tab top of retention mechanism filler bracket retention arm lever x16 card securing slot securing tab - Dell XPS Gen 3 | Owner's Manual - Page 79
end of the card into the card guide bracket as you lower the card toward its connector on the system board. Insert the card firmly into the card connector on the system board. not fully seated card fully seated card bracket within slot bracket caught outside of slot Removing and Installing Parts - Dell XPS Gen 3 | Owner's Manual - Page 80
www.dell.com | support.dell.com 8 If you replaced a card that was already installed in the computer and you removed the top of the retention mechanism, you can reinstall the top. 9 Before you lower the retention arm, ensure that: • The tops of all cards and filler brackets are flush with the - Dell XPS Gen 3 | Owner's Manual - Page 81
removing the card permanently, install a filler bracket in the empty card-slot opening. If you need a filler bracket, contact Dell (see page 123). NOTE: Installing filler brackets over empty card turn them on. 9 Remove the card's driver from the operating system. 10 If you removed an add-in network - Dell XPS Gen 3 | Owner's Manual - Page 82
www.dell.com | support.dell.com Drives Your computer supports a combination of these devices: • Up to three hard drives • One floppy drive • Up to two CD or DVD drives floppy drive CD/DVD drive(s) hard drive(s) General Installation Guidelines Connect serial ATA hard drives to the system board - Dell XPS Gen 3 | Owner's Manual - Page 83
power cable and a data cable-to the back of the drive and to the system board. Some drives may also have an audio connector; one end of the audio cable attaches to the drive connector and the other end attaches to the system board. Drive an attached cover or shroud. Removing and Installing Parts 83 - Dell XPS Gen 3 | Owner's Manual - Page 84
.dell.com | support.dell.com Power Cable Connector power input connector power cable Hard Drive CAUTION: Before you begin any of the procedures in this section, follow the safety instructions located in the Product Information Guide. NOTICE: To avoid damage to the drive, do not set it on a hard - Dell XPS Gen 3 | Owner's Manual - Page 85
the power and hard-drive cables from the drive and from the system board. hard-drive cable power cable tabs (2) hard drive system board connector 4 Press in on the tabs on each side of the drive and slide the drive up and out. Installing a Hard Drive 1 Unpack the replacement hard drive, and - Dell XPS Gen 3 | Owner's Manual - Page 86
www.dell.com | support.dell.com 4 Install the hard drive into the computer by gently sliding the drive into place until the tabs securely click into position. NOTE: If you are installing a hard drive in the lower bay, place the drive in the bay so that the power connector is on the left-hand side - Dell XPS Gen 3 | Owner's Manual - Page 87
system setup (see page 114), and update the appropriate Drive option. 16 Exit system setup, and restart the computer. 17 Partition and logically format your drive before you proceed to the next step. See the documentation for your operating system for instructions. Removing and Installing Parts 87 - Dell XPS Gen 3 | Owner's Manual - Page 88
the hard drive by running the Dell Diagnostics (see page 50). 19 If the drive you just installed is the primary drive, install your operating system on the hard drive. Adding a Second Hard Drive CAUTION: Before you begin any of the procedures in this section, follow the safety instructions located - Dell XPS Gen 3 | Owner's Manual - Page 89
rail tabs (2) second hard drive in upper bay first hard drive in lower bay hard drive bay 7 Connect a power cable to the drive. 8 Connect the hard-drive cable to the drive and to the system board (see page 69). 9 Close the computer cover (see page 108). NOTICE: To connect a network cable, first plug - Dell XPS Gen 3 | Owner's Manual - Page 90
www.dell.com | support.dell.com data cable power cable tabs (2) floppy drive 3 Press inward on the two tabs on the sides of the drive, slide the drive upward, and remove it from the floppy-drive bay. Installing a Floppy Drive 1 If you are replacing a drive and the new drive does not have the - Dell XPS Gen 3 | Owner's Manual - Page 91
drive bracket rails (2) screws (4) 2 Gently slide the drive into place until the tabs securely click into position. data cable power cable tabs (2) floppy drive Removing and Installing Parts 91 - Dell XPS Gen 3 | Owner's Manual - Page 92
and update the appropriate Diskette Drive option. 9 Verify that your computer works correctly by running the Dell Diagnostics (see page 50). CD/DVD Drive CAUTION: Before you begin any of the procedures in this section, follow the safety instructions located in the Product Information Guide. CAUTION - Dell XPS Gen 3 | Owner's Manual - Page 93
power cable tabs (2) data cable CD/DVD drive 3 Press inward on the two tabs on the sides of the drive, and then slide the drive upward and remove it from the drive bay. Installing a CD/DVD Drive 1 If you are installing a new drive, unpack the drive and prepare it for installation. Check the - Dell XPS Gen 3 | Owner's Manual - Page 94
www.dell.com | support.dell.com 3 If you are installing a replacement drive and the new drive does not have the bracket rails attached, remove the rails from the old drive by removing the two screws that secure each rail to the drive. Attach the bracket to the new drive by aligning the screw holes - Dell XPS Gen 3 | Owner's Manual - Page 95
that came with the drive for instructions on installing any software required for drive operation. 9 Enter system setup (see page 69) and select the appropriate Drive option. 10 Verify that your computer works correctly by running the Dell Diagnostics (see page 50). Removing and Installing Parts - Dell XPS Gen 3 | Owner's Manual - Page 96
dell.com | support.dell.com Processor Airflow Shroud Removing the Processor Airflow Shroud CAUTION: Before you perform this procedure, follow the safety instructions located in the Product Information Guide computer chassis. NOTICE: To avoid damaging the fan power cables, do not slide the shroud too - Dell XPS Gen 3 | Owner's Manual - Page 97
For technical service, see "Contacting Dell" on page 123. CAUTION: Before you begin any of the procedures in this section, follow the safety instructions located in the Product Information Guide. 1 Follow the procedures in "Before You Begin" on page 61. 2 Disconnect the cooling fan power cable from - Dell XPS Gen 3 | Owner's Manual - Page 98
www.dell.com | support.dell.com anchor tabs (3) shroud release lever CAUTION: The heat sink can get very hot during normal operation. Be sure that the heat sink has had sufficient time to cool before you touch it. 5 Remove the heat sink: a Remove the retention module clips. Press the tabs toward - Dell XPS Gen 3 | Owner's Manual - Page 99
the power supply. Press on the retention base tab until the heat sink pops up slightly. c Press out on the second retention tab while lifting the heat sink up and out of the retention base. NOTICE: Lay the heat sink down on its side. NOTICE: If you are installing a processor upgrade kit from Dell - Dell XPS Gen 3 | Owner's Manual - Page 100
www.dell.com | support.dell.com processor cover processor socket release lever 8 Remove the processor from the socket. Leave the release lever extended in the release position so that the socket is ready for the new processor. Installing the Processor NOTICE: Ground yourself by touching an - Dell XPS Gen 3 | Owner's Manual - Page 101
: If you are not installing a processor upgrade kit from Dell, reuse the original heat sink assembly when you replace the processor. If you installed a processor replacement kit from Dell, return the original heat sink assembly and processor to Dell in the same package in which your replacement - Dell XPS Gen 3 | Owner's Manual - Page 102
dell.com | support.dell 10 Reconnect the cooling fan power cable to the REAR FAN1 connector instructions located in the Product Information Guide. Removing the Front Panel 1 Follow the procedures in "Before You Begin" on page 61. 2 Disconnect and remove all disk drives (for more information, see "Drives - Dell XPS Gen 3 | Owner's Manual - Page 103
4 Close the computer cover halfway and pull the front panel away from the computer. Replacing the Front Panel To replace the front panel, perform the removal procedure in reverse. Removing and Installing Parts 103 - Dell XPS Gen 3 | Owner's Manual - Page 104
www.dell.com | support.dell.com Drive Door CAUTION: Before you begin any of the procedures in this section, follow the safety instructions located in the Product Information Guide. Removing the Drive Door 1 Open the drive door. 104 Removing and Installing Parts - Dell XPS Gen 3 | Owner's Manual - Page 105
is designed to "break away" from the computer if it is opened too far. If the drive door detaches from the computer without disassembling, perform the removal procedure in reverse. If the drive door is open and it is opened too far, instead of breaking away from the computer in one piece, the - Dell XPS Gen 3 | Owner's Manual - Page 106
www.dell.com | support.dell.com hinge tab door hinges (2) door bracket 2 Attach the door bracket/door hinge assembly to the door, starting with the lower part of each door hinge. door bracket/door hinge assembly door lower part of the door hinge 3 Attach the drive door to the computer, starting - Dell XPS Gen 3 | Owner's Manual - Page 107
Replacing the Battery CAUTION: Before you begin any of the procedures in this section, follow the safety instructions located in the Product Information Guide. NOTICE: To prevent static damage to components inside your computer, discharge static electricity from your body before you touch any - Dell XPS Gen 3 | Owner's Manual - Page 108
www.dell.com | support.dell.com NOTICE: To connect a settings you recorded in step 1. 9 Properly dispose of the old battery. See the Product Information Guide for battery disposal information. Closing the Computer Cover 1 Ensure that all cables are turn them on. 108 Removing and Installing Parts - Dell XPS Gen 3 | Owner's Manual - Page 109
Level 2 (L2) cache Memory Type Memory connectors Memory capacities Minimum memory Maximum memory BIOS address Computer Information Chipset DMA channels Interrupt levels BIOS chip (NVRAM) NIC System clock Intel® Pentium® 4 with HT Technology NOTE: Not all Pentium 4 processors support Hyper-Threading - Dell XPS Gen 3 | Owner's Manual - Page 110
www.dell.com | support.dell.com Video Type Expansion Bus Bus type Bus speed PCI Express PCI 2.3 PCI Express x1 and x16 PCI: 33 MHz PCI Express: x1 slot bidirectional speed - 500 MB/s x16 slot bidirectional speed - 8 GB/s PCI connector four connector size 120 pins connector data width ( - Dell XPS Gen 3 | Owner's Manual - Page 111
1394 Video Network adapter PS/2 (keyboard and mouse) USB Audio System board connectors: Primary IDE drive Serial ATA Floppy drive Fan PCI 2.3 PCI Express x1 PCI Express x16 Telephony (TAPI) Controls and Lights Power control Power light Hard-drive access light two bays for 1-inch high hard drives - Dell XPS Gen 3 | Owner's Manual - Page 112
www.dell.com | support.dell.com Controls and Lights (continued) Link integrity light (on integrated network adapter) Activity light (on integrated network adapter) Diagnostic lights Standby power light Case backlight green light - A good connection exists between a 10-Mbps network and the computer - Dell XPS Gen 3 | Owner's Manual - Page 113
the system configuration information after you add, change, or remove any hardware in your computer • To set or change a user-selectable option such as the user password • To read the current amount of memory or set the type of hard drive installed Before you use system setup, it is recommended - Dell XPS Gen 3 | Owner's Manual - Page 114
dell.com | support.dell.com Entering System Setup 1 Turn on (or restart) your computer. 2 When the blue DELL™ logo appears, press immediately. If you wait too long and the operating system logo appears, continue to wait until you see the Microsoft® Windows® desktop hardware, power conservation, - Dell XPS Gen 3 | Owner's Manual - Page 115
name, the BIOS version number and date, system tags, and other system-specific information. Identifies whether the computer's processor supports Hyper-Threading and lists the processor bus speed, processor ID, clock speed, and L2 cache. Indicates amount of installed memory, memory speed, channel - Dell XPS Gen 3 | Owner's Manual - Page 116
. Performance HyperThreading If your computer's processor supports Hyper-Threading, this option appears in the Options List. Performance • Bypass - Your computer does not test or change the current acoustics mode setting. • Quiet (default) - The hard drive operates at its most quiet setting - Dell XPS Gen 3 | Owner's Manual - Page 117
Auto Power On Auto Power Time Low Power Mode Remote Wake Up Suspend Mode Maintenance CMOS Defaults Event Log BIOS Update POST Behavior and S3, a standby state where the power is reduced or turned off for most components, however, system memory remains active. This setting restores the computer - Dell XPS Gen 3 | Owner's Manual - Page 118
this feature, for example, to tell the computer to boot from the CD drive so that you can run the Dell Diagnostics on the Dell Dimension ResourceCD, but you want the computer to boot from the hard drive when the diagnostic tests are complete. You can also use this feature to restart your computer - Dell XPS Gen 3 | Owner's Manual - Page 119
example, if you are booting to a USB memory key, highlight USB Flash Device and press - Dell XPS Gen 3 | Owner's Manual - Page 120
dell.com | support.dell Microsoft® Windows® desktop appears on your instructions located in the Product Information Guide. 1 Follow the procedures in "Before You Begin" on page 61. 2 Reset the current CMOS settings: a Locate the 3-pin CMOS jumper (CLR CMOS) on the system board (see page 69). b Remove - Dell XPS Gen 3 | Owner's Manual - Page 121
support requires the cooperation and participation of the customer in the troubleshooting process and provides for restoration of the operating system, software programs, and hardware drivers to the original default configuration as shipped from Dell card-mounting brackets, and on the cards - Dell XPS Gen 3 | Owner's Manual - Page 122
dell.com | support.dell.com Once you have determined your system's FCC classification, read the appropriate FCC notice. Note that FCC regulations provide that changes or modifications not expressly approved by Dell accordance with the manufacturer's instruction manual, may cause interference with - Dell XPS Gen 3 | Owner's Manual - Page 123
International Access Code: 00 Country Code: 54 City Code: 11 Aruba Department Name or Service Area, Website and E-Mail Address General Support General Support Website: www.dell.com.ar Tech Support and Customer Care Sales Tech Support Fax Customer Care Fax General Support Area Codes, Local Numbers - Dell XPS Gen 3 | Owner's Manual - Page 124
Website: support.euro.dell.com International Access Code: 00 E-mail: [email protected] Country Code: 32 City Code: 2 E-mail for French Speaking Customers: support.euro.dell.com/be/fr/emaildell/ Technical Support Customer Care Corporate Sales Fax Switchboard Bermuda General Support Bolivia - Dell XPS Gen 3 | Owner's Manual - Page 125
www.dell.com/br International Access Code: 00 Customer Support, Technical Support Country Code: 55 Tech Support Fax City Code: 51 Customer Care Fax Sales British Virgin Islands General Support Brunei Customer Technical Support (Penang, Malaysia) Country Code: 673 Customer Service (Penang - Dell XPS Gen 3 | Owner's Manual - Page 126
Code Country Code City Code China (Xiamen) Country Code: 86 City Code: 592 Colombia Costa Rica Department Name or Service Area, Website and E-Mail Address Tech Support website: support.dell.com.cn Tech Support E-mail: [email protected] Tech Support Fax Technical Support (Dimension™ and Inspiron - Dell XPS Gen 3 | Owner's Manual - Page 127
Name or Service Area, Website and E-Mail Address Website: support.euro.dell.com E-mail: [email protected] Technical Support Customer Care Fax TechFax Switchboard Website: support.euro.dell.com E-mail Support (portable computers): [email protected] E-mail Support (desktop computers - Dell XPS Gen 3 | Owner's Manual - Page 128
www.dell.com | support.dell.com Country (City) International Access Code Country Code City Code Department Name or Service Area, Website and E-Mail Address Finland (Helsinki) Website: support.euro.dell.com International Access Code: 990 E-mail: [email protected] Country Code: 358 City Code: - Dell XPS Gen 3 | Owner's Manual - Page 129
Support Gold Technical Support Switchboard Sales Fax Grenada General Support Guatemala General Support Guyana General Support Hong Kong Website: support.ap.dell.com International Access Code: 001 E-mail: [email protected] Country Code: 852 Technical Support (Dimension™ and Inspiron - Dell XPS Gen 3 | Owner's Manual - Page 130
Access Code: 16 Country Code: 353 City Code: 1 Italy (Milan) International Access Code: 00 Country Code: 39 City Code: 02 Jamaica Department Name or Service Area, Website and E-Mail Address Technical Support Sales Website: support.euro.dell.com E-mail: [email protected] Technical Support - Dell XPS Gen 3 | Owner's Manual - Page 131
Name or Service Area, Website and E-Mail Address Japan (Kawasaki) Website: support.jp.dell.com International Access Code: 001 Technical Support (servers) Country Code: 81 Technical Support outside of Japan (servers) City Code: 44 Technical Support (Dimension™ and Inspiron™) Technical Support - Dell XPS Gen 3 | Owner's Manual - Page 132
) Switchboard (Brussels, Belgium) Technical Support Customer Service (Penang, Malaysia) Transaction Sales Technical Support (Dell Precision, OptiPlex, and Latitude) Technical Support (Dimension and Inspiron) Customer Service Transaction Sales Corporate Sales Area Codes, Local Numbers, and Toll-Free - Dell XPS Gen 3 | Owner's Manual - Page 133
Access Code: 00 Country Code: 31 City Code: 20 General Support General Support Website: support.euro.dell.com E-mail (Technical Support): (Enterprise): [email protected] (Latitude): [email protected] (Inspiron): [email protected] (Dimension): nl_dimension_support@dell - Dell XPS Gen 3 | Owner's Manual - Page 134
Fax Switchboard Panama General Support Peru General Support Poland (Warsaw) Website: support.euro.dell.com International Access Code: 011 E-mail: [email protected] Country Code: 48 Customer Service Phone City Code: 22 Customer Care Sales Customer Service Fax Reception Desk Fax - Dell XPS Gen 3 | Owner's Manual - Page 135
Code Country Code City Code Portugal International Access Code: 00 Country Code: 351 Department Name or Service Area, Website and E-Mail Address Website: support.euro.dell.com E-mail: support.euro.dell.com/pt/en/emaildell/ Technical Support Customer Care Sales Fax Puerto Rico General Support - Dell XPS Gen 3 | Owner's Manual - Page 136
Access Code: 00 Country Code: 46 City Code: 8 Department Name or Service Area, Website and E-Mail Address Website: support.euro.dell.com E-mail: support.euro.dell.com/es/es/emaildell/ Home and Small Business Technical Support Customer Care Sales Switchboard Fax Corporate Technical Support Customer - Dell XPS Gen 3 | Owner's Manual - Page 137
Code: 002 Country Code: 886 Technical Support (portable and desktop computers) Technical Support (servers) Transaction Sales Corporate Sales Thailand Technical Support International Access Code: 001 Customer Service (Penang, Malaysia) Country Code: 66 Sales Trinidad/Tobago General Support - Dell XPS Gen 3 | Owner's Manual - Page 138
Code Country Code City Code U.K. (Bracknell) International Access Code: 00 Country Code: 44 City Code: 1344 Uruguay Department Name or Service Area, Website and E-Mail Address Area Codes, Local Numbers, and Toll-Free Numbers Website: support.euro.dell.com Customer Care website: support.euro.dell - Dell XPS Gen 3 | Owner's Manual - Page 139
-free: 1-800-357-3355 Extended Service and Warranty Sales toll-free: 1-800-247-4618 Fax toll-free: 1-800-727-8320 Dell Services for the Deaf, Hard-of-Hearing, or Speech-Impaired toll-free: 1-877-DELLTTY (1-877-335-5889) U.S. Virgin Islands General Support 1-877-673-3355 Venezuela General - Dell XPS Gen 3 | Owner's Manual - Page 140
www.dell.com | support.dell.com 140 Appendix - Dell XPS Gen 3 | Owner's Manual - Page 141
VGA, 66 video, 66 copying CDs and DVDs, 26 cover closing, 108 cover release latch, 65 opening, 67 D Dell contacting, 123 Dell Dimension Help file, 10 Dell Solution Center, 9 support policy, 121 support site, 11 Dell Diagnostics, 50 Dell Premier Support website, 10 diagnostic lights, 47 Index 141 - Dell XPS Gen 3 | Owner's Manual - Page 142
drive installing, 90 removing, 89 H hard drive activity light, 63 installing, 85 installing second, 88 problems, 33 removing, 84 hardware Dell Diagnostics, 50 drives, RAID configuration, 17 Hardware Troubleshooter, 57 headphone connector, 64 Help and Support Center, 11 help file Dell Dimension - Dell XPS Gen 3 | Owner's Manual - Page 143
78 removing, 81 performance overclocking, 29 power button, 63 connector, 66 problems, 40 power light conditions, 40 power supply fans, 66 printer problems, 41 problems battery, 31 blue screen, 37 CD drive, 32 CD-RW drive, 32 computer crashes, 36-37 computer stops responding, 36 Dell Diagnostics, 50 - Dell XPS Gen 3 | Owner's Manual - Page 144
troubleshooting tips, 31 video and monitor, 44 volume adjusting, 42 processor fans, 65 type, 109 Product Information Guide, 10 Program Compatibility Wizard, 37 R RAID configuring, 17 regulatory information, 10 reinstalling Windows XP, 57 ResourceCD, 9, 54 Dell Diagnostics, 50 S safety instructions - Dell XPS Gen 3 | Owner's Manual - Page 145
, 118 connectors, 64, 66 V VGA connector, 66 video connector, 66 problems, 44 volume adjusting, 42 W warranty information, 10 Windows XP Device Driver Rollback, 54 Files and Settings Transfer Wizard, 25 Hardware Troubleshooter, 57 Help and Support Center, 11 Hyper-Threading, 29 Network Setup Wizard - Dell XPS Gen 3 | Owner's Manual - Page 146
146 Index
-
 1
1 -
 2
2 -
 3
3 -
 4
4 -
 5
5 -
 6
6 -
 7
7 -
8
-
9
-
10
-
11
-
12
-
13
-
14
-
15
-
16
-
17
-
18
-
19
-
20
-
21
-
22
-
23
-
24
-
25
-
26
-
27
-
28
-
29
-
30
-
31
-
32
-
33
-
34
-
35
-
36
-
37
-
38
-
39
-
40
-
41
-
42
-
43
-
44
-
45
-
46
-
47
-
48
-
49
-
50
-
51
-
52
-
53
-
54
-
55
-
56
-
57
-
58
-
59
-
60
-
61
-
62
-
63
-
64
-
65
-
66
-
67
-
68
-
69
-
70
-
71
-
72
-
73
-
74
-
75
-
76
-
77
-
78
-
79
-
80
-
81
-
82
-
83
-
84
-
85
-
86
-
87
-
88
-
89
-
90
-
91
-
92
-
93
-
94
-
95
-
96
-
97
-
98
-
99
-
100
-
101
-
102
-
103
-
104
-
105
-
106
-
107
-
108
-
109
-
110
-
111
-
112
-
113
-
114
-
115
-
116
-
117
-
118
-
119
-
120
-
121
-
122
-
123
-
124
-
125
-
126
-
127
-
128
-
129
-
130
-
131
-
132
-
133
-
134
-
135
-
136
-
137
-
138
-
139
-
140
-
141
-
142
-
143
-
144
-
145
-
146
 |
 |

www.dell.com | support.dell.com
Dell™ Dimension™ XPS Gen 3
headphone
connector
microphone
connector
USB 2.0
connectors (2)
IEEE 1394
connector
PCI card (4), PCI Express
x1 card (1), PCI Express
x16 card (1) slots
serial port
parallel port
diagnostic lights
keyboard connector
USB 2.0
connectors (6)
VGA video connector
cover latch release
fans (2)
network adapter connector
security cable slot
fans (2)
sound card connectors
padlock ring
modem connector
power connector
DVI video connector
mouse connector
TV-OUT connector
Model WHL