Denon DN-A7100 User Guide
Denon DN-A7100 - AV Surround Preamplifier Manual
 |
UPC - 081757507554
View all Denon DN-A7100 manuals
Add to My Manuals
Save this manual to your list of manuals |
Denon DN-A7100 manual content summary:
- Denon DN-A7100 | User Guide - Page 1
AV SURROUND PREAMPLIFIER DN-A7100 USER GUIDE BEDIENUNGSANLEITUNG MODE D'EMPLOI GUIDA DELL'UTENTE GUÍA DEL USUARIO GEBRUIKSAANWIJZING GUIA DO UTILIZADOR BRUKSANVISNING - Denon DN-A7100 | User Guide - Page 2
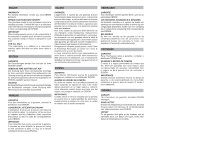
ENGLISH ITALIANO NEDERLANDS WARRANTY For warranty information, contact your local DENON for insurance purposes or when corresponding with DENON. IMPORTANT When seeking warranty service, it is the responsibility of the uso e manutenzione dettagliate nel presente manuale o per guasti dovuti ad uso - Denon DN-A7100 | User Guide - Page 3
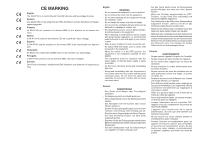
DN-A7100 conforma com as diretrizes EMC e de baixa voltagem. Svenska DN-A7100 är tillverkad i enlighet med EMC direktiven och direktiven för lågvoltsutrusning. English regulations or environmental public instruction's rules that apply in areas other than the controls and rear panel connection jacks - Denon DN-A7100 | User Guide - Page 4
en diversas partes, no exclusivamente en el sector de los controles o en las conexiones del panel posterior. No tocar las och miljöskyddsråd som gäller i det land eller område där du bor när du gör dig av med batterier. - Se till att det finns omkring 0,2 meter fri plats runt omkring enheten. - - Denon DN-A7100 | User Guide - Page 5
Thank you for purchasing the DENON DN-A7100 Surround receiver. This remarkable component has been engineered to provide you with many years of home theater enjoyment. Please take a few minutes to read this manual thoroughly before you connect and operate the DN-A7100. As there are a number of - Denon DN-A7100 | User Guide - Page 6
ENGLISH DESCRIPTION DTS was introduced in 1994 to provide 5.1 channels of discrete digital audio into home theater been used professionally in movie theaters since 1999. Pro Logic IIx Dolby Pro Logic IIx technology delivers a natural and immersing 7.1-channel listening experience to the home theater - Denon DN-A7100 | User Guide - Page 7
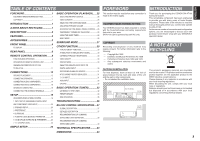
Audio Input (AUX Input) • Remote control • Simple Setup Function • Video convert system • LIP.SYNC Funciton (Audio delay) • XLR type Balanced Audio Output ACCESSORIES Remote Controller RC-1065 AAA-size batteries × 2 AM Loop Antenna FM Antenna AC Power Cord User Guide Service Station List × 1 3 - Denon DN-A7100 | User Guide - Page 8
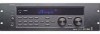
HDMI indicator This indicator is illuminated when HDMI device is connected to the DN-A7100. y INFRARED receiving sensor window This window receives infrared signals for the remote control !9 HT-EQ button Used to turn on or off HT(Home Theater)-EQ mode. This mode compensates for the audio portion of - Denon DN-A7100 | User Guide - Page 9
ENGLISH FL DISPLAY sd a g j k ¡0 ¡2 f h l ¡1 j NIGHT mode indicator This indicator is illuminated when the DN-A7100 is in the Night mode, which reduces the dynamic range this happens, you should press the ATT button on the remote. l EQ mode indicator This indicator is illuminated when the HT - Denon DN-A7100 | User Guide - Page 10
ENGLISH HDMI INPUT/OUTPUT This unit has 2 HDMI inputs and 1 HDMI output. The input function can be selected from the OSD menu system. (See page 20) o AC INLET Plug the supplied power cord into this AC INLET and then into the power outlet on the wall. DN-A7100 is for (status) control only, It is not - Denon DN-A7100 | User Guide - Page 11
ENGLISH !4 AUX1 analog audio input level switch (-10dBV/+4dBu) This switch changes the standard input level of the AUX1 , portable DVD etc. !7 RS-232C The RS-232C port is to be used in conjunction with an external controller to control the operation of the DN-A7100 by using an external device. 7 - Denon DN-A7100 | User Guide - Page 12
ENGLISH REMOTE CONTROL OPERATION FUNCTION AND OPERATION Used to remotely control the unit. You can switch between functions by pressing either the AMP or TUNER source buttons. to use this remote controll with the DN-A7100. ⁄6 P.DIRECT button When this button is pressed, the tone control circuit is - Denon DN-A7100 | User Guide - Page 13
ENGLISH ¤1 MEMO/HT-EQ button (When TUNER mode is selected) This button is used to store setting to memory or program a source. (When AMP mode is selected) Used to turn on or off HT(Home Theater and the voice distorts even by throttling the DN-A7100 VOLUME control, turn on this function. "ATT" is - Denon DN-A7100 | User Guide - Page 14
ENGLISH OPERATION OF REMOTE CONTROL UNIT REMOTE CONTROL The distance between the transmitter of the remote control and the IR SENSOR of the DN-A7100 should be less than 5 meters. If the remote control is pointed in a direction other than the IR SENSOR or if there is an obstacle between them, use of - Denon DN-A7100 | User Guide - Page 15
GENERAL INFORMATION OF RC-1065 TO DN-A7100 To control the DN-A7100 by your RC-1065, you have to select the device AMP or TUNER by pressing the SOURCE button. Please refer , VOL+, VOL-, MUTE, BASS+, BASS-, TREBLE+, and TREBLE- keys can be selected in TUNER mode the same as in AMP mode. 11 ENGLISH - Denon DN-A7100 | User Guide - Page 16
ENGLISH frequency limited in earlier "Pro Logic' type systems. Bass effects are an important part of home theater. For optimal enjoyment a little backward from the line. Surround left and right speakers When the DN-A7100 is used in surround operation, the preferred location for surround speakers is - Denon DN-A7100 | User Guide - Page 17
ENGLISH CONNECTING SPEAKERS Passive subwoofer Power Amplifier INVERT OUTPUT INPUT INPUT LEVEL BTL EXT. CONT. IN MASTER SLAVE REMOTE CONT. MIN MA X VIDEO/ SYSTEM OUT OUT IN +5~13V DC FUSE SPEAKER SYSTEM MINIMUM 4 OHMS Powered subwoofer or Surround BACK Right Left XLR terminals are - Denon DN-A7100 | User Guide - Page 18
ENGLISH CONNECTING AUDIO COMPONENTS CD recorder DIGITAL INPUT OUT IN DIGITAL OUTPUT L L R R the L (left) channel. • Be sure to connect input and output properly. • Refer to the instructions for each component that is connected to this unit. • Do not bind audio/video connection cables with - Denon DN-A7100 | User Guide - Page 19
or 3 video cords to connect the component video out jacks on the DN-A7100 to the monitor. Notes: • Be sure to connect the left and right of your DVD player, or other digital source components. Refer to the instructions of the each component connected to the digital input jacks. • There is 15 ENGLISH - Denon DN-A7100 | User Guide - Page 20
ENGLISH ADVANCED CONNECTING LR LR LR RL RL RL CENTER L R FRONT SURR. SURR. SUB BACK WOOFER PUSH NEUTRIK PUSH NEUTRIK PUSH NEUTRIK PUSH NEUTRIK PUSH NEUTRIK - Denon DN-A7100 | User Guide - Page 21
above a window or outside. Notes: • Do not remove the AM loop antenna. • To avoid the risk of lightning and electrical shock, grounding is necessary. 17 ENGLISH - Denon DN-A7100 | User Guide - Page 22
to a display that supports HDCP. • There may be no image output if connected to a TV or display that is not compatible with the above format. • Refer to the instruction manual of the TV or display to be connected to the DN-A7100 for detailed information regarding the HDMI terminal. * HDCP: High - Denon DN-A7100 | User Guide - Page 23
DN-A7100 incorporates an on-screen menu system, which makes various operations possible by using the cursor (3, 4, 1, 2) and ENTER buttons on the remote control MAIN RETURN NEXT EXIT 2-3 SPEAKERS LEVEL TEST MODE : MANUAL FRONT L : 0 dB CENTER : 0 dB FRONT CONVERT HDMI : ENABLE ENGLISH - Denon DN-A7100 | User Guide - Page 24
ENGLISH 1 INPUT SETUP (ASSIGNABLE DIGITAL INPUT AND COMPONENT VIDEO INPUT) 6 digital inputs, 3 component video inputs and 2 HDMI inputs can be the setting to DIGITAL. 2 SPEAKER SETUP After you have installed the DN-A7100, connected all the components, and determined the speaker layout, it is now - Denon DN-A7100 | User Guide - Page 25
special DVD and LD's available to guide you through proper home theater configuration. If you are unsure, have your DENON dealer perform the installation for you. They are trained professionals familiar with even the most sophisticated custom installations. DENON recommends the WWW.CEDIA.ORG website - Denon DN-A7100 | User Guide - Page 26
THROUGH: The audio input to the HDMI jacks is not output from the output terminals of the DN-A7100. Audio data is output directly to You can select MAIN ROOM, REMOTE or DISABLE by pressing 1 or 2 cursor buttons. Notes: • REMOTE is available for the external control. The RC-1065 cannot operate - Denon DN-A7100 | User Guide - Page 27
5 PL II (PRO LOGIC II) MUSIC PARAMETER Pro Logic II-Music mode creates a rich and enveloping surround ambience from stereo sources such as CDs. In this mode, DN-A7100 includes three controls to fine-tune feature can be directly selected with the CH-SEL button of the remote controller. 23 ENGLISH - Denon DN-A7100 | User Guide - Page 28
ENGLISH SIMPLE SETUP You can setup the speaker conditions quickly with SIMPLE SETUP menu. In this menu, the number of speakers and speaker delay time can - Denon DN-A7100 | User Guide - Page 29
ENGLISH BASIC OPERATION (PLAYBACK) SELECTING AN INPUT SOURCE Before you can listen to any input media, you must first select the input source on the DN-A7100. Example : DVD To select DVD, turn the INPUT SOURCE knob on the front panel or simply press the DVD button on the remote. After you have - Denon DN-A7100 | User Guide - Page 30
is muted, the display will show "MUTE" . Press the MUTE button again to return to normal operation. To program the DN-A7100 for automatic standby, press the SLEEP button on the remote. Each press of the button will increase the time before shut down in the following sequence. OFF 10 20 30 40 - Denon DN-A7100 | User Guide - Page 31
ENGLISH SURROUND MODE The DN-A7100 mode. 2 MODE (Dolby Digital, Pro Logic IIx MOVIE, Pro Logic IIx MUSIC, Pro Logic IIx GAME, Pro Logic) This mode is used with analog input has been selected. Dolby Digital EX In a movie theater, film soundtracks that have been encoded with Dolby Digital surround EX - Denon DN-A7100 | User Guide - Page 32
HDMI) and turning the FL display off. CAUTION NOTE for DTS signal * Connected DVD player, laserdisc player or CD player needs to support DTS digital output. You may not be able to play some DTS source signals from certain CD players and LD players even if you connect the player to the DN-A7100 - Denon DN-A7100 | User Guide - Page 33
ENGLISH The relation between the selected surround mode and the input signal The surround mode is selected with the surround mode selector on DN-A7100 or the remote control Dolby Digital 5.1 Dolby Digital 5.1 Pro Logic IIx Pro Logic IIx Multi Ch-PCM + PLIIx Pro Logic IIx Pro Logic IIx DTS 5.1 DTS 96 - Denon DN-A7100 | User Guide - Page 34
display mode for the front display of the DN-A7100. To select this mode, press the DISPLAY on the remote control. When this button is pressed, the is switched in the following sequence. → HDMI Auto → HDMI → Digital Auto → Digital → Analog → HDMI Auto.... In HDMI Auto mode, the types of signals being - Denon DN-A7100 | User Guide - Page 35
ENGLISH RECORDING AN ANALOG SOURCE In normal operation, the audio or video source selected for listening through the DN-A7100 simply press the input selector buttons on the remote. The input source is now selected and the HOME THEATER EQUALIZER has been deactivated. 7.1 CH INPUT The DN-A7100 is - Denon DN-A7100 | User Guide - Page 36
, use to the "Manual tuning" operation. MANUAL TUNING 1. 2. 1. 2. (Using the DN-A7100) 1. To select tuner and desired band (FM or AM), press the BAND button on the front panel. 2. Press the 3 or 4 cursor buttons on the front panel to select the desired station. (Using the remote control unit) 1. To - Denon DN-A7100 | User Guide - Page 37
), either input "02" or just input "2" and wait for a few seconds. 1. (Using the DN-A7100) 1. Select the desired preset station by pressing the 1 or 2 cursor buttons on the front panel (Using the remote control unit) 1. Press the PRESET - / + buttons to select the desired preset station, or input - Denon DN-A7100 | User Guide - Page 38
ENGLISH CLEARING STORED PRESET STATIONS You can remove preset stations from the memory using seconds. While blinking, press the CLEAR button on the front panel or press the CL button on the remote. 4. "xx CLEAR" appears on the display to indicate that the specified preset number has been cleared. - Denon DN-A7100 | User Guide - Page 39
the display, press the T-DISP button on the remote. PS (Program Service Name) RT (RADIO TEXT) Frequency PROGRAMME TYPE (PTY 2. 1. 3. 4. 1. Press the PTY button in the TUNER MODE on the remote controller. The current station's PTY will be displayed, or the currently selected PTY group ENGLISH - Denon DN-A7100 | User Guide - Page 40
DN-A7100 and the Remove offending object. remote commander. Note: After "PROTECT" appears on the unit's display, the standby indicator may start flashing. If it does, there is a problem in the unit or the connection. If this problem reoccurs even when power is activated from the remote control - Denon DN-A7100 | User Guide - Page 41
ENGLISH RS-232C CONTROL SPECIFICATION GLOBAL DESCRIPTION OVERVIEW A Host controller can control or watch out the product as a Slave very easily via the communication cable. BLOCK DIAGRAM HOST (Controller) RS232C cable (straight) * The product connector is using D-SUB 9pin male. * RS232C cable - Denon DN-A7100 | User Guide - Page 42
ENGLISH TRANSMISSION DATA FORMAT Transmission data format from Host to Slave There status to Host and the statuses of layer 4 are probably no wished statuses.) * Each layer status can control transmit enable or disable by Host command. (The product default would be all disables.) * Slave sends auto - Denon DN-A7100 | User Guide - Page 43
ENGLISH Examples of the handshaking flowchart • Example of successful handshaking HOST Command Status request SLAVE same as a remote controller buttons (IR controller) of the product. - All commands are required working by discreate as ON/OFF commands. (It means that do not support TOGGLE command - Denon DN-A7100 | User Guide - Page 44
ENGLISH RECOMMENDATIONS OF COMMAND, STATUS AND LAYER This section is told how to define "Command","Status"and "Layer" of this product. Normal Command list Main - Denon DN-A7100 | User Guide - Page 45
ENGLISH Surround contents Surr. Mode Command AUTO STEREO DOLBY PL2xMOVIE :2" "TTO:3" "TTO:4" "NGT:0" "NGT:1" "NGT:2" Reply from Slave "TTO:1xy" (OFF), "TTO:2xy" (ON, x= auto(0)/ manual(1), y= ch.) "NGT:1"(OFF), "NGT:2"(ON) Lip Sync. Command VALUE UP DOWN "LIP:0xxx" (xxx = value) xxx = 000 (OFF - Denon DN-A7100 | User Guide - Page 46
ENGLISH STATUS REQUEST AND STATUS ANSWER LIST Normal Status request and Status (answer and feedback) list POWER Status request "PWR:?" AUDIO ATT "ATT:?" AUDIO MUTE "AMT:?" - Denon DN-A7100 | User Guide - Page 47
Power Requirement AC 230 V 50 Hz Power Consumption 40 W Weight 7.66 Kg ACCESSORIES Remote Control Unit RC-1065 1 AAA-size batteries 2 FM Antenna 1 AM Loop Antenna 1 AC Power Cord 1 Service Station List 1 User guide 1 Specifications subject to change without prior notice. DIMENSIONS 482 - Denon DN-A7100 | User Guide - Page 48
D&M Holdings Inc. PROFESSIONAL BUSINESS COMPANY TOKYO, JAPAN http://www.dm-pro.jp Printed in China 12/2006 00D5114595008 ecmf-d
-
 1
1 -
 2
2 -
 3
3 -
 4
4 -
 5
5 -
 6
6 -
 7
7 -
8
-
9
-
10
-
11
-
12
-
13
-
14
-
15
-
16
-
17
-
18
-
19
-
20
-
21
-
22
-
23
-
24
-
25
-
26
-
27
-
28
-
29
-
30
-
31
-
32
-
33
-
34
-
35
-
36
-
37
-
38
-
39
-
40
-
41
-
42
-
43
-
44
-
45
-
46
-
47
-
48
 |
 |

AV SURROUND PREAMPLIFIER
DN-A7100
USER GUIDE
BEDIENUNGSANLEITUNG
MODE D’EMPLOI
GUIDA DELL’UTENTE
GUÍA DEL USUARIO
GEBRUIKSAANWIJZING
GUIA DO UTILIZADOR
BRUKSANVISNING