Dewalt D28710 Instruction Manual - Page 11
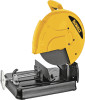
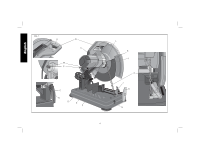
Operation, Tips for More, Accurate Cuts, MAINTENANCE, Motor Brush Inspection and Replacement, Fig. - chop saw parts
 |
View all Dewalt D28710 manuals
Add to My Manuals
Save this manual to your list of manuals |
Page 11 highlights
English CRADLE MOUNTING (FIG. 10) 1. Cut two boards approximately 20" long x 2" high x 4" wide (508 x 50.8 x 101.6mm). 2. Place the chop saw at desired work location. 3. Place boards tightly alongside and nail to work surface. FIG. 10 Operation Tips for More Accurate Cuts • Allow the wheel to do the cutting. Excessive force will cause the wheel to glaze reducing cutting efficiency and/or to deflect causing inaccurate cuts. • Properly adjust fence angle. • Make sure material is laying flat across base. • Properly clamp material to avoid movement and vibration. MAINTENANCE Motor Brush Inspection and Replacement (Fig. 11) WARNING: Turn off and unplug the tool before making any adjustments or removing or installing attachments or accessories. Be sure the trigger switch is in the OFF position. FIG. 11 W X .2" (6mm) X Brushes should be regularly inspected for wear. To inspect brushes, remove brush cap (W). Brushes (X) should slide freely in brush box. If brushes are worn down to .2" (6mm) as shown in Figure 10 they should be replaced. To reinstall, push new brush back into brush box. If replacing existing brush, maintain same orientation as when removed. Replace the brush cap (do not overtighten). Cleaning WARNING: Blow dirt and dust out of all air vents with clean, dry air at least once a week. To minimize the risk of eye injury, always wear ANSI Z87.1 approved eye protection when performing this. WARNING: Never use solvents or other harsh chemicals for cleaning the non-metallic parts of the tool. These chemicals may weaken the plastic materials used in these parts. Use a cloth dampened only with water and mild soap. Never let any liquid get inside the tool; never immerse any part of the tool into a liquid. Repairs To assure product SAFETY and RELIABILITY, repairs, maintenance and adjustment should be performed by authorized service centers or other qualified service organizations, always using identical replacement parts. 9
-
 1
1 -
2
-
3
-
4
-
5
-
 6
6 -
 7
7 -
 8
8 -
 9
9 -
 10
10 -
 11
11 -
 12
12 -
 13
13 -
 14
14 -
 15
15 -
 16
16 -
17
-
18
-
19
-
20
-
21
-
22
-
23
-
24
-
25
-
26
-
27
-
28
-
29
-
30
-
31
-
32
-
33
-
34
-
35
-
36
-
37
-
38
-
39
-
40
-
41
-
42
-
43
-
44
 |
 |
