Dymo LabelManager® 280 User Guide 1 - Page 10
Adding Clip Art, Adding Accented Characters, Inserting the Date and Time, Date and Time
 |
View all Dymo LabelManager® 280 manuals
Add to My Manuals
Save this manual to your list of manuals |
Page 10 highlights
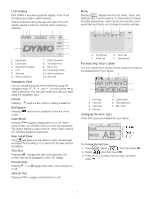
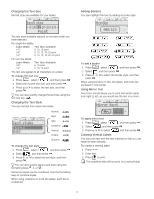
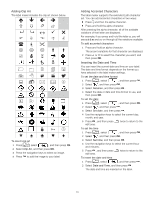
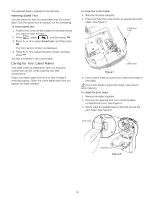
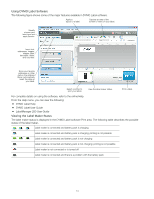
Adding Clip Art The label maker includes the clip art shown below. ↔ ☺ To insert clip art 1 Press , select , and then press . 2 Select Clip Art, and then press . 3 Press the navigation keys to select an image. 4 Press to add the image to your label. Adding Accented Characters The label maker supports the extended Latin character set. You can add accented characters in two ways: Press and then the alpha character. Press and hold the alpha character. After pressing the alpha character, all of the available variations of that letter are displayed. For example, if you press and hold the letter a, you will see a à â æ and so on through all the variations available. To add accented characters 1 Press and hold an alpha character. The accent variations for that character are displayed. 2 Press or > to select the character you want, and then press . > Inserting the Date and Time You can insert the current date and time on your label. The date and time format depends on the format you have selected in the label maker settings. To set the date and time format 1 Press , select , and then press . 2 Select , and then press . 3 Select Notation, and then press . 4 Select the date or date and time format to use, and then press . To set the date 1 Press , select , and then press . 2 Select , and then press . 3 Select Set date, and then press . 4 Use the navigation keys to select the current day, month, and year. 5 Press , and then press edit area. twice to return to the To set the time 1 Press , select , and then press . 2 Select , and then press . 3 Select Set time, and then press . 4 Use the navigation keys to select the current hour and minutes. 5 Press , and then press edit area. twice to return to the To insert the date and time 1 Press , select , and then press . 2 Select Date and Time, and then press . The date and time are inserted on the label. 10
-
 1
1 -
2
-
3
-
4
-
 5
5 -
 6
6 -
 7
7 -
 8
8 -
 9
9 -
 10
10 -
 11
11 -
 12
12 -
 13
13 -
 14
14 -
 15
15 -
16
-
17
 |
 |
