Dymo LabelManager® Wireless PnP Quick Start Guide - Page 12
Configuring the Label Maker as a Wireless Printer, charger. See
 |
View all Dymo LabelManager® Wireless PnP manuals
Add to My Manuals
Save this manual to your list of manuals |
Page 12 highlights
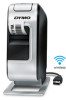
To charge the battery using the wall adapter 1 Insert one end of the USB cable into the label maker. 2 2 Insert the other end of the USB cable into the wall charger. See Figure 7. 1 3 Plug the wall adapter into a working power outlet. 4 If the label maker is turned off, press the power button to turn the label maker on and start charging the battery pack. Figure 7 Configuring the Label Maker as a Wireless Printer You can use your label maker either as a local printer connected to a powered USB port on your computer or as a networked printer on your wireless network. You must have a network with a wireless router or access point to use your label maker as a wireless network printer. Before configuring the label maker, you must determine the connection method to use to connect to your wireless network. Refer to the documentation that came with your router or access point to determine the connection methods supported. Connection Method Description Standard Advanced Use this method if you want the Wireless Setup tool to automatically detect your network. Your network will be detected automatically and you will be prompted to enter your security information. Use this method if you want to enter all network information manually. The Wireless Setup tool will not automatically detect your network. Use this method only if you are very familiar with your wireless network, or if the other methods are unsuccessful. You cannot use the label maker as a wireless network printer while the label maker is connected to a USB port on your computer. 8
-
 1
1 -
2
-
3
-
4
-
5
-
6
-
 7
7 -
 8
8 -
 9
9 -
 10
10 -
 11
11 -
 12
12 -
 13
13 -
 14
14 -
 15
15 -
 16
16 -
 17
17 -
18
-
19
-
20
-
21
-
22
-
23
-
24
-
25
-
26
-
27
-
28
-
29
-
30
-
31
-
32
-
33
-
34
-
35
-
36
-
37
-
38
-
39
-
40
-
41
-
42
-
43
-
44
-
45
-
46
-
47
-
48
-
49
-
50
-
51
-
52
-
53
-
54
-
55
-
56
-
57
-
58
-
59
-
60
-
61
-
62
 |
 |
