Edimax 3G-6200n Manual
Edimax 3G-6200n Manual
 |
View all Edimax 3G-6200n manuals
Add to My Manuals
Save this manual to your list of manuals |
Edimax 3G-6200n manual content summary:
- Edimax 3G-6200n | Manual - Page 1
1 - Edimax 3G-6200n | Manual - Page 2
and the setup screen may appear slightly different from those shown in this QIG. For more detailed information about this product, please refer to the User Manual on the CD-ROM. The software and specifications are subject to change without notice. Please visit our web site www.edimax.com for - Edimax 3G-6200n | Manual - Page 3
95/98/Me IP address setup 15 2-2-2 Windows 2000 IP address setup 17 2-2-3 Windows XP IP address setup 19 2-2-4 Windows Vista IP address setup 21 2-3 Connect to broadband router by web browser 23 2-4 Using 'Quick Setup 27 2-4-1 3G/3.5G 31 2-4-2 Using 'Dynamic IP' as broadband connection type - Edimax 3G-6200n | Manual - Page 4
3-5-2-3 UPnP Settings 110 3-5-2-4 ALG Settings 111 3-5-2-5 Static Routing 112 3-5-3 Firewall 114 3-5-3-1 Access Control 114 3-5-3-2 URL Blocking 119 3-5-3-3 DoS 121 3-5-4 DDNS 124 3-5-5 Port Forwarding 127 3-5-6 DMZ 130 3-5-7 Fail Over 133 3-6 Print Server ...134 3-6-1 LPR Printing ...136 - Edimax 3G-6200n | Manual - Page 5
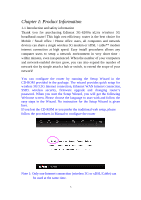
! You can configure the router by running the Setup Wizard in the CD-ROM provided in the package. The wizard provides quick setup for wireless 3G/3.5G Internet connection, Ethernet WAN Internet connection, SSID, wireless security, firmware upgrade and changing router's password. When you start - Edimax 3G-6200n | Manual - Page 6
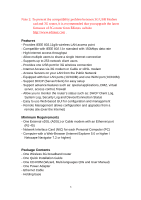
an Ethernet port (RJ-45) - Network Interface Card (NIC) for each Personal Computer (PC) - Computer with a Web-Browser (Internet Explorer 5.0 or higher / Netscape Navigator 7.2 or higher) Package Contents - One Wireless 3G broadband router - One Quick Installation Guide - One CD-ROM (Wizard, Multi - Edimax 3G-6200n | Manual - Page 7
. 3) USB The USB port allow you to share internet via 3G USB modem card. 4) WPS / Reset button You can press the button 2~4 seconds to enable WPS for wireless security. When you experience some problem on using this router, or you forgot your password, you can press the reset button for longer than - Edimax 3G-6200n | Manual - Page 8
seconds and the router will reset itself to the factory default settings (warning: your original configurations will be replaced with the factory default settings) 5) Wireless on/off You can enable/disable WiFi wireless signal via switch button. Front Panel On the router's front panel there are LEDs - Edimax 3G-6200n | Manual - Page 9
the following safety instructions: 1. This router is designed for indoor use only; DO NOT place this router outdoor. 2. DO NOT put this router at or this router on paper, cloth, or other flammable materials. 7. There's no user-serviceable part inside the router. If you found that the router is not - Edimax 3G-6200n | Manual - Page 10
1-3 System Requirements z Internet connection, provided by xDSL or cable modem with a RJ-45 Ethernet port. z Computer or network devices with wired or wireless network interface card. z Web browser (Microsoft Internet Explorer 4.0 or above, Netscape Navigator 4.7 or above, Opera web browser, or - Edimax 3G-6200n | Manual - Page 11
network connection Setup Diagram (A) 3G/3.5G Modem card installation: If you have 3G/3.5G modem card and SIM card, please follow the following instructions to establish connection 1. Connect power adapter to 3G-6200n 2. Connect another Ethernet cable from the any LAN ports (1~4) on router to the - Edimax 3G-6200n | Manual - Page 12
(B) Cabling installation: If you can also access Internet by xDSL/Cable modem, please follow the following instructions: 1. Connect the Ethernet cable from the router's WAN port to the LAN port of the modem. 2. Connect another Ethernet cable from the any LAN ports (1~4) on router to the Ethernet - Edimax 3G-6200n | Manual - Page 13
3. Check to make sure the router's LINK LED is lit; to confirm the cable connections are made correctly. 13 - Edimax 3G-6200n | Manual - Page 14
to the router and start configuration procedures, your computer must be able to get an IP address automatically (use dynamic IP address). If it's set to use static IP address, or you're unsure, please follow the following instructions to configure your computer to use dynamic IP address: If the - Edimax 3G-6200n | Manual - Page 15
2-2-1 Windows 95/98/Me IP address setup: 1. Click 'Start' button (it should be located at lower-left corner of your computer), then click control panel. Double-click Network icon, and Network window will appear. Select 'TCP/IP', then click 'Properties'. 15 - Edimax 3G-6200n | Manual - Page 16
2. Select 'Obtain an IP address from a DHCP server', then click 'OK'. 16 - Edimax 3G-6200n | Manual - Page 17
2-2-2 Windows 2000 IP address setup: 1. Click 'Start' button (it should be located at lower-left corner of your computer), then click control panel. Double-click Network and Dial-up Connections - Edimax 3G-6200n | Manual - Page 18
2. Select 'Obtain an IP address automatically' and 'Obtain DNS server address automatically', then click 'OK'. 18 - Edimax 3G-6200n | Manual - Page 19
2-2-3 Windows XP IP address setup: 1. Click 'Start' button (it should be located at lower-left corner of your computer), then click control panel. Double-click Network and Internet Connections icon, - Edimax 3G-6200n | Manual - Page 20
2. Select 'Obtain an IP address automatically' and 'Obtain DNS server address automatically', then click 'OK'. 20 - Edimax 3G-6200n | Manual - Page 21
2-2-4 Windows Vista IP address setup: 1. Click 'Start' button (it should be located at lower-left corner of your computer), then click control panel. Click View Network Status and Tasks, then - Edimax 3G-6200n | Manual - Page 22
2. Select 'Obtain an IP address automatically' and 'Obtain DNS server address automatically', then click 'OK'. 22 - Edimax 3G-6200n | Manual - Page 23
2-3 Connect to broadband router by web browser Default IP address of this broadband router is '192.168.2.1', and you can connect to broadband router's web-based configuration interface by any connected computer with web browser (Internet Explorer 5.x or above, Firefox, or Netscape). Please input ' - Edimax 3G-6200n | Manual - Page 24
the IP address of this broadband router previously, please input correct IP address instead of the default IP address '192.168.2.1'. If the DHCP server function of this broadband router is enabled, please follow the following instructions to find out the IP address of this broadband router: 24 - Edimax 3G-6200n | Manual - Page 25
Please click 'start' -> 'run' at the bottom-lower corner of your desktop: Input 'cmd', then click 'OK' 25 - Edimax 3G-6200n | Manual - Page 26
and router, and / or go to the beginning of this chapter, to recheck every step of network setup procedure. If you tried the instructions listed above and still can not find the IP address of this broadband router / you forget the password, please jump to chapter 6-1 to reset the broadband router - Edimax 3G-6200n | Manual - Page 27
2-4 Using 'Quick Setup' This broadband router provides a 'Quick Setup' menu, and you can setup basic parameters of this broadband router. Please follow the following instructions to use 'Quick Setup' menu: 1. Click 'Quick Setup' after logged in. 27 - Edimax 3G-6200n | Manual - Page 28
country / region of your residence. This load-balance router supports NTP (Network Time Protocol). NTP server will provide correct time for this router to setup the date and time of the router automatically. Please input the host name or IP address of NTP server here. If you don't know the host name - Edimax 3G-6200n | Manual - Page 29
you finish with time zone settings, please click 'Next' to proceed to next step of quick setup - broadband type: Please choose the broadband (Internet connection) type you're using in this page. There are six types of Internet connection, they are: 3G/3.5G Dynamic IP Fixed-IP xDSL PPPoE xDSL PPTP - Edimax 3G-6200n | Manual - Page 30
type will cause connection problem, and you will not be able to connect to internet. If you want to go back to previous step, please press 'Back' button on the bottom of this page. NOTE: Some service providers use 'DHCP' (Dynamic Host Configuration Protocol) to assign IP address to you. In this - Edimax 3G-6200n | Manual - Page 31
to Internet, please use wired Internet connection to access our website :http://www.edimax.com/ ,download latest version of firmware and upgrade 3G-6200n's firmware. If you still not be able to get connected by your 3G/3.5G modem card, please contact your dealer of purchase and provide the model - Edimax 3G-6200n | Manual - Page 32
not work with instructions (A) or (B) listed above (ex. BandLuxe C100S). You need to install 3G/3.5G modem card driver / utility on every PC which needs to access Internet first. After driver / utility installation is complete, every PC will be able to access Internet via 3G/6200n. 1. Plug in the - Edimax 3G-6200n | Manual - Page 33
3. Please click "Cancel" to ignore the message of the found new hardware wizard. 33 - Edimax 3G-6200n | Manual - Page 34
4. Please go to "My computer", you will see the BandLuxe C100S. Double click the device. 5. The program inside the adapter will prepare to install the driver and utility of the adapter. 34 - Edimax 3G-6200n | Manual - Page 35
6. Click "Next". 7. Select "I accept the terms in the license agreement" and click "Next". 35 - Edimax 3G-6200n | Manual - Page 36
8. If you want to change the destination folder, please click "Change". Click "Next" to continue. 9. Click "install". 36 - Edimax 3G-6200n | Manual - Page 37
10.The system is installing the driver and utility of the adapter. 11.Install successfully, click "Finish" to close the install wizard. 37 - Edimax 3G-6200n | Manual - Page 38
12.The utility of C100S will start up automaticity. Please select the "MENU" 13.Click "Setting". 14.Select the "Auto connect on startup". 38 - Edimax 3G-6200n | Manual - Page 39
15.Plug in the C100S into the USB port of the 3G router. 16.The USB adapter will get the IP address from ISP automatically. You can check the Status of the 3G‐6200n on the Web site (ex: 192.168.2.1). 17.Now you are able to connect to Internet successfully. Note : If your SIM card requires entering - Edimax 3G-6200n | Manual - Page 40
IP' as broadband connection type If your Internet service provider uses cable modem to provide Internet service to you, you can select this connection type. You can also select this connection type if your ISP tells you that they will assign you the IP address by 'DHCP' (Dynamic Host Configuration - Edimax 3G-6200n | Manual - Page 41
click 'Back'; or you can click 'OK' to finish with quick setup. You'll see the following messages: Please click 'Apply' to save changes you made and restart the broadband router, this requires about 30 seconds and the broadband router will stop responding (this is normal and is not malfunction). You - Edimax 3G-6200n | Manual - Page 42
mask assigned by your service provider. Please input the IP address of DNS server provided by your service provider. Please input the IP address of DNS server provided by your service provider. Time-to-live (TTL) is a value in an Internet Protocol packet that tells a network router whether or not - Edimax 3G-6200n | Manual - Page 43
be discarded. You must use the addresses provided by your Internet service provider, wrong setting value will cause connection problem. If you wish to select another connection type as broadband connection type, click 'Back'; or you can click 'OK' to finish with quick setup. You'll see the following - Edimax 3G-6200n | Manual - Page 44
' as broadband connection type If your ISP requires you to establish Internet connection by PPPoE (Point-to-Point Protocol over Ethernet), you can use this connection type to establish Internet connection. Here are descriptions of every setup items: Item Name User Name Password Service Name MTU - Edimax 3G-6200n | Manual - Page 45
when there's a connect attempt, Idle Time Out TTL Manual - only connects to Internet when 'Connect' button on this setup. You'll see the following messages: Please click 'Apply' to save changes you made and restart the broadband router, this requires about 30 seconds and the broadband router - Edimax 3G-6200n | Manual - Page 46
connection. PPTP xDSL requires two kinds of setting: WAN interface setting (setup IP address) and PPTP setting (PPTP user name and password). Here we start from WAN interface setting first: Select the type of how you obtain IP address from your service provider here. You can choose 'Obtain an - Edimax 3G-6200n | Manual - Page 47
setup items: Item Name User ID Password PPTP Gateway Connection ID MTU BEZEQ-ISRAEL Connection Type Description Please input user ID (user name) assigned by your Internet service provider here. Please input the password assigned by your Internet service provider here. Please input the IP address - Edimax 3G-6200n | Manual - Page 48
'Back'; or you can click 'OK' to finish with quick setup. You'll see the following messages: Please click 'Apply' to save changes you made and restart the broadband router, this requires about 30 seconds and the broadband router will stop responding (this is normal and is not malfunction). You - Edimax 3G-6200n | Manual - Page 49
with PPTP connection. Like PPTP, there are two kinds of required setting, we'll start from 'WAN Interface Settings': Please select the type of how you obtain IP address from your service provider here. You can choose 'Obtain an IP address automatically' (equal to DHCP, please refer to 'Cable Modem - Edimax 3G-6200n | Manual - Page 50
here. Please input the password assigned by your Internet service provider here. Please input the IP address of L2TP gateway assigned by your Internet service provider here. Please input the MTU value of your network connection here. If you don't know, you can use default value. Please select the - Edimax 3G-6200n | Manual - Page 51
click 'Back'; or you can click 'OK' to finish with quick setup. You'll see the following messages: Please click 'Apply' to save changes you made and restart the broadband router, this requires about 30 seconds and the broadband router will stop responding (this is normal and is not malfunction). You - Edimax 3G-6200n | Manual - Page 52
the IP address of login server here. If you wish to select another connection type as broadband connection type, click 'Back'; or you can click 'OK' to finish with quick setup. You'll see the following messages: Please click 'Apply' to save changes you made and restart the broadband router, this - Edimax 3G-6200n | Manual - Page 53
Chapter III: General Setup The 'General Setup' is for you to setup "System, WAN, LAN, Wireless, and others ( Advance settings ) ". Please follow the following instructions to use 'General Setup' menu: 1. Click 'General Setup' after logged in. 53 - Edimax 3G-6200n | Manual - Page 54
go to chapter 3-2) LAN - Setup LAN port manually (please go to chapter 3-3) Wireless - Setup wireless interface manually (please go to chapter 3-4) Advance Settings - Setup advanced settings of this broadband router (Please go to chapter 3-5) Printer Server- Setup Print Server manually (please go to - Edimax 3G-6200n | Manual - Page 55
setup basic system settings of this broadband router in 'System' menu: Please select the setting item you wish to set, then click 'Apply' button to proceed. You can also click 'Previous' button to back to 'System' menu. 3-1-1 Time Zone You can change the time zone settings of this broadband router - Edimax 3G-6200n | Manual - Page 56
every setting item are listed as follow: Item Name Time Zone Time Server Address Daylight router supports NTP (Network Time Protocol). NTP server will provide correct time for this router to setup the date and time of the router automatically. Please input the host name or IP address of NTP server - Edimax 3G-6200n | Manual - Page 57
change the web login password of this broadband router. If you keep using the default password '1234', other people may access the configuration interface without your permission. Please change the password as soon as possible. The descriptions of every setting item are listed as follow: Item Name - Edimax 3G-6200n | Manual - Page 58
setting item are listed as follow: Item Name Host address Port Enabled Description Input the IP address of the remote host you wish to initiate a management access. You can define the port number this router should expect an incoming connection request. If you're providing a web service (default - Edimax 3G-6200n | Manual - Page 59
can click 'Cancel' to discard all settings in this page. After you click 'Apply' button, you'll see the following message: Please click 'Apply' to save changes you made and restart the broadband router, this requires about 30 seconds and the broadband router will stop responding (this is normal and - Edimax 3G-6200n | Manual - Page 60
) connections of this broadband router in 'WAN' menu: Please select the WAN connection type you wish to use, then click 'Apply' to continue. You can also click 'Previous' to back to previous page. If you're not sure which connection type you should use, please call your ISP's service hotline and ask - Edimax 3G-6200n | Manual - Page 61
to Internet, please use wired Internet connection to access our website :http://www.edimax.com/ ,download latest version of firmware and upgrade 3G-6200n's firmware. If you still not be able to get connected by your 3G/3.5G modem card, please contact your dealer of purchase and provide the model - Edimax 3G-6200n | Manual - Page 62
information. If telecomm provider provides you with username / password, please check /User Name / Password box and input the user name / password provided by telecomm service provider, then click 'OK' button. Wait for 1 minute (for 3G-6200n to reboot), then you can access Internet. Note: Please - Edimax 3G-6200n | Manual - Page 63
(Dynamic Host Configuration Protocol). Dynamic IP is often used by cable modem Internet connection. Here are descriptions of every setup items: Item Name Host Name MAC address TTL Description Please input the host name of your computer, this is optional, and only required if your service provider - Edimax 3G-6200n | Manual - Page 64
click 'Back'; or you can click 'OK' to finish with quick setup. You'll see the following messages: Please click 'Apply' to save changes you made and restart the broadband router, this requires about 30 seconds and the broadband router will stop responding (this is normal and is not malfunction). You - Edimax 3G-6200n | Manual - Page 65
mask assigned by your service provider. Please input the IP address of DNS server provided by your service provider. Please input the IP address of DNS server provided by your service provider. Time-to-live (TTL) is a value in an Internet Protocol packet that tells a network router whether or not - Edimax 3G-6200n | Manual - Page 66
You must use the addresses provided by your Internet service provider, wrong setting value will cause connection problem. If you wish to select another connection type as broadband connection type, click 'Back'; or you can click 'OK' to finish with quick setup. You'll see the following messages: - Edimax 3G-6200n | Manual - Page 67
of every setup items: Item Name User Name Password Service Name MTU Connection password assigned by your Internet service provider here. Please give a name to this Internet service, this is optional. Please input the MTU value of your network connection here. If you don't know, you can use default - Edimax 3G-6200n | Manual - Page 68
'Back'; or you can click 'OK' to finish with quick setup. You'll see the following messages: Please click 'Apply' to save changes you made and restart the broadband router, this requires about 30 seconds and the broadband router will stop responding (this is normal and is not malfunction). You - Edimax 3G-6200n | Manual - Page 69
Internet connection. PPTP requires two kinds of setting: WAN interface setting (setup IP address) and PPTP setting (PPTP user name and password). Here we start from WAN interface setting first: Select the type of how you obtain IP address from your service provider here. You can choose 'Obtain an - Edimax 3G-6200n | Manual - Page 70
setup items: Item Name User ID Password PPTP Gateway Connection ID MTU BEZEQ-ISRAEL Connection Type Description Please input user ID (user name) assigned by your Internet service provider here. Please input the password assigned by your Internet service provider here. Please input the IP address - Edimax 3G-6200n | Manual - Page 71
'Back'; or you can click 'OK' to finish with quick setup. You'll see the following messages: Please click 'Apply' to save changes you made and restart the broadband router, this requires about 30 seconds and the broadband router will stop responding (this is normal and is not malfunction). You - Edimax 3G-6200n | Manual - Page 72
with PPTP connection. Like PPTP, there are two kinds of required setting, we'll start from 'WAN Interface Settings': Please select the type of how you obtain IP address from your service provider here. You can choose 'Obtain an IP address automatically' (equal to DHCP, please refer to 'Cable Modem - Edimax 3G-6200n | Manual - Page 73
here. Please input the password assigned by your Internet service provider here. Please input the IP address of L2TP gateway assigned by your Internet service provider here. Please input the MTU value of your network connection here. If you don't know, you can use default value. Please select the - Edimax 3G-6200n | Manual - Page 74
click 'Back'; or you can click 'OK' to finish with quick setup. You'll see the following messages: Please click 'Apply' to save changes you made and restart the broadband router, this requires about 30 seconds and the broadband router will stop responding (this is normal and is not malfunction). You - Edimax 3G-6200n | Manual - Page 75
server manually Login Server Description Please input the user name assigned by Telstra. Please input the password assigned by Telstra. Check this box to choose login server by yourself. Please input the IP address of login server here. If you wish to select another connection type as broadband - Edimax 3G-6200n | Manual - Page 76
router, this requires about 30 seconds and the broadband router will stop responding (this is normal and is not malfunction). You can reconnect to this broadband router and continue on other settings later. 76 - Edimax 3G-6200n | Manual - Page 77
for detailed setup instructions. 3-3-1 Start Before you start - Suggestions for deciding an IP address to be used with this broadband router Before all computers using wired Ethernet connection (i.e. those computers connect to this router's LAN port 1 to 4 by Ethernet cable) or wireless connection - Edimax 3G-6200n | Manual - Page 78
(like Internet service, print service, and file service), they should use static IP address. Give each of them a unique number between 1 and 253, and maintain a list, so everyone can locate those servers easily. 4. For computers which are not dedicated to provide specific service to others, they - Edimax 3G-6200n | Manual - Page 79
"DHCP Server" , the router can assign IP address to PC which connect with the router. You can use this setting to assign an IP address to the LAN interface of this broadband router. Here are descriptions of every setup items: Item Name Description IP address Please input the IP address of this - Edimax 3G-6200n | Manual - Page 80
'End IP' must be greater than 'Start IP', and can not the same with router's IP address. 2. The former three fields of IP address of 'Start IP', 'End IP', and 'IP Address of 'LAN IP' section (mentioned 'a', 'b', and 'c' field) should be the same. 3. These settings will affect wireless clients, too - Edimax 3G-6200n | Manual - Page 81
function to establish a MAC-to-IP address table here, so you can assign a specific IP address to a specific computer / network device by its MAC address. Here are descriptions of every setup items: Item Name Enable Static DHCP Leases MAC Address IP address Add Clear Description Check this box - Edimax 3G-6200n | Manual - Page 82
All MAC-to-IP address entries will be listed in this page, and this broadband router supports up 16 static DHCP leases: To delete one or more entries listed here, please check the box of the mapping entry (under 'Select'), and click 'Delete Selected' button. If you wish to delete all mapping entries - Edimax 3G-6200n | Manual - Page 83
3-4 Wireless You can setup Wireless LAN connection parameters of this broadband router in 'Wireless' menu: Please select one setting in this menu, then click 'Apply' to proceed. If you wish to go back to previous page, click 'Previous'. 83 - Edimax 3G-6200n | Manual - Page 84
3-4-1 Basic Settings You can set basic settings of wireless LAN here. 84 - Edimax 3G-6200n | Manual - Page 85
mode, the following settings will appear: Here are descriptions of every setup items: Item Name Band Description Please select the radio band from one of following options: 2.4 GHz (B): 2.4GHz band, only allows 802.11b wireless network client to connect this router (maximum transfer rate 11Mbps - Edimax 3G-6200n | Manual - Page 86
Advanced Settings compatibility. This is the name of broadband router. You can type any alphanumerical characters here, maximum 32 characters. ESSID is used to identify your own broadband router from others when there are other broadband routers in the same area. Default SSID is 'default', it - Edimax 3G-6200n | Manual - Page 87
is too slow, or keep having problem while transferring the file over wireless network. There could be some other broadband routers using the same channel, which will disturb the radio communication between wireless client and the broadband When you finished with the settings in this page, you can - Edimax 3G-6200n | Manual - Page 88
responding (this is normal and is not malfunction). You can reconnect to this broadband router and continue on other settings later. You can click 'Continue' to continue on other settings without restart the broadband router, however, the changes you made will not take effect before you restart the - Edimax 3G-6200n | Manual - Page 89
3-4-2 Security Settings This wireless router supports two types of encryption: WEP (Wired Equivalent Privacy) and WPA (Wi-Fi Protected Access): Please select an encryption method from 'Encryption' dropdown menu, and corresponding setting will appear: Disabled Encryption is disabled. It's not - Edimax 3G-6200n | Manual - Page 90
Equivalent Privacy) encryption: Here are descriptions of every setup items: Item Name Key Length Key Format Default Tx Key Encryption Key 1 to 4 Description There is 10 characters. You can set up to four sets of WEP key, and you can decide which key is being used by default here. If you don't know - Edimax 3G-6200n | Manual - Page 91
click 'Apply' to save changes, or click 'Reset' to clear the texts in all fields. If you click 'Apply', the following messages will appear: You can click 'Continue' to back to previous page and continue setting, or click 'Apply' to restart the broadband router so the changes will take effect. WPA - Edimax 3G-6200n | Manual - Page 92
to previous page and continue setting, or click 'Apply' to restart the broadband router so the changes will take effect. WPA RADIUS If you have RADIUS authentication server on your local network, you can authenticate the wireless clients by RADIUS server's user database. Only authenticated clients - Edimax 3G-6200n | Manual - Page 93
to make sure your wireless client support the cipher you selected. Input the IP address of RADIUS authentication server here. Input the port number of RADIUS authentication server here. Most of RADIUS server will use port number 1812 and you can keep using default value. Input the password of RADIUS - Edimax 3G-6200n | Manual - Page 94
can be assigned. To enable MAC address filtering, please check 'Enable Wireless Access Control' box in this page, the descriptions of other setting items are listed as follow: Item Name MAC address Comment Description Input the MAC address you wish to add to the MAC address to the table. You can - Edimax 3G-6200n | Manual - Page 95
with the settings in this page, you can click 'Apply' button to save changes you made in this page, or you can click 'Cancel' to discard changes. After you click 'Apply' button, you'll see the following messages: Please click 'Apply' to save changes you made and restart the broadband router, this - Edimax 3G-6200n | Manual - Page 96
the connection between this broadband router and wireless clients. Any WPS-compatible wireless clients can establish secure connection with this broadband router with simple push-button type configuration or PinCode type configuration. Here are descriptions of every setup items: Item Name Enable - Edimax 3G-6200n | Manual - Page 97
the WPS push-button on other WPS-compatible network devices to begin WPS configuration. Configure via Client PinCode You can also push the 'WPS / Reset' button located at the back of this broadband router to start PBC without using web configuration interface. Please input the PinCode displayed at - Edimax 3G-6200n | Manual - Page 98
is not workable, if you disable wireless hardware button ( back panel ). Click " Add ", the list of schedules will be listed here. Please click 'Apply' to save changes you made and restart the broadband router, this requires about 30 seconds and the broadband router will stop responding (this is - Edimax 3G-6200n | Manual - Page 99
3-5 Advance Settings* This router provides various network functionalities like QoS and NAT, and you can configure these functions in 'Advanced Settings' menu. Please select the function you wish to set, then click 'Apply' button. If you wish to go back to previous page, click 'Previous' button. 99 - Edimax 3G-6200n | Manual - Page 100
the internet bandwidth with a promised quality of internet service. Without QoS, all computers and devices on the network specific computer, to avoid said unpleasing result from happening. 3-5-1-1 Basic QoS Settings Here are descriptions of every setup items: Item Name Enable QoS Total Download - Edimax 3G-6200n | Manual - Page 101
with the settings in this page, you can click 'Apply' button to save changes you made in this page, or you can click 'Cancel' to discard changes. After you click 'Apply' button, you'll see the following messages: Please click 'Apply' to save changes you made and restart the broadband router, this - Edimax 3G-6200n | Manual - Page 102
of every setup items: Item Name Rule Name Bandwidth Local IP Address Local Port Range Description Please give a name to this QoS rule (up to 15 alphanumerical characters). Set the bandwidth limitation of this QoS rule. You have to select the data direction of this rule (Upload of Download), and - Edimax 3G-6200n | Manual - Page 103
specific traffic type for this rule, if you want to make this rule as a IP address based rule (apply the limitation on all traffics from / to the specified IP address / port to work. Please click 'save' button to save settings, and the rule you just set will appear in current QoS table; if you did - Edimax 3G-6200n | Manual - Page 104
user. Therefore it's necessary to use NAT technology to share a single Internet IP address to multiple computers on local network, so everyone can get connected to Internet. This broadband router supports four types of NAT functions, and the instructions of these functions will be given below. 104 - Edimax 3G-6200n | Manual - Page 105
server. Input the IP address of the computer which provides Internet service. All computer names found by this broadband router on local network will be listed here. You can select the computer name and click ' - Edimax 3G-6200n | Manual - Page 106
Comment Add Reset address which will be redirected to the port number of local IP address defined above. Please input any text to describe this mapping, up to 16 alphanumerical characters. Add the mapping to virtual server table. Remove all inputted values. All existing virtual server mappings - Edimax 3G-6200n | Manual - Page 107
for special applications, and uncheck this box to disable this support. Input the IP address of the computer which is going to use the special application. All computer names found by this broadband router on local network will be listed here. You can select the computer name and click ' - Edimax 3G-6200n | Manual - Page 108
to help you remember the purpose of this item. This is optional. This router comes with a numerous port mapping settings of network games. If the game you wish to set is listed here, you can select it from dropdown menu. Add Reset After a game is selected, click 'Add' (the one next to 'Select Game - Edimax 3G-6200n | Manual - Page 109
with the settings in this page, you can click 'Apply' button to save changes you made in this page, or you can click 'Cancel' to discard changes. After you click 'Apply' button, you'll see the following messages: Please click 'Apply' to save changes you made and restart the broadband router, this - Edimax 3G-6200n | Manual - Page 110
and access the Internet through this router without any configuration. The NAT Traversal function provided by UPnP can let applications which support UPnP smoothly connect to Internet websites and avoid any incompatibility problem due to the NAPT port translation. Click at the bottom - Edimax 3G-6200n | Manual - Page 111
"Application Layer Gateway" support. Parameters Enable Default Description You can enable "Application Layer Gateway" function, and the router will let selected application correctly pass though the NAT gateway. Click at the bottom of the screen to save the configurations. You can now - Edimax 3G-6200n | Manual - Page 112
, and the static routing can work with NAT (IP Sharing) function. With static routing, the router can forward packets according to your routing rules. Parameters Description Enable Static Routing Static routing function is disabled by default. You have to enable the static routing function - Edimax 3G-6200n | Manual - Page 113
click "Delete Selected". If you want remove all rules from the table, just click "Delete All" button. Click "Reset" will clear your current selections. Click at the bottom of the screen to save the configurations. You can now configure other advance sections or start using the router. 113 - Edimax 3G-6200n | Manual - Page 114
This broadband router supports several firewall functions which will help you to protect your network and computer. In this chapter, instructions for certain MAC address to access the network, or deny the computers in the list from accessing your network. Here are descriptions of every setup items: - Edimax 3G-6200n | Manual - Page 115
computer names found by this broadband router on local network will be listed here. You can select the computer name and click ' - Edimax 3G-6200n | Manual - Page 116
'Allow' to decide the behavior of IP filtering table (Deny the access of IP addresses in the list, or allow the access of IP addressees in the list). You have to click 'Add PC' button to add a new IP address to the list: Here are descriptions of every setup items: Item Name Client PC Description - Edimax 3G-6200n | Manual - Page 117
control rule from the list: You can select multiple services here. If you wish to deny or allow all services of certain IP address(es), please select both 'TCP' and 'UDP'. If the service you wish to deny or allow is not listed, you can use 'User Define Service' table to add a new service of your own - Edimax 3G-6200n | Manual - Page 118
of service port (like '110'). If this service consists multiple continuous ports, you can input '110-120' for port number 110 to 120, or '110,115,120' for port number 110, 115, and 120. Click 'Add' to add this IP address restriction rule to the list (and back to previous page), or click 'Reset' to - Edimax 3G-6200n | Manual - Page 119
and company managers. Please follow the following instructions to set URL blocking parameters: Please click 'Firewall setup items: Item Name Enable URL Blocking URL/Keyword Description Check this box to enforce URL Blocking, uncheck it to disable URL Blocking. Input the URL (host name or IP address - Edimax 3G-6200n | Manual - Page 120
a specific URL/Keyword entry, check the 'select' box of the MAC address you want to delete, then click 'Delete Selected' button. (You can select more than one MAC addresses). If you want to delete all URL/Keyword listed here, please click 'Delete All' button, or you can also click 'Reset' button - Edimax 3G-6200n | Manual - Page 121
Denial of Service (DoS) is a common attack measure, by transmitting a great amount of data or request to your Internet IP address and server, the Internet connection will become very slow, and server may stop responding because it is not capable to handle too much traffics. This router has a built - Edimax 3G-6200n | Manual - Page 122
all traffics which are trying to scan your Internet IP address. This is another kind of attack, which uses a lot of fake connection request to consume the memory of your server, and try to make your server become unusable. Check this box and the router will filter this kind of traffic out. If you - Edimax 3G-6200n | Manual - Page 123
with the settings in this page, you can click 'Apply' button to save changes you made in this page, or you can click 'Cancel' to discard changes. After you click 'Apply' button, you'll see the following messages: Please click 'Apply' to save changes you made and restart the broadband router, this - Edimax 3G-6200n | Manual - Page 124
) IP address. It will be a problem when such user wants to provide services to other users on Internet, because their IP address will vary every time when connected to Internet, and other user will not be able to know the IP address they're using at a certain time. This router supports DDNS service - Edimax 3G-6200n | Manual - Page 125
provider. Input account or email of DDNS registration. Input DDNS service password or key. If your DDNS provider is 'DHIS', the settings will be different: Here are descriptions of every setup items: Item Name HostID ISAddr Authentication Type HostPass Description Please input the HostID you - Edimax 3G-6200n | Manual - Page 126
with the settings in this page, you can click 'Apply' button to save changes you made in this page, or you can click 'Cancel' to discard changes. After you click 'Apply' button, you'll see the following messages: Please click 'Apply' to save changes you made and restart the broadband router, this - Edimax 3G-6200n | Manual - Page 127
Description Check this box to enable port forwarding, and uncheck this box to disable port forwarding. Input the IP address of the computer on local network which provides internet service. All computer names found by this broadband router on local network will be listed here. You can select the - Edimax 3G-6200n | Manual - Page 128
. (You can select more than one port forwarding entries). If you want to delete all port forwarding entries listed here, please click 'Delete All' button or you can also click 'Reset' button to unselect all port forwarding entries. When you finished with the settings in this page, you can click - Edimax 3G-6200n | Manual - Page 129
Please click 'Apply' to save changes you made and restart the broadband router, this requires about 30 seconds and the broadband router will stop responding (this is normal and is not malfunction). You can reconnect to this broadband router and continue on other settings later. 129 - Edimax 3G-6200n | Manual - Page 130
DMZ setting page looks like this: Here are descriptions of every setup items: Item Name Enable DMZ Public IP address Client PC IP address Type IP', please input the IP address that you want to map to a specific private IP address. Please input the private IP address that the Internet IP address - Edimax 3G-6200n | Manual - Page 131
. Add the mapping to port forwarding table. Remove all inputted values. NOTE: Please note that every public IP address can be mapped to a single Client PC IP address only. All existing DMZ entries will be displayed in 'Current DMZ Table': If you want to delete a specific DMZ entry, check the - Edimax 3G-6200n | Manual - Page 132
Please click 'Apply' to save changes you made and restart the broadband router, this requires about 30 seconds and the broadband router will stop responding (this is normal and is not malfunction). You can reconnect to this broadband router and continue on other settings later. 132 - Edimax 3G-6200n | Manual - Page 133
3-5-7 Fail Over 3G-6200n supports automatic backup function. When connecting with xDSL/Cable broadband, 3G-6200n will enable the xDSL/Cable broadband connection automatically when 3G/3.5G Internet connection is not available. You can surf Internet anywhere and anytime via Edimax 3G-6200n. 133 - Edimax 3G-6200n | Manual - Page 134
3-6 Print Server The router provides Print Server function that let you share a printer to all PCs in your Intranet. It supports LPD and IPP printing protocol. Parameters Description Enable Print Enable/disable USB print server. Server IPP Enable to support the Internet Printing Protocols. LPR - Edimax 3G-6200n | Manual - Page 135
Click at the bottom of the screen to save the configurations. You can now configure other advance sections or start using the router. 135 - Edimax 3G-6200n | Manual - Page 136
to printers via TCP/IP protocol for printing sharing. Computer with Windows 98SE/Me/NT/2000/XP/2003 operating system can use the protocol to share printer over the network. To configure the LPR setting in Windows 2000/XP/2003, please follow the instructions listed below: 1) Click "Start", choose - Edimax 3G-6200n | Manual - Page 137
4) Select "Local Printer attached to this computer" and click "Next". 5) Choose "Create a new port" and "Standard TCP/IP Port". Click "Next". 137 - Edimax 3G-6200n | Manual - Page 138
6) Please make sure that the Print Server and the Printer have turned on and connected to the network correctly before you continue. Click "Next". 7) Enter the IP Address of the Print Server in the "Printer Name or IP Address". Click "Next". 138 - Edimax 3G-6200n | Manual - Page 139
8) Select "Custom" and click "Settings". When you have finished the settings at step 9, click "Next" to continue. 9) Select "LPR" and enter "lpt1" in the "Queue Name", click "OK". By default the queue name of the Print Server is "lpt1". 139 - Edimax 3G-6200n | Manual - Page 140
10) Click "Finish". 11) Select a suitable printer manufacturer and the printer model and click "Next". If your printer is not in the list, click "Have Disk..." to install the driver of the printer. After installation, the printer model will be added to the list. 140 - Edimax 3G-6200n | Manual - Page 141
12) Choose to set the print whether as a default printer or not. Click "Next". 13) You have added the network printer to the PC successfully. The information of the printer is displayed in the windows. Click "Finish". 141 - Edimax 3G-6200n | Manual - Page 142
have to set a valid Internet IP address to the Print Server. You also have to make sure that there's no gateway, router or firewall blocking IPP protocol if you have these gateway devices installed in your network. At client side, please follow the steps below to configure the LPR setting in Windows - Edimax 3G-6200n | Manual - Page 143
network" and enter the URL of Print Server. The URL format is "http://IP:631/Port Name". The IP should be the Print Server's IP. The number 631 is IPP standard port number. Port Name is the port name of Print Server that your printer is connected to. The default port name is "lpt1". One example of - Edimax 3G-6200n | Manual - Page 144
6) Select a suitable printer manufacturer and the printer model and click "Next". If your printer is not in the list, click "Have Disk..." to install the driver of the printer. After installation, the printer model will be added to the list. 144 - Edimax 3G-6200n | Manual - Page 145
7) Choose to set the print whether as a default printer or not. Click "Next". 8) Now you have successfully added the network printer to your PC. The information of the printer will be displayed in the window. Click "Finish". 145 - Edimax 3G-6200n | Manual - Page 146
operation status of this broadband router. To view the status, follow the following instructions: 1. Click 'Status' button from main menu: 2. The basic system information will be shown: You can check the system uptime and firmware version of this broadband router. If you need detailed information - Edimax 3G-6200n | Manual - Page 147
147 - Edimax 3G-6200n | Manual - Page 148
5-1 Internet Connection This page shows the current status of Internet connection. 148 - Edimax 3G-6200n | Manual - Page 149
5-2 Device Status This page shows current wireless LAN and wired LAN configuration. 149 - Edimax 3G-6200n | Manual - Page 150
5-3 System Log This page shows all logged system information. You can use scroll bar to view the logs, or click 'Save' to download the log file to your computer. You can also click 'Clear' to remove all logs, or click 'Refresh' to reload logs. 150 - Edimax 3G-6200n | Manual - Page 151
5-4 Security Log This page shows all logged security-related information. You can use scroll bar to view the logs, or click 'Save' to download the log file to your computer. You can also click 'Clear' to remove all logs, or click 'Refresh' to reload logs. 151 - Edimax 3G-6200n | Manual - Page 152
5-5 Active DHCP Client This page shows all current DHCP clients. You can click 'Refresh' to reload the list. 152 - Edimax 3G-6200n | Manual - Page 153
5-6 Statistics This page shows the statistical information of network interfaces of this broadband router, and the total system uptime. 153 - Edimax 3G-6200n | Manual - Page 154
5-7 Modem Information This page shows the modem information of you have connected with 3G modem card or xDSL modem. 154 - Edimax 3G-6200n | Manual - Page 155
Chapter V : Tools This broadband router comes with several tools that will help you to manage the configuration of broadband router, upgrade the firmware, and restart the broadband router. To use these tools, follow the following instructions: 1. Click 'Tools' button from main menu: 155 - Edimax 3G-6200n | Manual - Page 156
2. The list of tools will appear: Please select the tool you wish to use, then click 'Apply' button. If you wish to go back to previous page, click 'Previous' button. 156 - Edimax 3G-6200n | Manual - Page 157
, then click 'Upload' to upload the configuration file to broadband router, and the configuration of broadband router will be replaced by the content of uploaded configuration file. Click 'Reset' button to restore the settings of the broadband router to factory default value. A pop-up message window - Edimax 3G-6200n | Manual - Page 158
function to upgrade firmware: Please click 'Browse...' button to select the firmware file saved on your computer, then click 'Apply' button to start firmware upload. The broadband router will restart after file upload is successful, and all settings will be lost. Please use default IP address (192 - Edimax 3G-6200n | Manual - Page 159
6-3 Restart If you found that the broadband router is not functioning correctly, or responding slowly then usual, you can use this function to restart the broadband router, and this may correct the problem. Click 'Apply' button to restart the broadband router. You'll be prompted to confirm the - Edimax 3G-6200n | Manual - Page 160
Chapter VI : Language This 3G router's web-based user interface supports 14-languages . You can change the display language by click 'Language' button in main menu. To change the display language, follow the following instructions: 1. Click 'Language' button from main menu: 160 - Edimax 3G-6200n | Manual - Page 161
Statement This equipment must be installed and operated in accordance with provided instructions and a minimum 20 cm spacing must be provided between computer mounted antenna and person's body (excluding extremities of hands, wrist and feet) during wireless - Edimax 3G-6200n | Manual - Page 162
A declaration of conformity is available on www.edimax.com N20379 162 - Edimax 3G-6200n | Manual - Page 163
163
-
 1
1 -
 2
2 -
 3
3 -
 4
4 -
 5
5 -
 6
6 -
 7
7 -
8
-
9
-
10
-
11
-
12
-
13
-
14
-
15
-
16
-
17
-
18
-
19
-
20
-
21
-
22
-
23
-
24
-
25
-
26
-
27
-
28
-
29
-
30
-
31
-
32
-
33
-
34
-
35
-
36
-
37
-
38
-
39
-
40
-
41
-
42
-
43
-
44
-
45
-
46
-
47
-
48
-
49
-
50
-
51
-
52
-
53
-
54
-
55
-
56
-
57
-
58
-
59
-
60
-
61
-
62
-
63
-
64
-
65
-
66
-
67
-
68
-
69
-
70
-
71
-
72
-
73
-
74
-
75
-
76
-
77
-
78
-
79
-
80
-
81
-
82
-
83
-
84
-
85
-
86
-
87
-
88
-
89
-
90
-
91
-
92
-
93
-
94
-
95
-
96
-
97
-
98
-
99
-
100
-
101
-
102
-
103
-
104
-
105
-
106
-
107
-
108
-
109
-
110
-
111
-
112
-
113
-
114
-
115
-
116
-
117
-
118
-
119
-
120
-
121
-
122
-
123
-
124
-
125
-
126
-
127
-
128
-
129
-
130
-
131
-
132
-
133
-
134
-
135
-
136
-
137
-
138
-
139
-
140
-
141
-
142
-
143
-
144
-
145
-
146
-
147
-
148
-
149
-
150
-
151
-
152
-
153
-
154
-
155
-
156
-
157
-
158
-
159
-
160
-
161
-
162
-
163
 |
 |

1