Epson 2180 User Manual - Page 17
front push, rear push, Using a pull tractor
 |
UPC - 010343815766
View all Epson 2180 manuals
Add to My Manuals
Save this manual to your list of manuals |
Page 17 highlights
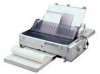
Tractor position Description To use this tractor, load paper in the front slot. If you print on thick paper such as multi-part forms or continuous paper with labels, load the paper in the front paper slot because the paper path from this slot is almost straight. This reduces the chance of paper jams. front push To use this tractor, load paper in the rear slot. rear push Note: Because thick multi-part forms require a straight paper path, load them in the front slot. Caution: Do not load continuous paper with labels in the rear slot. If you load continuous paper with labels in the rear slot, the labels may come off their backing sheet inside the printer and cause a paper jam. Using a pull tractor If you often print on thick or heavy continuous paper, such as multi-part forms or continuous paper with labels, use a tractor in the pull position. The pull tractor provides the best paper jam prevention, and allows you to load continuous paper from the front, rear, or bottom of the printer. However, you cannot use the tear-off feature with the pull tractor. Note: If you plan to use a pull tractor, you can remove the tractor from the front push position and install it in the pull position, or you can purchase the optional pull tractor (C80032V) and install it in the pull position. See Chapter 2 for instructions. 5 Getting to Know Your Printer
-
 1
1 -
2
-
3
-
4
-
5
-
6
-
7
-
8
-
9
-
10
-
11
-
 12
12 -
 13
13 -
 14
14 -
 15
15 -
 16
16 -
 17
17 -
 18
18 -
 19
19 -
 20
20 -
 21
21 -
 22
22 -
23
-
24
-
25
-
26
-
27
-
28
-
29
-
30
-
31
-
32
-
33
-
34
-
35
-
36
-
37
-
38
-
39
-
40
-
41
-
42
-
43
-
44
-
45
-
46
-
47
-
48
-
49
-
50
-
51
-
52
-
53
-
54
-
55
-
56
-
57
-
58
-
59
-
60
-
61
-
62
-
63
-
64
-
65
-
66
-
67
-
68
-
69
-
70
-
71
-
72
-
73
-
74
-
75
-
76
-
77
-
78
-
79
-
80
-
81
-
82
-
83
-
84
-
85
-
86
-
87
-
88
-
89
-
90
-
91
-
92
-
93
-
94
-
95
-
96
-
97
-
98
-
99
-
100
-
101
-
102
-
103
-
104
-
105
-
106
-
107
-
108
-
109
-
110
-
111
-
112
-
113
-
114
-
115
-
116
-
117
-
118
-
119
-
120
-
121
-
122
-
123
-
124
-
125
-
126
-
127
-
128
-
129
-
130
-
131
-
132
-
133
-
134
-
135
-
136
-
137
-
138
-
139
-
140
-
141
-
142
-
143
-
144
-
145
-
146
-
147
-
148
-
149
-
150
-
151
-
152
-
153
-
154
-
155
-
156
-
157
-
158
-
159
-
160
-
161
-
162
-
163
-
164
-
165
-
166
-
167
-
168
-
169
-
170
-
171
-
172
-
173
-
174
-
175
-
176
-
177
-
178
-
179
-
180
-
181
-
182
-
183
-
184
-
185
-
186
-
187
-
188
-
189
-
190
-
191
-
192
-
193
-
194
-
195
-
196
-
197
-
198
-
199
-
200
-
201
-
202
-
203
-
204
-
205
-
206
-
207
-
208
-
209
-
210
-
211
-
212
-
213
-
214
-
215
-
216
-
217
-
218
-
219
-
220
-
221
-
222
-
223
-
224
-
225
-
226
-
227
-
228
-
229
 |
 |
