Epson 680Pro Product Information Guide - Page 9
Using the Tear Off Button, Using Auto Tear- off Mode, Removing Continuous Paper - lq user
 |
UPC - 010343832138
View all Epson 680Pro manuals
Add to My Manuals
Save this manual to your list of manuals |
Page 9 highlights
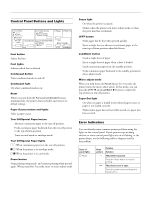
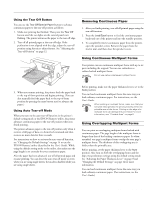
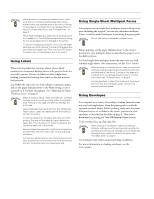
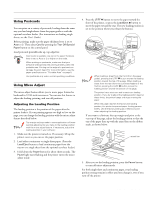
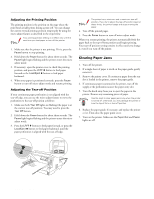
EPSON LQ-680Pro Using the Tear Off Button You can use the Tear Off/Special Paper button to advance continuous paper to the tear-off position as follows: 1. Make sure printing has finished. Then press the Tear Off button until the two lights on the control panel start flashing. The printer advances the paper to the tear-off edge. 2. Tear off all printed pages at the tear-off edge. If the perforation is not aligned with the edge, adjust the tear-off position using the micro adjust feature. See "Adjusting the Tear-off Position" on page 12. Removing Continuous Paper 1. After you finish printing, tear-off all printed pages using the tear-off function. 2. Press the Load/Eject button to feed the continuous paper backward out of the printer and into the standby position. 3. To completely remove continuous paper from the printer, open the sprocket covers. Remove the paper from the tractor unit, and then close the sprocket covers. Using Continuous Multipart Forms Your printer can use continuous multipart forms with up to six parts including the original. You can use carbonless or carbon-backed multipart forms. Do not use carbon-interleaved multipart forms. 3. When you resume printing, the printer feeds the paper back to the top-of-form position and begins printing. (You can also manually feed the paper back to the top-of-form position by pressing the same button used to advance the paper.) Using Auto Tear-off Mode When you turn on the auto tear-off function in the printer's default-setting mode or the EPSON Remote! utility, the printer advances continuous paper to the tear-off position when you finish printing. The printer advances paper to the tear-off position only when it receives a full page of data or a form-feed command and then receives no more data for three seconds. For instructions on how to activate the auto tear-off function, see "Changing the Default Settings" on page 14 or use the EPSON Remote! utility (described in the User's Guide). While using the default setting mode or the utility, also make sure the page length is set correctly for your continuous paper. After the paper has been advanced, tear off all printed pages and resume printing. You can leave the auto tear-off mode on even when you are using single sheets; the mode is disabled while you are using single sheets. Before printing, make sure the paper thickness lever is set to the Auto position. You can load continuous multipart forms the same way you load ordinary continuous paper. For instructions, see the User's Guide. When printing on multipart forms, make sure that your software settings keep the printing entirely within the printable area of the forms. Printing on the edge of a multipart form can damage the print head. For more information, see "Printable Area" on page 5. Using Overlapping Multipart Forms You can print on overlapping multipart forms backed with continuous paper. The page length of the multipart forms is longer than that of the backing continuous paper. So when extended, one page's multipart forms overlap the next page's multipart forms. The thickness of this overlapping area is thicker than the printable area. Before printing, set the paper thickness lever to the Auto position. Also turn on both the overlapping-forms and the skip-over-perforation settings using the default setting mode. See "Adjusting the Paper Thickness Lever" on page 8 and "Changing the Default Settings" on page 14 for more information. You can load continuous multipart forms the same way you load ordinary continuous paper. (For instructions, see the User's Guide.) 11/00 EPSON LQ-680Pro - 9
-
 1
1 -
2
-
3
-
 4
4 -
 5
5 -
 6
6 -
 7
7 -
 8
8 -
 9
9 -
 10
10 -
 11
11 -
 12
12 -
 13
13 -
 14
14 -
15
-
16
 |
 |
