Epson 7800p User Manual - Page 87
When you finish changing an address in the network menu, press
 |
View all Epson 7800p manuals
Add to My Manuals
Save this manual to your list of manuals |
Page 87 highlights
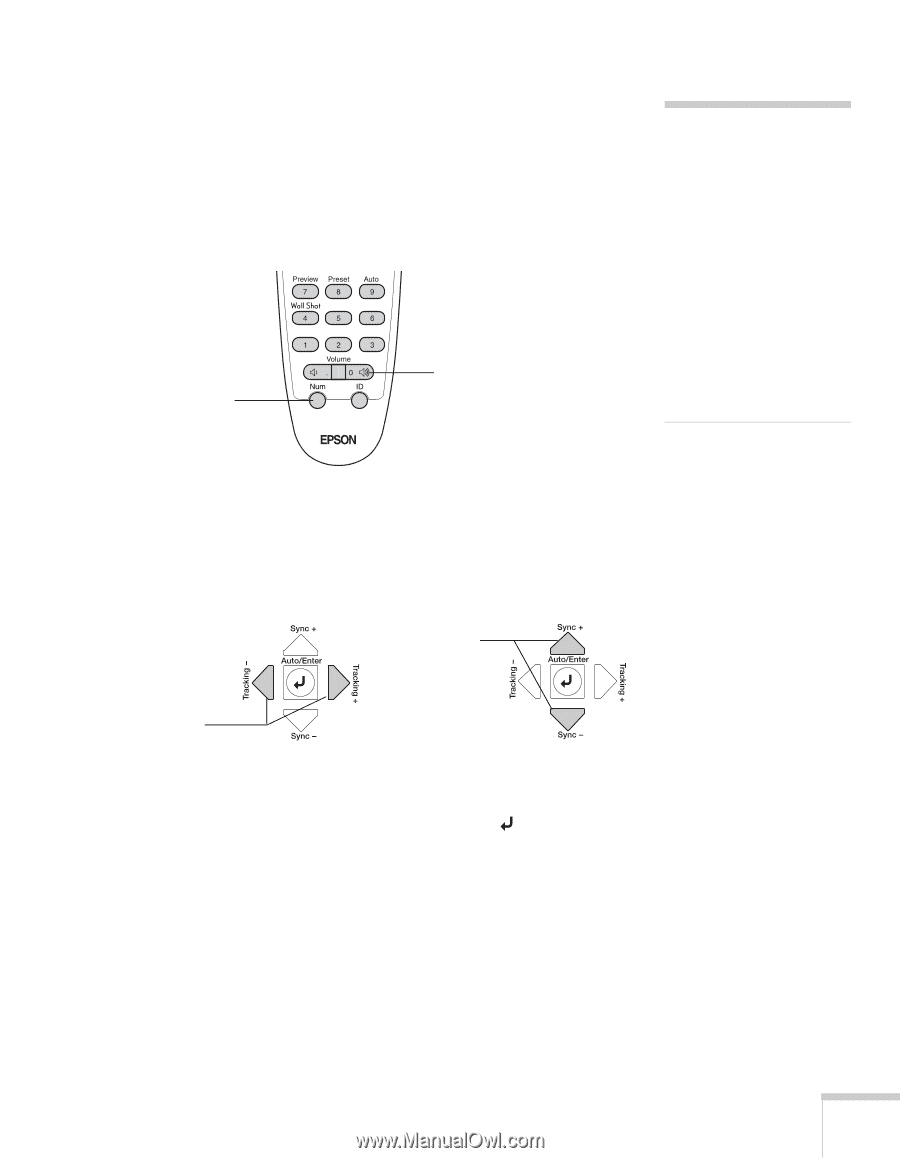
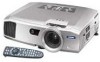
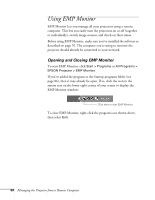
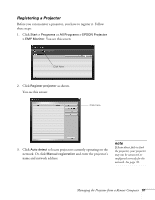
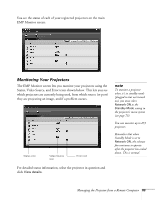
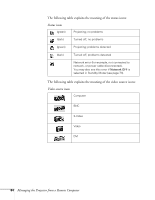
5. If your network does not assign addresses automatically, turn off DHCP and enter the projector's IP Address, Subnet Mask, Gateway Address, and MAC Address, as needed. ■ To enter numbers using the remote control, press the Num button until it lights, then use the number keypad shown below. Num button Zero note If you're a network administrator, you can use the SNMP option to enter a trap IP address. This lets you receive trap alerts for the projectors you're monitoring. If you have HP OpenView, a plug-in will be available to allow you to manage your projectors in HP OpenView. Check with your dealer or EPSON for availability (see page 113). ■ To change the network addresses from the projector's control panel, press the right and left arrow buttons to select the part of the address you want to enter, then use the up and down arrow buttons to increase or decrease the numeric value. Select the part of the address to change Increase or decrease the value When you finish changing an address in the network menu, press the Enter button (on the remote control) or the Auto/Enter button (on the projector). This stores the value. 6. When done making all necessary changes, press ESC to exit the menu system. Managing the Projector from a Remote Computer 79
-
 1
1 -
2
-
3
-
4
-
5
-
6
-
7
-
8
-
9
-
10
-
11
-
12
-
13
-
14
-
15
-
16
-
17
-
18
-
19
-
20
-
21
-
22
-
23
-
24
-
25
-
26
-
27
-
28
-
29
-
30
-
31
-
32
-
33
-
34
-
35
-
36
-
37
-
38
-
39
-
40
-
41
-
42
-
43
-
44
-
45
-
46
-
47
-
48
-
49
-
50
-
51
-
52
-
53
-
54
-
55
-
56
-
57
-
58
-
59
-
60
-
61
-
62
-
63
-
64
-
65
-
66
-
67
-
68
-
69
-
70
-
71
-
72
-
73
-
74
-
75
-
76
-
77
-
78
-
79
-
80
-
81
-
 82
82 -
 83
83 -
 84
84 -
 85
85 -
 86
86 -
 87
87 -
 88
88 -
 89
89 -
 90
90 -
 91
91 -
 92
92 -
93
-
94
-
95
-
96
-
97
-
98
-
99
-
100
-
101
-
102
-
103
-
104
-
105
-
106
-
107
-
108
-
109
-
110
-
111
-
112
-
113
-
114
-
115
-
116
-
117
-
118
-
119
-
120
-
121
-
122
-
123
-
124
-
125
-
126
-
127
-
128
-
129
-
130
-
131
-
132
-
133
-
134
-
135
-
136
-
137
-
138
-
139
-
140
-
141
-
142
-
143
-
144
-
145
-
146
 |
 |