Epson P6000 Product Support Bulletin(s) - Page 4
Formatted Compact Flash 16MB to 8GB, SD memory card 16MB to 2GB; or 2GB - pro
 |
UPC - 010343866812
View all Epson P6000 manuals
Add to My Manuals
Save this manual to your list of manuals |
Page 4 highlights
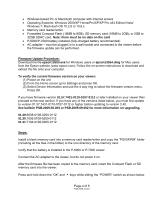
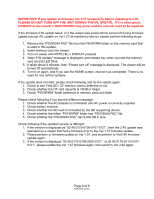
• Windows-based PC or Macintosh computer with Internet access • Operating Systems: Windows 2000/XP Home/Pro/XP/XP Pro x64 Edition/Vista/ Windows 7; Macintosh OS 10.2.8 to 10.6.x • Memory card reader/writer • Formatted Compact Flash (16MB to 8GB), SD memory card (16MB to 2GB); or 2GB to 32GB SDHC card. Note: there must be no data on the card • P-6000/P-7000 battery installed (fully-charged battery recommended) • AC adapter - must be plugged in to a wall socket and connected to the viewer before the firmware update can be performed. Firmware Update Procedure: Download the file epson13553.exe for Windows users or epson13554.dmg for Mac users from the Epson website (www.epson.com). Follow the on-screen instructions to download and extract the file onto your computer. To verify the current firmware version on your viewer: (1) Power on the unit (2) From the Home screen go to Settings and press OK. (3) Select Device Information and use the 4 way ring to select the firmware version menu. Press OK. If you have firmware version 01.57.7431-0110-0107-0112 or later installed on your viewer then proceed to the next section. If you have any of the versions listed below, you must first update to version 01.57.7431-0110-0107-0112 or higher before updating to version 2.40. See bulletin PSB.2009.06.003 or PSB.2009.09.002 for more information on upgrading. 01.29.6838-0108-0200-0112 01.30.7099.0108-0200-0112 01.31.7104-0108-0200-0112 Steps: Install a blank memory card into a memory card reader/writer and copy the "PSV5FIRM" folder (including all the files in the folder) to the root directory of the memory card. Verify that the battery is installed in the P-6000 or P-7000 viewer. Connect the AC adapter to the viewer, but do not power it on. After the firmware file has been copied to the memory card, insert the Compact Flash or SD memory card into the viewer. Press and hold down the "OK" and keys while sliding the "POWER" switch as shown below. Page 4 of 6 PSB.2009.11.001
-
 1
1 -
 2
2 -
 3
3 -
 4
4 -
 5
5 -
 6
6 -
 7
7 -
 8
8 -
 9
9 -
 10
10 -
11
-
12
-
13
-
14
-
15
-
16
-
17
 |
 |
