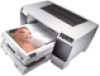
Epson Stylus Pro 5500 Product Information Guide - Page 7
Running a Printer Check, Aligning the Print Head, Using the Print Head Alignment Utility, Macintosh - ink cartridges
 |
View all Epson Stylus Pro 5500 manuals
Add to My Manuals
Save this manual to your list of manuals |
Page 7 highlights
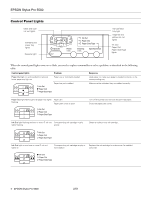
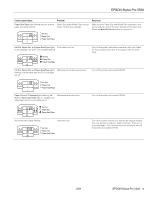
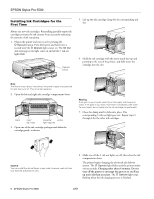
EPSON Stylus Pro 5500 Caution: Never turn off the printer or open the paper path cover when the P Operate light is flashing. However, if the light is still flashing after 15 minutes and the printer is not moving or making noise, you may turn off the printer. Running a Printer Check You can run a printer check to make sure that your printer is operating correctly. Follow these steps: 1. Make sure the printer is turned off. 2. Make sure letter-size (or larger) paper is loaded in the main paper tray. 3. Hold down the Reset button and press the P Operate button to turn on the printer. Release both buttons when the P Operate light begins flashing. After a few moments, the printer prints one page showing the version of your printer's ROM, a nozzle check pattern, and the printer's default settings, as shown below: 4. Press the P Operate button to turn off the printer. 5. Check the printout. ❏ If the printout looks like the example above, your printer is operating correctly. ❏ If the pattern has missing segments, as in the following example, your printer may have a clogged ink nozzle. Run a cleaning cycle (see page 12). ❏ If nothing prints at all, make sure your ink cartridges are correctly installed. Then run a cleaning cycle (see page 12). Aligning the Print Head Before you use the printer, you should align the print head to ensure accurate, clean printouts. Before you begin, load several sheets of one of these types of paper, letter-size or larger, in the main paper tray: ❏ Archival Matte Paper ❏ Premium Glossy Photo Paper, or ❏ Professional Glossy Paper There are two ways to align the print head: ❏ Using the Print Head Alignment utility in your printer software (not available if you're accessing the printer over a network) ❏ Using the printer's control panel buttons Using the Print Head Alignment Utility 1. Make sure the printer is turned on but not printing, and the paper described above is loaded in the main paper tray. 2. If you have an application running, access the printer settings dialog box. Or, with Windows, click Start, point to Settings, and select Printers. Right-click the EPSON Stylus Pro 5500 printer icon. Then select Properties (Windows 95, 98, or Me), Document Defaults (Windows NT), or Printing Preferences (Windows 2000). 3. Macintosh: Click the utility button. Windows: Click the Utility tab. 4. Click the Print Head Alignment button. 5. Follow the instructions on the screen to print a test page. Printing takes several minutes. You see an alignment window. 6. On the printed page, select the pattern that shows the two vertical lines most precisely printed on top of each other. Select one pattern each for rows 1, 2, and 3. Then enter the number of the best pattern for each row in the corresponding boxes on the screen. Note: You may want to check the alignment patterns using a standard 8X loupe so they're easier to see. You'll probably need to align the print head at least twice when you first set up the printer. 7. Click Realignment to print another test page. Make sure the pattern numbered 8 in each row is the best aligned. If not, repeat steps 6 and 7. 8. When you're finished, click Finish. 2/01 EPSON Stylus Pro 5500 - 7
-
 1
1 -
 2
2 -
 3
3 -
 4
4 -
 5
5 -
 6
6 -
 7
7 -
 8
8 -
 9
9 -
 10
10 -
 11
11 -
 12
12 -
13
 |
 |
