Fluke 287 Fluke 287 and 289 Multimeter Users Manual - Page 48
Measuring Current, later in this manual. Use the proper
 |
View all Fluke 287 manuals
Add to My Manuals
Save this manual to your list of manuals |
Page 48 highlights
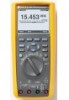
287/289 Users Manual Measuring Current XW Warning To avoid damage to the Meter and possible injury, never attempt an in-circuit current measurement where the open-circuit potential to earth is greater than 1000 V. W Caution To avoid possible damage to the Meter or to the equipment under test, check the meter's fuses before measuring current. See the Maintenance section later in this manual. Use the proper terminals, function, and range for your measurement. Never place the probes across (in parallel with) any circuit or component when the leads are plugged into the current terminals. Current is the flow of electrons through a conductor. To measure current, you must open the circuit under test, then place the meter in series with the circuit. Note When measuring current, the display will flash when the input current exceeds 10 amps for the A terminal and 400 mA for the mA/μA terminal. This is a warning that current is approaching the fuse's current limit. To measure ac or dc current, proceed as follows: 1. Turn off power to the circuit. Discharge all high- voltage capacitors. 38 2. Insert the black lead into the COM terminal. Insert the red lead in an input appropriate for the measurement range. Note To avoid blowing the Meter's 440 mA fuse, use the mA/μA terminal only if you are sure the current is less than 400 mA. 3. If you are using the A terminal, set the rotary switch to A. If you are using the mA/μA terminal, set the rotary switch to X for currents below 5000 μA (5 mA), or A for currents above 5000 μA. See Figure 21 for test lead connections and function selection. Refer to the "Input Alert Feature" section for information on the alerts the Meter uses when leads are not used correctly for current measurements. 4. As shown in Figure 22, open the circuit path to be tested. Touch the red probe to the more positive side of the break; touch the black probe to the more negative side of the break. Reversing the leads will produce a negative reading, but will not damage the meter. 5. Turn on power to the circuit; then read the display. Be sure to note the measurement unit given at the right side of the display (μA, mA, or A). 6. Turn off power to the circuit and discharge all high-voltage capacitors. Remove the Meter and restore the circuit to normal operation.
-
 1
1 -
2
-
3
-
4
-
5
-
6
-
7
-
8
-
9
-
10
-
11
-
12
-
13
-
14
-
15
-
16
-
17
-
18
-
19
-
20
-
21
-
22
-
23
-
24
-
25
-
26
-
27
-
28
-
29
-
30
-
31
-
32
-
33
-
34
-
35
-
36
-
37
-
38
-
39
-
40
-
41
-
42
-
 43
43 -
 44
44 -
 45
45 -
 46
46 -
 47
47 -
 48
48 -
 49
49 -
 50
50 -
 51
51 -
 52
52 -
 53
53 -
54
-
55
-
56
-
57
-
58
-
59
-
60
-
61
-
62
-
63
-
64
-
65
-
66
-
67
-
68
-
69
-
70
-
71
-
72
-
73
-
74
-
75
-
76
-
77
-
78
-
79
-
80
-
81
-
82
-
83
-
84
-
85
-
86
-
87
-
88
 |
 |
