Fluke 287 Fluke 287 and 289 Multimeter Users Manual - Page 58
Setting Date and Time, Setting Backlight and Auto Off Timeouts, Setting a Custom dBm Reference
 |
View all Fluke 287 manuals
Add to My Manuals
Save this manual to your list of manuals |
Page 58 highlights
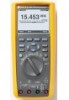
287/289 Users Manual Setting Date and Time The Meter's internal clock is used in the display and for timestamping recorded measurements. To change the date and time as well as the display format, press the softkey labeled Setup. Position the menu selector next to the menu item labeled Display. To set the date and time, press the softkey labeled Date/Time to open the date/time menu. Next, position the menu selector next to either the Set Date item or Set Time item and press the softkey labeled Edit. Using 5 and 6, position the cursor on the date or time element to adjust. Use 7 and 8 to change the selected date or time element value. Press OK to complete the action. Setting Backlight and Auto Off Timeouts The Meter's backlight and auto off features use timers to determine when to turn off the backlight, when to automatically turn the Meter off or enable the battery saver mode. To set these timeouts, press the softkey labeled Setup and position the menu selector next to the menu item labeled Instrument. Position the menu selector next to the menu item labeled Auto Backlight Timeout or Auto Power Off and then press the softkey labeled Edit. Use 7 and 8 to adjust the time to one of the preset values. Press OFF to disable the timeout feature. Press the softkey labeled OK to set the selected time. Press the softkey labeled Close to return to normal Meter operation. The battery-saver mode is used when the Meter is performing a recording session or during MIN MAX, Peak record and AutoHold. The battery-saver mode powers down circuits that are not involved in the operation of these recording sessions, including the display. For the record mode, the timeout period is set to five minutes and is enabled only when the Auto Power Off 48 timeout is set to a value other than Off. For MIN MAX, Peak, and AutoHold, the timeout is the time period set for Auto Off. Setting a Custom dBm Reference To add a custom dBm reference value, press the softkey labeled Setup and position the menu selector next to the menu item labeled Instrument. Next press the softkey labeled Instrument and position the menu selector next to the menu item labeled dBm Reference. Next, press the softkey labeled Edit. Use 5 and 6 to position the cursor on a specific digit. Press 7 and 8 to increment or decrement the digit. With the desired reference displayed, press the softkey labeled OK to add this value to the dBm reference list. Only one custom value is allowed. Press the softkey labeled Close to return to normal Meter operation. Disabling and Enabling the Beeper The Meter's beeper alerts users to the presence of messages, operator errors such as incorrect lead connections for the selected function, and newly sensed values for MIN MAX and Peak recording. Although the beeper is also used for the continuity function, controlling the beeper for that function is not done through this setup option. See the "Testing for Continuity" section for information on the continuity beeper. To enable or disable the Meter's beeper, press the softkey labeled Setup and position the menu selector next to the menu item labeled Instrument. Next press the softkey labeled Instrument and position the menu selector next to the menu item labeled Beeper. Press the softkey labeled Edit to move the cursor to the on or off selection. Use 7 and 8 to switch the beeper on or off. The status of the beeper is indicated in the display's status bar (see item 12 in Figure 2).
-
 1
1 -
2
-
3
-
4
-
5
-
6
-
7
-
8
-
9
-
10
-
11
-
12
-
13
-
14
-
15
-
16
-
17
-
18
-
19
-
20
-
21
-
22
-
23
-
24
-
25
-
26
-
27
-
28
-
29
-
30
-
31
-
32
-
33
-
34
-
35
-
36
-
37
-
38
-
39
-
40
-
41
-
42
-
43
-
44
-
45
-
46
-
47
-
48
-
49
-
50
-
51
-
52
-
 53
53 -
 54
54 -
 55
55 -
 56
56 -
 57
57 -
 58
58 -
 59
59 -
 60
60 -
 61
61 -
 62
62 -
 63
63 -
64
-
65
-
66
-
67
-
68
-
69
-
70
-
71
-
72
-
73
-
74
-
75
-
76
-
77
-
78
-
79
-
80
-
81
-
82
-
83
-
84
-
85
-
86
-
87
-
88
 |
 |
