Frigidaire FCRG3051BB Installation Instructions
Frigidaire FCRG3051BB Manual
 |
View all Frigidaire FCRG3051BB manuals
Add to My Manuals
Save this manual to your list of manuals |
Frigidaire FCRG3051BB manual content summary:
- Frigidaire FCRG3051BB | Installation Instructions - Page 1
of this or any other appliance. IMPORTANT SAFETY INSTRUCTIONS If the information in this manual is not followed exactly, a fire or electrical the Use & Care Guide, read it carefully. • Be sure your range is installed and grounded properly by a qualified installer or service technician. • Make - Frigidaire FCRG3051BB | Installation Instructions - Page 2
Guide, read it carefully. • Be sure your range is installed and grounded properly by a qualified installer or service Instructions on page 9. • All materials used in construction of cabinets, enclosures, and supports surrounding handle type manual gas valve must be installed in the gas supply line to - Frigidaire FCRG3051BB | Installation Instructions - Page 3
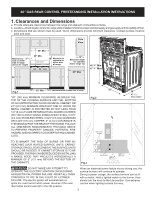
30" GAS REAR CONTROL FREESTANDING INSTALLATION INSTRUCTIONS 1. Clearances and Dimensions a. Provide adequate clearances between the range and adjacent combustible surfaces. b. Location-Check location where the range will be installed. Check for proper - Frigidaire FCRG3051BB | Installation Instructions - Page 4
30" GAS REAR CONTROL FREESTANDING INSTALLATION INSTRUCTIONS 2. Tools You Will Need (Wear safety glasses when using tools need: • Pipe joint sealant that resists action of LP/Propane gas (Fig. h) • Gas line manual shut-off valve (Fig. i) • A new flexible metal appliance conduit (1/2" NPT x 3/4" or - Frigidaire FCRG3051BB | Installation Instructions - Page 5
the range itself. If range is ever moved to a different location, the anti-tip brackets must also be moved and installed with the range. Instructions are provided for installation in wood or cement fastened to either the floor or wall. When installed to the wall, make sure that screws completely - Frigidaire FCRG3051BB | Installation Instructions - Page 6
line. If the LP/Propane conversion kit has been used, follow instructions provided with the kit for converting the pressure regulator to LP/ regulator to turn on pipe when tightening fittings. a. Install an external manual gas shut-off valve to gas supply line in an accessible location outside - Frigidaire FCRG3051BB | Installation Instructions - Page 7
30" GAS REAR CONTROL FREESTANDING INSTALLATION INSTRUCTIONS c. Tighten the gas supply fitting and/or appliance conduit gas supply fitting and/or appliance conduit. Service shut-off valve (shown in ON position) Fig. 10 d. Install flare union adapter to external manual shut-off valve (See Fig. 8). - Frigidaire FCRG3051BB | Installation Instructions - Page 8
30" GAS REAR CONTROL FREESTANDING INSTALLATION INSTRUCTIONS 7. Read the following electrical connection details before connecting electricity to range. Before servicing, disconnect electrical supply at circuit breaker, fuse or power cord. Electric requirements: A dedicated, properly grounded and - Frigidaire FCRG3051BB | Installation Instructions - Page 9
will continue as long as the oven control is set to operate. To check oven burner ignition: a. Set oven to Bake at 300ºF. See User's Manual for operating instructions. b. Within 60 seconds the oven burner should ignite. Check for proper flame, and allow the burner to cycle once. Reset control to OFF - Frigidaire FCRG3051BB | Installation Instructions - Page 10
the Kilowatt rating (power requirements) and Voltage ratings. Serial Plate Location: Fig. 19 Before You Call for Service Read the "Before You Call" and operating instruction sections in your Use & Care Manual. It may save you time and expense. The list includes common occurrences that are not the - Frigidaire FCRG3051BB | Installation Instructions - Page 11
être réalisés par un installateur qualifié, un technicien de service ou le fournisseur de gaz. Ne faites jamais fonctionner la section de la cuisinière Support antirenversement Remarques importantes pour l'installateur • Lisez toutes les instructions contenues dans ce guide avant de procéder - Frigidaire FCRG3051BB | Installation Instructions - Page 12
Vous les trouverez dans le Guide d'utilisation et d'entretien. Lisez installateur qualifié ou un technicien de service. • Cette cuisinière doit ê aux ÉtatsUnis). Reportez-vous aux instructions de mise à la terre se se trouve autour de la cuisinière peut supporter la chaleur produite par celle-ci. • - Frigidaire FCRG3051BB | Installation Instructions - Page 13
INSTRUCTIONS D'INSTALLATION DE LA COMMANDE ARRIÈRE À GAZ DE 30 PO 1. Dégagements et dimensions a. Veillez à créer un dégagement suffisant entre la cuisinière et les - Frigidaire FCRG3051BB | Installation Instructions - Page 14
lorsque vous allumez les brûleurs de cette façon. Instructions particulières pour les appareils installés dans l'État du DI) (Fig. k). Matériel fourni avec l'appareil : • Gabarit pour support anti-renversement (Fig. l) • Support anti-renversement avec deux vis de montage (Fig. m) Outils Fig. a Fig - Frigidaire FCRG3051BB | Installation Instructions - Page 15
, assurez-vous que les vis ne s'enfoncent pas dans des fils électriques ou de la tuyauterie. Instructions d'installation du support anti-renversement a. Installation du support à l'aide du gabarit (le support peut être installé sur le côté gauche ou sur le côté droit de la cuisinière. Reportez-vous - Frigidaire FCRG3051BB | Installation Instructions - Page 16
DOIT être branché en série avec la conduite d'alimentation en gaz. Si vous utilisez le nécessaire de conversion au gaz propane/GPL, suivez les instructions fournies dans ce nécessaire pour faire la conversion du détendeur. Lors de l'installation de la cuisinière, il est important de s'assurer que le - Frigidaire FCRG3051BB | Installation Instructions - Page 17
INSTRUCTIONS D'INSTALLATION DE LA COMMANDE ARRIÈRE À GAZ DE 30 PO c. Serrez le raccord d'alimentation en gaz ou la conduite de l'appareil en le branchant à l'adaptateur - Frigidaire FCRG3051BB | Installation Instructions - Page 18
soit équivalent ou supérieur au courant nominal du circuit de dérivation. Ce type de rallonge est disponible au service après-vente de votre région. Veuillez lire attentivement ces instructions! Pour des raisons de sécurité, ce produit doit être correctement mis à la terre. Ne coupez et ne retirez - Frigidaire FCRG3051BB | Installation Instructions - Page 19
èle est muni d'un brûleur de gril situé à hauteur de la taille, réglez votre four à Broil (gril). Pour connaître les instructions d'utilisation, reportez-vous au Guide de l'utilisateur. d. Le brûleur du gril devrait s'allumer en l'espace de 60 secondes. Vérifiez la qualité de la flamme. Éteignez les - Frigidaire FCRG3051BB | Installation Instructions - Page 20
ée à la sortie de l'usine. Fig. 19 Avant de faire appel au service aprèsvente Lisez la section « Avant de faire appel au service après-vente » et les instructions d'utilisation qui se trouvent dans le Guide d'utilisation et d'entretien. Cela pourrait vous faire économiser temps et argent. Cette - Frigidaire FCRG3051BB | Installation Instructions - Page 21
INSTRUCCIONES DE INSTALACIÓN ESTUFA INDEPENDIENTE DE GAS 30" LA INSTALACIÓN Y EL SERVICIO (DE MANTENIMIENTO/REPARACIÓN) DEBEN SER REALIZADOS POR UN INSTALADOR CALIFICADO. IMPORTANTE: CONSERVE ESTAS INSTRUCCIONES PARA USO DEL INSPECTOR LOCAL DE ELECTRICIDAD. LEA Y CONSERVE ESTAS INSTRUCCIONES PARA - Frigidaire FCRG3051BB | Installation Instructions - Page 22
en Estados Unidos. Consulte las "Instrucciones de puesta a tierra" en la página 8. • All materials used in construction of cabinets, enclosures, and supports surrounding the product must have a temperature rating above 200°F (94°C). • Antes de instalar la estufa en un área cubierta con linóleo - Frigidaire FCRG3051BB | Installation Instructions - Page 23
3 pies (36 pulgadas; 92 centímetros) de longitud. En la línea de entrada de gas que va hacia el artefacto, se debe instalar una válvula manual de gas de tipo manija en forma de "T". 23 - Frigidaire FCRG3051BB | Installation Instructions - Page 24
INSTRUCCIONES DE INSTALACIÓN - ESTUFA INDEPENDIENTE DE GAS 30" 1. Espacios libres y dimensiones a. Asegúrese de dejar todos los espacios libres adecuados entre la estufa y las superficies combustibles adyacentes. b. Ubicación: verifique el lugar donde se instalará la estufa. Controle que el - Frigidaire FCRG3051BB | Installation Instructions - Page 25
ño (Figuras f y g) Materiales necesarios: • Sellador de unión de tuberías que sea resistente a la acción del gas LP/propano (Fig. h) • Válvula de cierre manual del suministro de gas (Fig. i) • Se debe diseñar un conducto flexible nuevo metálico para el artefacto (1/2" NPT x 3/4" o 1/2" de diámetro - Frigidaire FCRG3051BB | Installation Instructions - Page 26
INSTRUCCIONES DE INSTALACIÓN - ESTUFA INDEPENDIENTE DE GAS 30" 3. Instalación del soporte antivuelco ¡ADVERTENCIA IMPORTANTE DE SEGURIDAD! Para minimizar el riesgo de vuelco, la estufa debe fijarse al piso con los tornillos y el soporte antivuelco debidamente instalados que se proporcionan con la - Frigidaire FCRG3051BB | Installation Instructions - Page 27
macho (exterior). No permita que el regulador de presión de gas abra la tubería cuando esté ajustando los conectores. a. Instale una válvula externa de cierre manual del suministro de gas en un lugar de fácil acceso fuera de la estufa. Asegúrese de saber cómo y dónde cerrar el suministro de gas - Frigidaire FCRG3051BB | Installation Instructions - Page 28
antes de apretar el accesorio y/o el conducto del electrodoméstico. Fig. 10 d. Instale un adaptador de unión acampanada a la válvula externa de cierre manual (vea la Fig. 8). e. Ajuste el conducto flexible del artefacto al adaptador de la unión acampanada en la válvula de cierre (vea la Fig - Frigidaire FCRG3051BB | Installation Instructions - Page 29
INSTRUCCIONES DE INSTALACIÓN - ESTUFA INDEPENDIENTE DE GAS 30" 7. Lea la siguiente información de conexión eléctrica antes de conectar el suministro eléctrico a la estufa. WARNING: Antes de realizar el mantenimiento, desconecte el suministro eléctrico del disyuntor, el fusible o el cable de - Frigidaire FCRG3051BB | Installation Instructions - Page 30
c. Si su modelo viene equipado con un asador a nivel de la cintura, ajuste el horno a la opción "Broil" (asado a la parrilla). Consulte el manual del usuario para obtener las instrucciones de funcionamiento. d. El quemador de asar debería encenderse en el curso de 60 segundos. Verifique que la llama - Frigidaire FCRG3051BB | Installation Instructions - Page 31
y la presión en la que fue ajustada la estufa cuando salió de la fábrica. 13. Cuidado, limpieza y mantenimiento Consulte el manual del usuario para obtener instrucciones detalladas de limpieza. Si necesita retirar la estufa para realizar una limpieza o mantenimiento, cierre el suministro de gas - Frigidaire FCRG3051BB | Installation Instructions - Page 32
-
 1
1 -
 2
2 -
 3
3 -
 4
4 -
 5
5 -
 6
6 -
 7
7 -
8
-
9
-
10
-
11
-
12
-
13
-
14
-
15
-
16
-
17
-
18
-
19
-
20
-
21
-
22
-
23
-
24
-
25
-
26
-
27
-
28
-
29
-
30
-
31
-
32
 |
 |
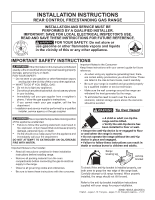
INSTALLATION INSTRUCTIONS
REAR CONTROL FREESTANDING GAS RANGE
INSTALLATION AND SERVICE MUST BE
PERFORMED BY A QUALIFIED INSTALLER.
IMPORTANT: SAVE FOR LOCAL ELECTRICAL INSPECTOR'S USE.
READ AND SAVE THESE INSTRUCTIONS FOR FUTURE REFERENCE.
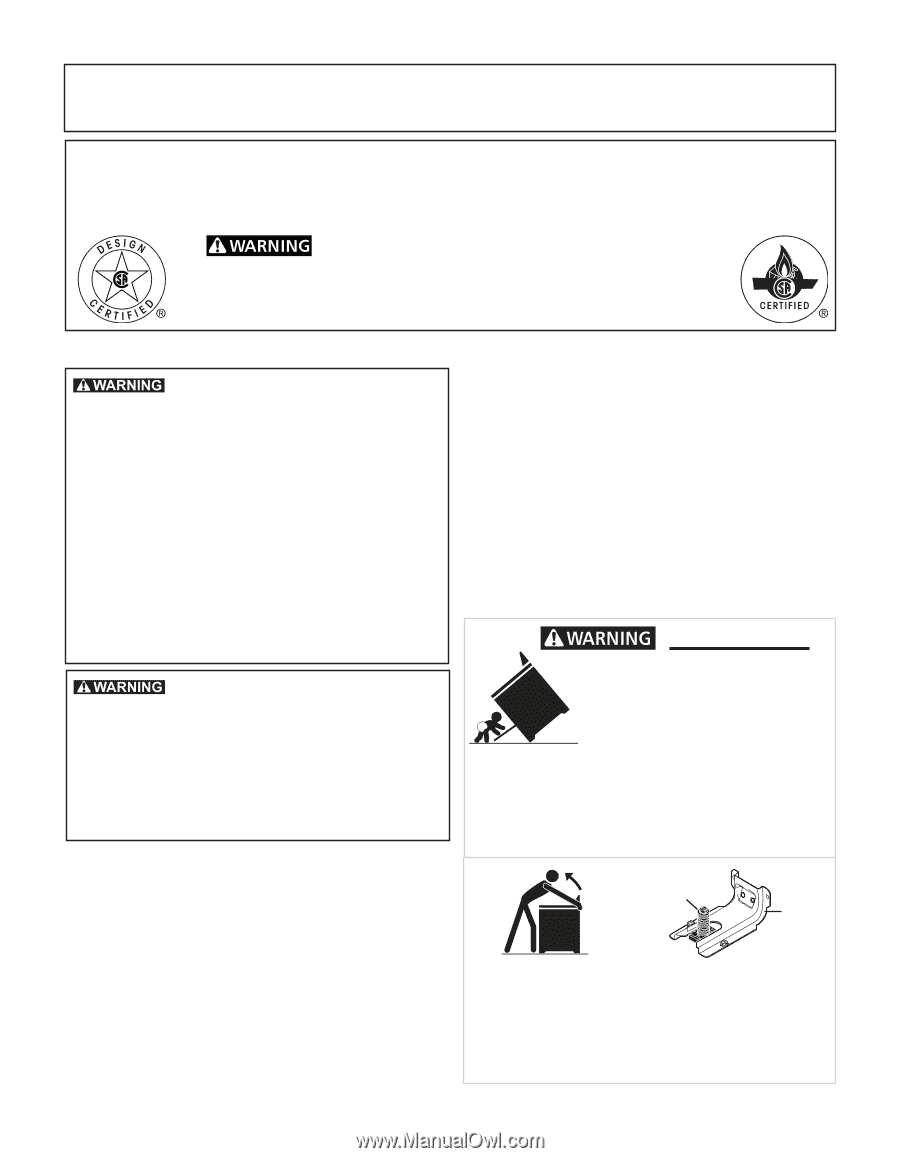
IMPORTANT SAFETY INSTRUCTIONS
Tip Over Hazard
Range
leveling leg
Anti-tip
bracket
• A child or adult can tip the
range and be killed.
• Verify the anti-tip device has
been installed to floor or wall.
• Ensure the anti-tip device is re-engaged to floor
or wall when the range is moved.
• Do not operate the range without the anti-tip
device in place and engaged.
• Failure to follow these instructions can result in
death or serious burns to children and adults.
To check if the anti-tip bracket is installed properly, use
both arms to grasp the rear edge of the range back.
Carefully attempt to tilt range forward. When properly
installed, the range should not tilt forward.
Refer to the anti-tip bracket installation instructions
supplied with your range for proper installation.
FOR YOUR SAFETY: Do not store or
use gasoline or other flammable vapors and liquids
in the vicinity of this or any other appliance.
If the information in this manual is not followed
exactly, a fire or electrical shock may result causing property
damage, personal injury or death.
FOR YOUR SAFETY:
— Do not store or use gasoline or other flammable vapors
and liquids in the vicinity of this or any other appliance.
— WHAT TO DO IF YOU SMELL GAS:
•
Do not try to light any appliance.
•
Do not touch any electrical switch; do not use any phone
in your building.
•
Immediately call your gas supplier from a neighbor’s
phone. Follow the gas supplier’s instructions.
•
If you cannot reach your gas supplier, call the fire
department.
— Installation and service must be performed by a qualified
installer, service agency or the gas supplier.
809017004/A (04/2023)
English – pages 1-10; Français – pages 11-20; Espagnol paginas –
21-31
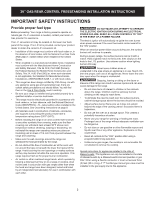
Important Notes to the Installer:
•
Read all instructions contained in these installation
instructions before installing range.
•
Remove all packing material from the oven
compartments before connecting the gas & electrical
supply to the range.
•
Observe all governing codes and ordinances.
•
Be sure to leave these instructions with the consumer.
Never operate the top surface cooking section
of this appliance unattended.
•
Failure to follow this warning statement could result in
fire, explosion, or burn hazard that could cause property
damage, personal injury, or death.
•
If a fire should occur, keep away from the appliance and
immediately call your fire department.
DO NOT ATTEMPT TO EXTINGUISH AN OIL/GREASE
FIRE WITH WATER.
Important Notes to the Consumer:
Keep these instructions with your owner’s guide for future
reference.
•
As when using any appliance generating heat, there
are certain safety precautions you should follow. These
are listed in the Use & Care Guide, read it carefully.
•
Be sure your range is installed and grounded properly
by a qualified installer or service technician.
•
Make sure the wall coverings around the range can
withstand the heat generated by the range.
•
To eliminate the need to reach over the surface
elements, cabinet storage space above the elements
should be avoided.