Fujitsu P7230 P7230 User's Guide - Page 92
Using the Shock Sensor Utility, Using the Shock Sensor Monitor Window - windows 7 base system device
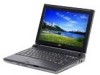 |
View all Fujitsu P7230 manuals
Add to My Manuals
Save this manual to your list of manuals |
Page 92 highlights
LifeBook P7000 Notebook - Section Six 5. If you have an external DVD drive connected, proceed to step 6; otherwise, proceed to step 7. 6. If you have an external DVD drive connected: ■ Select the Advanced menu in the BIOS window. ■ Scroll down to the USB Features submenu and press the Enter key to open it. ■ If Legacy USB Support is disabled, press the space bar to enable it. ■ Scroll down to SCSI SubClass Support and press the space bar to enable it. 7. Press [F10], then click on [Yes] to exit the BIOS Setup Utility and return to the boot process. After you have changed the boot priority, you can restore a backup image when you are booting up. Procedure 1. Turn on the power to your system. 2. Ensure that you have a device that can read DVDs either installed in your system or attached externally to it. 3. Insert the Restore Disc into the drive tray. 4. Reboot your system. WINDOWS VISTA USERS: IMPORTANT NOTE - While the operating system is booting up during the restoration procedure, your screen will go blank for a short period of time. This is normal. During the period while your screen is blank, do not press any buttons. Please wait for the "Set Up Windows" screen to be displayed, then follow the instructions that appear. 5. After the system reboots, follow the instructions that appear to either restore your system image or erase all data from your hard disk. USING THE SHOCK SENSOR UTILITY The Shock Sensor Utility is a feature that helps to The Shock Sensor Utility is designed to decrease the risk of damage to the computer's hard disk drive (HDD) in the event of excessive impact or vibration. The Shock Sensor Utility also has the ability to improve the security of the computer by automatically locking the computer with a password when it is carried. Note that the HDD protection and computer locking features are mutually exclusive; both cannot be selected at the same time. ■ Shock Sensor Utility does not completely protect the HDD and does not provide absolute security for the computer. ■ The computer may stop temporarily while the HDD head is retracted. To restart the computer, keep the system horizontal. 1. Double-click the Shock Sensor Utility icon in the Notification Area at the bottom-right of the screen. The [Shock Sensor Utility] window appears. 2. Click the [Setting] button. The [Shock Sensor Utility Settings] window appears. Action Select the action you wish this utility to perform: ■ Protect HDD from impact. HDD head is retracted when an impact to the computer is detected. ■ Lock computer when carried. Lock the computer when it is being carried. ■ Nothing. No action. Sensitivity of impact/horizontal move/fall/carry detection Adjust the sensitivity of the acceleration sensor based on system motion or impact. Ignore periodic vibration. If vibration is periodic, disregard it. Ignore mouse click When the mouse is clicked, sensitivity is temporarily lowered. Ignore keyboard action When the keyboard is used, sensitivity is temporarily lowered. Confirm calibration when user logs on Select [Confirm calibration when user logs on] if you want to recognize the current orientation as horizontal at logon. Perform calibration automatically when user logs on. Select [Perform calibration automatically when user logs on] if the system is normally used on a horizontal surface. [Calibrate Now] The calibration is executed. Please position the computer as horizontally as possible, then click the [Calibrate Now] button. The current horizontal position will be recognized as the true horizontal by performing the calibration. 3. Click the [OK] or [Cancel] button. The [Setup] window closes. Using the Shock Sensor Monitor Window Right-click the Shock Sensor Utility icon in the Notification Area at the bottom-right of the screen, and select [Monitor] from the menu. The Monitor window appears. Note that the Monitor is designed for entertainment, and has no effect on system settings or orientation. To navigate the monitor, use the buttons described below. 82
-
 1
1 -
2
-
3
-
4
-
5
-
6
-
7
-
8
-
9
-
10
-
11
-
12
-
13
-
14
-
15
-
16
-
17
-
18
-
19
-
20
-
21
-
22
-
23
-
24
-
25
-
26
-
27
-
28
-
29
-
30
-
31
-
32
-
33
-
34
-
35
-
36
-
37
-
38
-
39
-
40
-
41
-
42
-
43
-
44
-
45
-
46
-
47
-
48
-
49
-
50
-
51
-
52
-
53
-
54
-
55
-
56
-
57
-
58
-
59
-
60
-
61
-
62
-
63
-
64
-
65
-
66
-
67
-
68
-
69
-
70
-
71
-
72
-
73
-
74
-
75
-
76
-
77
-
78
-
79
-
80
-
81
-
82
-
83
-
84
-
85
-
86
-
 87
87 -
 88
88 -
 89
89 -
 90
90 -
 91
91 -
 92
92 -
 93
93 -
 94
94 -
 95
95 -
 96
96 -
 97
97 -
98
-
99
-
100
-
101
-
102
-
103
-
104
-
105
-
106
-
107
-
108
-
109
-
110
-
111
-
112
-
113
-
114
-
115
-
116
-
117
-
118
-
119
-
120
-
121
-
122
-
123
-
124
-
125
-
126
-
127
-
128
 |
 |
