Garmin GPSMAP 741xs Flush Mount Kit Instructions (multilingual) - Page 2
Install the unit in the opening see - transducer
 |
View all Garmin GPSMAP 741xs manuals
Add to My Manuals
Save this manual to your list of manuals |
Page 2 highlights
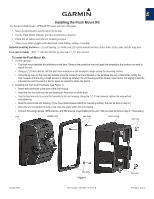
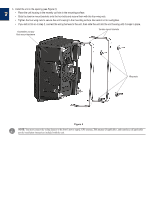
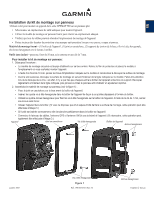
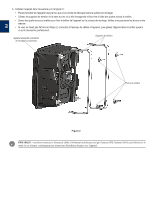
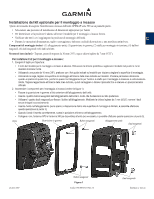
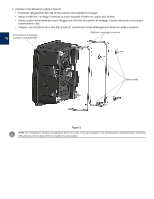
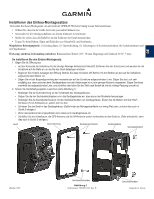
EN 3. Install the unit in the opening (see Figure 2): • Place the unit housing in the recently cut hole in the mounting surface. • Slide the tension mount brackets onto the hex bolts and secure them with the four wing nuts. • Tighten the four wing nuts to secure the unit housing to the mounting surface. Be careful not to overtighten. • If you did not do so in step 2, connect the wiring harness to the unit, then slide the unit into the unit housing until it snaps in place. Assembled unit and flush mount hardware Tension mount brackets Wing nuts Figure 2 NOTE: You must connect the wiring harness to the boat's power supply, GPS antenna, XM antenna (if applicable), and transducer (if applicable) per the installation instructions included with the unit.
-
 1
1 -
 2
2 -
 3
3 -
 4
4 -
 5
5 -
 6
6 -
 7
7 -
 8
8 -
9
-
10
-
11
-
12
-
13
-
14
-
15
-
16
-
17
-
18
-
19
-
20
-
21
-
22
-
23
-
24
-
25
-
26
-
27
-
28
 |
 |
